Showing posts with label #cascard. Show all posts

Tuesday, July 16, 2024

July Scraps Cards ~ Just Keep Swimming plus More ~ Unity Stamp Co.

 Hello there crafty friend!
I finished up my latest batch of leftover scraps and turned them into four pretty simple cards. Yay! I also played with some stamps that hadn't seen ink yet which is always a great bonus! It feels so good to have some more papers done!


Here's a look at the four cards all together. All very different! I'd love to know if you have a favorite of the batch. If you have a moment, comment below and let me know.
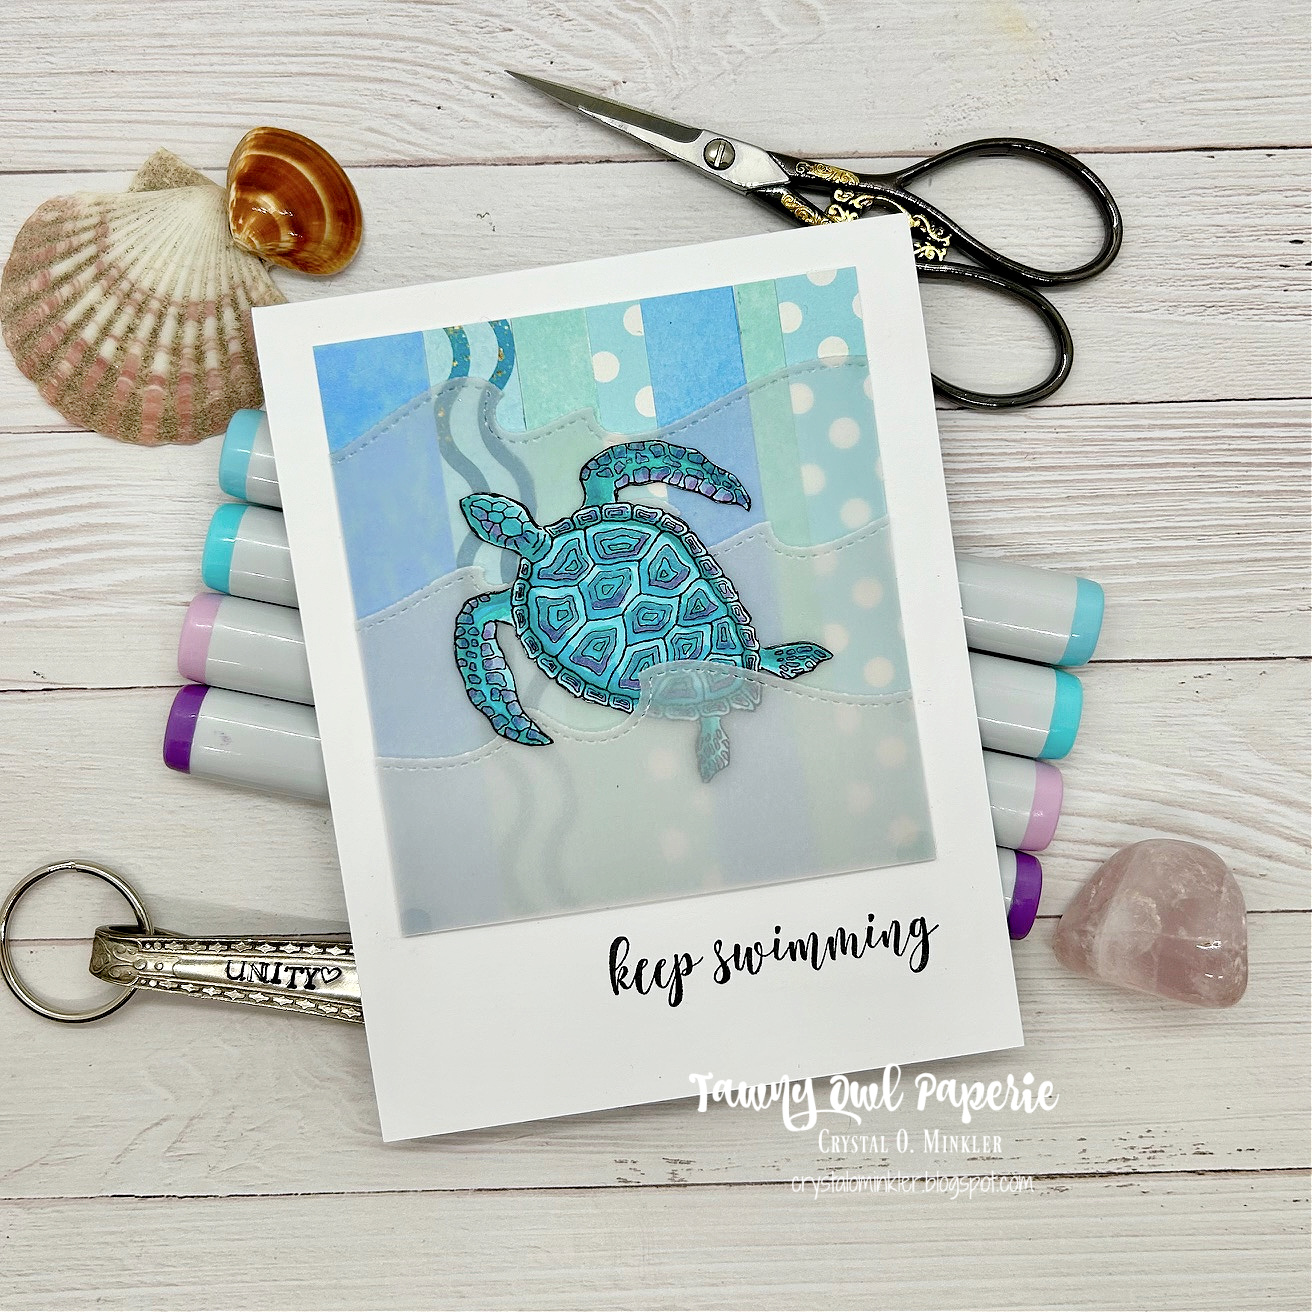

My first card features the beautiful turtle from the Just Keep Swimming stamps. I love this turtle! It's always so much fun to color too. As far as the scraps for this card, I had a bunch of paper strips that were different lengths and widths. I decided to combine them for a fun background. I adhered them all to a 3-1/2 x 3-7/8" piece of thin card stock. I trimmed off the excess paper strips and adhered the panel to a white A2 top fold card base. I die cut some Vellum Card Stock from Papertrey Ink using the Stitched Wave Borders dies from Lawn Fawn for a fun wave background for the turtle. 


I stamped the turtle with Black Amalgam ink from Gina K. Designs. I colored up the turtle using my Copic markers and then I fussy cut it on the line. I colored the edges of the fussy cutting using a Memento Tuxedo Black marker from behind the turtle just in case my marker slipped. I secured the vellum waves together using washi tape and then I trimmed the excess so they would fit over the 3-1/2 x 3-7/8" panel. I adhered the turtle tucking his bottom behind the last vellum wave. I adhered the vellum to the card by adding glue to the back of the turtle. Once it was a little dry and wouldn't shift anymore, I added a drop of liquid glue to the bottom corners of the vellum to secure it a tiny bit more. I also added tiny dots of glue under the stitches on the very edge of each layer. The stitches covered the glue pretty well. You can see the glue a tiny bit on those bottom corners but it's hardly noticeable in person. I finished this card by stamping the sentiment.

Copic Markers: BG000, BG01, BG15, BG05, BG57, V0000, V12, V15
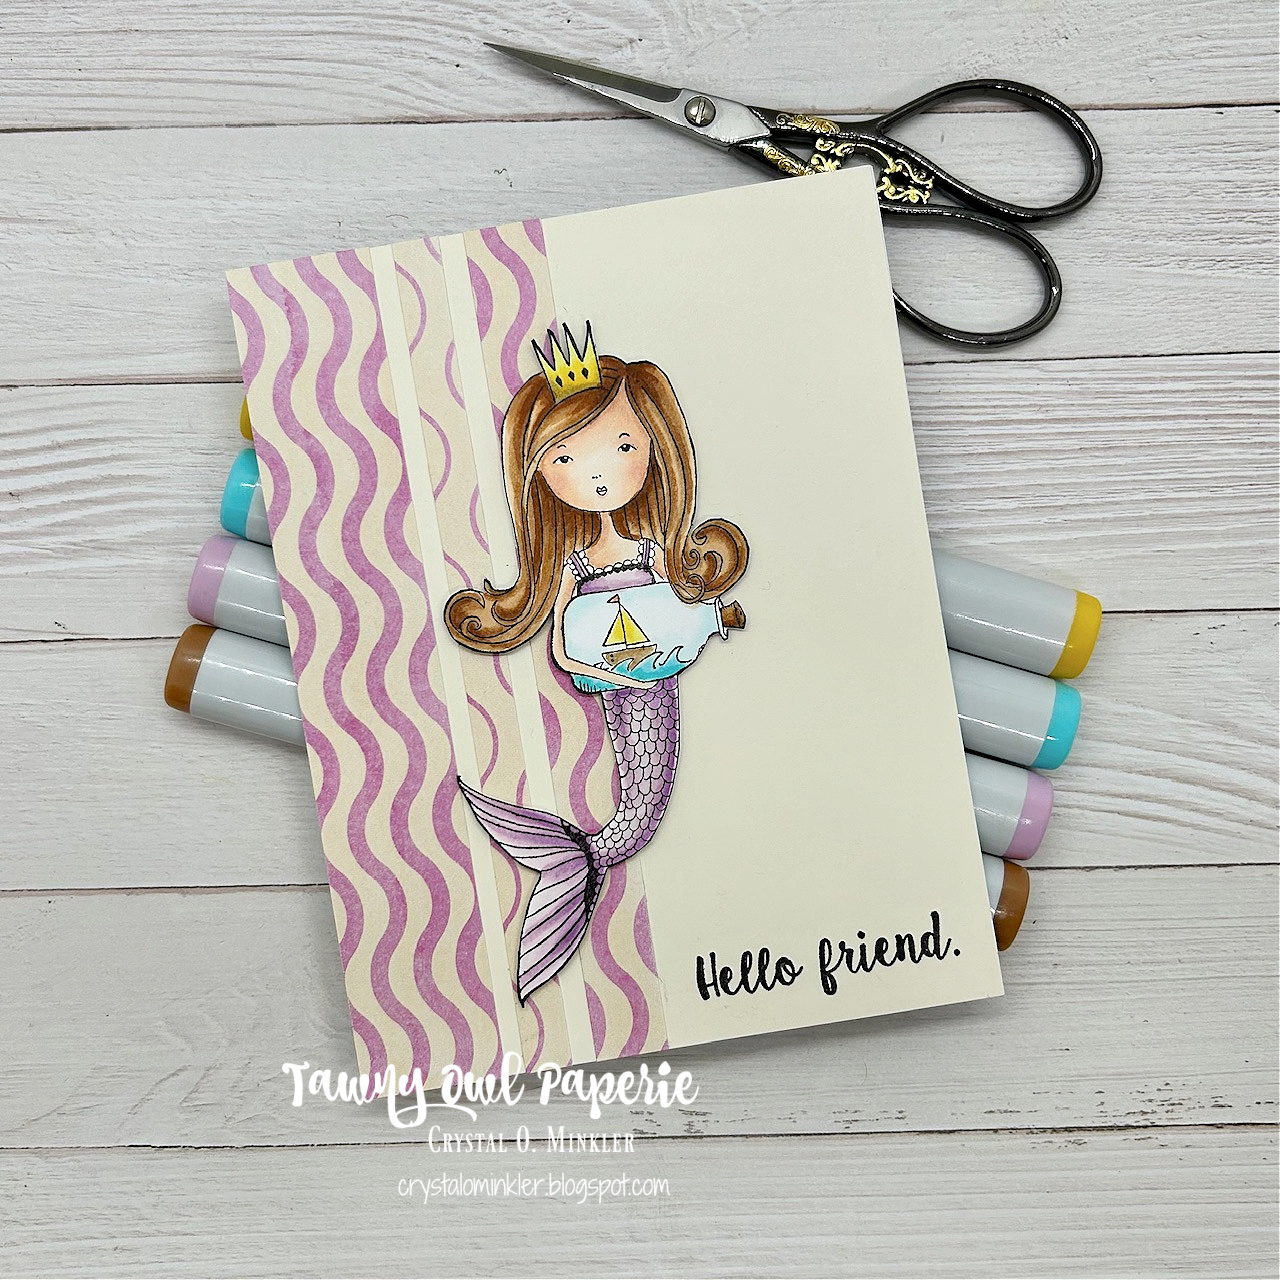

My second card uses three similar strips of pattern paper for a quick card design. I adhered them to a 4-1/4 x 5-1/2" piece of Vintage Cream Card Stock from Papertrey Ink. And then I adhered the card front to a white A2 top fold card base of Stampers Select White Card Stock, also from Papertrey Ink. I stamped the adorable mermaid from the Spirit of a Mermaid stamps using Black Amalgam Ink and I also stamped the sentiment on the card. Sadly, this is one of the retired stamp sets from Unity. I colored up this beauty with my Copic markers and fussy cut her just like I did with the turtle. I added a touch of Sakura White Gelly Roll pen to the whites of her eyes and the frill on her top. And I popped her up on the card using foam tape.

Here's a quick list of the Copic markers I used for the mermaid:
Skin: E000, E00, E11, R00, R20
Hair: E50, E30, E35, E37
Crown: Y11, Y15, Y28
Body / Tail: V0000, V000, V12, V15
Sailboat: Y11, Y15, R12, R05, E30, E35
Waves: BG000, BG01, BG15
Bottle: BG000
Cork: E30, E35, E37


My third card uses four rectangle scraps for an interesting background. I overlapped them just a bit and adhered them all to a white A2 top fold card base. I stamped the fish from the retiring Fishy Philosophy stamps with Black Amalgam ink and fussy cut them. The sentiment I stamped with Peacock Feathers Distress Ink. I added foam tape to the back of these fish and popped them up on the card. And I finished off the card with a few clear drops from my stash.

Copic Markers: Y11, Y15, YR15


My last card also features the cute fish from the Fishy Philosophy stamps. I love this cute stamp set! I had one last large piece of scrap pattern paper from these papers so I just adhered it directly to white A2 top fold card base that I turned on it's side for a landscape card. This was such a simple card! I stamped the fish and the sentiment using the Black Amalgam ink. I fussy cut the fish just like the others and popped it up on the card, too.

Copic Markers: Y11, Y15, R12, R05


I'm so excited to have another paper pack done! Woohoo! What do you think of the card designs this time? Do you have a favorite? I love the simple designs of all of them so it's hard for me to choose a favorite. Well, I'm excited to pick out another pattern paper pack to finish off. I'll definitely pick one out to use with the upcoming Tawny Owl Paperie Inky Inspiration Sketch 24 that will start in a couple of weeks. Have a wonderfully inky week!

Thanks so much for stopping by!
See ya next time.

Inky Hugs,
Crystal


{Please note that comment moderation is on. Your lovely comment will appear once approved.}

Wednesday, June 26, 2024

Membership Wednesday ~ June 2024 KOM Whisper of Summer ~ Unity Stamp Co.

  Hello there crafty friend!
Today I'm sharing a super CAS card featuring a gorgeous stamp from the June 2024 Kit of the Month membership called Whisper of Summer from Unity. I can't get enough of this month's KOM!! So many fantastic stamps and not enough time to ink them all up!


As I mentioned above, this is a CAS card. What does CAS mean? It an acronym for Clean and Simple. Clean basically means a lot of white space and simple, well simple means a simple design.  


I stamped the beautiful lemon circle using Squeezed Lemonade Distress Ink onto a card front of Stampers Select White Card Stock from Papertrey Ink measuring 4-1/4 x 5-1/2". I die cut it using the largest die from the Scallops & Rectangles {nesting dies}. I stamped the lemon circle again partially on a scrap of white card stock and die cut it using a die from the Scallops & Circles {nesting dies}.


I stamped the sentiment directly on the panel using the Squeezed Lemonade Distress Ink but it was too light. I actually meant to just stamp the lower portion of the sentiment with Mustard Seed Distress Ink so it would kind of be ombre. BUT somehow my card stock had shifted so when I stamped it gave the appearance of a shadow. I decided to go with it and stamped the entire stamp using the Mustard Seed Distress Ink. I added foam tape to the back of the stitched circle and popped it up on the card. To finish off the card, I added a few yellow enamel dots from my stash. 
 

Here's a quick look at this month's Kit of the Month membership! LOVE it!! So many wonderful stamps!

Well, that's it for me today! I hope you've been inspired to play with your membership stamps! 
Have an ink-redible day!


Thanks so much for stopping by!
See ya next time.

Inky Hugs,
Crystal


{Please note that comment moderation is on. Your lovely comment will appear once approved.}

Tuesday, June 18, 2024

More 'Scraps' Cards ~ Pissy Party Plus a Few More Stamps ~ Unity Stamp Co.

 Hello there crafty friend!
I found some time to finish up the latest batch of 'scraps' cards I've been mentioning. Yay! I had enough scraps to make three cards and a tag. It feels so good to finish up another pattern paper pack. These are the papers I've been using for some of my TOP Inky Inspiration Sketch 21 and 22 cards. It was starting to feel like these papers would never get finished up!


Here's a look at the three cards and the tag. All very different! I'd love to know if you have a favorite of the batch. If you have a moment, comment below and let me know.


My first card features the adorable Pissy Party kitty. I'm making an effort to once again do a bit of watercoloring each month so this month I watercolored this fun cat. I used a bunch of ZIG Clean Color Real Brush Markers. Here's the list: Light Gray, Mid Gray, Yellow Green, Light Green, Yellow, Pink, Light Carmine, Light Blue, Cobalt Blue and Beige. Oh, and I also used my water pen. I fussy cut the kitty leaving a bit of a white border around him. I added foam tape to the back of the kitty and popped him up on the card. I used two scrap papers for this card. These were my largest pieces. I die cut a scrap of white card stock with a die from the Make a Tag {die set}. I didn't want to leave a lot of white space above the kitty so I used a couple of the tiny scraps and stapled them to the card. To finish off the card, I stamped the sentiment with Black Amalgam ink and die cut it with a die from the Scalloped & Stitched Sentiment Nesting Dies.


My second card features the adorable Planner Gal: Simply Perfect Birthday. This card was actually inspired by the Tawny Owl Paperie Inky Inspiration Sketch 22. It has some elements from the sketch, but it definitely took a left turn at some point! LOL! I really liked the three pattern papers clustered together but I wanted a touch of black behind them so I die cut a piece of True Black card stock from Papertrey Ink using a circle die from the Scallops & Circles {nesting dies} from Unity. Not completely sure I love how that turned out. I do like the contrast of the rectangles with the circle. Here's a quick list of the Copic markers I used to color up the sweet birthday girl:

Skin: E000, E00, E11
Hair: E51, E55, E57
Dress: RV10, RV11
Crown: Y11, Y15, Y28
Flower: Y11, RV10, RV11, YG11, YG23
Cake: C00, C1, C3
Candle: Y11, Y15, B000, B00, B02
Cake Stand: B000, B00, B02


Here's a look at the Tawny Owl Paperie Inky Inspiration Sketch 22. This challenge ends next Monday June 24th!! So get your entries in! I'd love to see what you do with this sketch.


My last card is super CAS and simple! I had one long strip of pattern paper. This is always an easy card design for a quick CAS card. This card features the You're Better itty bitty. I thought this would be a fun birthday card. I'm thinking I need to color in the heart though. What do you think?


My tag features the Hooray it's your Birthday itty bitty stamp. My last couple of scraps really had me stuck for a bit. I just couldn't figure out a card design that I liked and then I saw this tag on my desk. I think the pattern papers look so nice with this tag and then the black circles really make the pile of gifts pop! The black circles were also scraps in my True Black card stock folder so that was a bonus. I found a few enamel dots from my stash to compliment the blues in the papers and to finish off the tag I added a bit of white organdy ribbon. Here's a quick list of the Copic markers I used for the gifts: Y11, Y15, Y28, C00, C1, C3, RV10, RV11, B000, B00, YG11, and YG23. 


So excited to add three more cards and a cute tag to my stash! I'm even more excited to have another paper pack done! Woohoo! What do you think of the card designs this time? Do you have a favorite? I'm leaning towards the kitty card. Well, I'm excited to pick out another paper pack to finish off. I think I'll pick one out to use with the upcoming Tawny Owl Paperie Inky Inspiration Sketch 23 that will start next Tuesday. Have a wonderfully inky week!

Thanks so much for stopping by!
See ya next time.

Inky Hugs,
Crystal


{Please note that comment moderation is on. Your lovely comment will appear once approved.}

Thursday, December 28, 2023

One Stamp Two Cards ~ Seraphim Wings ~ Unity Stamp Co.

Hello there crafty friend! 
Did you see that Unity had one last release for 2023?! I finally had a chance to play and, of course, I just HAD to play with the gorgeous Seraphim Wings. Love, love, love this gorgeous butterfly!! And it's SO big that I was able to make two cards from one stamped image!


Very simple CAS cards but oh so pretty and versatile depending on the occasion.


I stamped the butterfly in the middle of a half sheet of white card stock measuring 8-1/2 x 5-1/2". I cut the butterfly in half and then trimmed both of my panels to 4 x 5-1/8".


I failed miserably this year sending out birthday cards and was thinking this sentiment would be awesome for my first official birthday card for the 2024 year. I intend on sending more birthday cards in 2024 and this card design is perfect for a quick card.


I adhered the butterfly panel to a Pretty in Pink card front {Stampin' Up} measuring 4-1/4 x 5-1/2" that I adhered to a white A2 top fold card base. Here's a quick list of the Copic Markers I used to color up this half of the butterfly: Y11, Y15, R81, R83, V12, V15, B0000, B000.


I also haven't sent as many sympathy cards this year as I should have. I always intended too but time seemed to get in the way. So, I plan to make more sympathy cards to have on hand.


I think neutral cards are nice for sympathy cards and this beautiful sentiment with the gorgeous butterfly are perfect. Such a simple card that I can duplicate it, too. 


All the measurements are the same for both cards. I adhered the butterfly panel to a Crumb Cake card front {Stampin' Up} that's adhered to a white A2 top fold card base. Here's a quick list of the Copic Markers I used for the second card: N1, N3, W00, W1, W3, W5, C00, C1, C3.

You can check out my video for these cards here... One Stamp Two Cards | Seraphim Wings | Unity Stamp Co.


 That's it for me today! Head on over to Unity and check out the awesome new releases for the last sale of 2023!

Thanks so much for stopping by!
See ya next time.

Inky hugs,
Crystal

{Please note that comment moderation is on. Your lovely comment will appear shortly.}

Saturday, November 18, 2023

A Friend Like You ~ Merry Mingle ~ Unity Stamp Co.

Hello there crafty friend! 
The awesome sale over at Unity Stamp Co. continues with another HUGE release for the Black Friday Sale! Lots and lots more amazing goodies available. Including a new Angie Girl that I just HAD to play with called Merry Mingle!


Isn't she lovely?! I wanted a very simple CAS card so that Merry Mingle would be the focus of the card. I blended over the Star Confetti Stencil onto the front of my white A2 top fold card base using Mustard Seed and Kitsch Flamingo Distress Oxide inks.


 Here's a quick list of the Copic markers I used:

Skin: E000, E00, E11
Hair: N0, N1, N3, N5
Dress: Y11, Y06, RV10, RV21
Heels: RV10, RV21
Gift: V000, V12, V15, V17, YG11, G14, Y11, Y06


I fussy cut Merry Mingle and colored the edges with a Memento Tuxedo Black marker making the edges look all nice and neat. I trimmed the sentiment and cut a fishtail on the end. I mat the sentiment with a piece of True Black card stock. I also found a strip of black card stock to ground Merry Mingle. I adhered the girl directly to the card for easy mailing. That's it for me today! Go check out the awesome new releases for Black Friday over at Unity! It's seriously another HUGE release friends! Lots and lots of fabulous new goodies!

Thanks so much for stopping by!
See ya next time.

Inky hugs,
Crystal

{Please note that comment moderation is on. Your lovely comment will appear shortly.}

Thursday, August 24, 2023

Colorful Balloon Card ~ Balloon Layering Stencils ~ Unity Stamp Co.

 Hello there crafty friend!
Today I have one more card featuring the new Balloon Layering Stencil and Cheers & Confetti stamps from Unity! So many possibilities with this fun new stencil!


I've been on a bit of a CAS card kick {Clean & Simple Card, for those not familiar}. They are quick and easy and I just LOVE all the white space. I partially stenciled some of the balloons using both of the balloon stencils in the stencil set... just focusing on the top portion of the card.


I've been trying to mix up my color choices. I seem to always grab the same colors so I challenged myself to grab a few colors I wouldn't normally. I already had Kitsch Flamingo on my desk from my No Layer Cards I shared the other day. I also grabbed Mustard Seed, Cracked Pistachio, and Abandoned Coral Distress Oxide inks.


I stamped the birthday sentiment using Black Amalgam ink. I die cut the panel using the Deckle & Stitches Nesting Dies... these dies are quickly becoming my favorite! I adhered the panel to a white A2 top fold card base. 

You can check out my short process video here... Colorful Balloons Card | Balloon Layering Stencil | Unity Stamp Co.


  Unity Stamp Co. has so many wonderful new releases but I think the new Bevy of Balloons Bundle is amazing! I haven't even played with the awesome new Bevy of Balloons Background stamp. I hope to this week if I have time. Stop by Unity to check out all the amazing new releases for the month of August! You won't regret it!

Thanks so much for stopping by!
See ya next time.

Inky hugs,
Crystal


{Please note that comment moderation is on. Your lovely comment will appear once approved.}

Tuesday, August 22, 2023

No Layer Cards with Stencils ~ Balloon Layering Stencil ~ Unity Stamp Co.

 Hello there crafty friend!
Today I'm sharing two fun and quick CAS cards with NO layers using the new Balloon Layering Stencil along with the Star Confetti Stencil and the Heart Confetti Stencil... all from Unity! Unfortunately, the Star Confetti and Heart Confetti Stencils are out of stock but the Falling Confetti Layering Stencil would be awesome with this technique!


As I mentioned above these CAS cards have NO layers. I blended over the stencils directly onto the front of the white A2 card bases. Easy peasy AND quick!


I blended Kitsch Flamingo Distress Oxide ink over the largest balloon in the Balloon Layering Stencil. And then I placed the Heart Confetti Stencil over the balloon stencil and blended Picked Raspberry Distress Oxide ink. 


I finished off the card by stamping the sentiment from the awesome new Cheers & Confetti stamps and adding a string for the balloon with a black Copic Multiliner Brush Small Marker.


For my second card, I blended Salvaged Patina Distress Oxide ink over the largest balloon in the Balloon Layering Stencil. I then blended Peacock Feathers over the Star Confetti Stencil.


And finished off this card in the same way by stamping a sentiment from the Cheers & Confetti stamps and drawing a string using a Copic Multiliner Brush Small Marker.


You can check out my short process video here... No Layer Cards with 2 Stencils | Balloon Layering Stencil | Unity Stamp Co.


 Stop by Unity Stamp Co. and check out all the amazing new releases for the month of August!

Thanks so much for stopping by!
See ya next time.

Inky hugs,
Crystal


{Please note that comment moderation is on. Your lovely comment will appear once approved.}

Monday, July 31, 2023

Inky Paws Challenge #203 ~ Color Challenge Reminder

 Hello there crafty friend!
 There's still time to play along with the Inky Paws Challenge #203 - Color Challenge!! You have until this coming Friday, August 4th to get your entries in for the #203 Color Challenge and a chance to win a $20 store credit to Newton's Nook Designs!


Here's another look at the fun colors... Watermelon Red, Flamingo Pink, Parakeet Green, and Sea Foam Blue.


A caffeinated CAS birthday card today featuring the adorable kitty from the Newton Loves Coffee Stamp Set! I found that Abandoned Coral and Candied Apple Distress Oxide inks blend to make a lovely Watermelon Red. It's pretty bold on the card but I think it draws the eye directly to the kitty. I stamped the adorable kitty in the center of my white card stock panel measuring 4 x 5-1/4". I also stamped the kitty a second time on a scrap piece of white card stock. Using a large post it note I masked the top portion of the first stamped panel covering the kitty just along the black line. I blended the oxides along the post it note and down - kinda like an ombre blend to create a table for the kitty to peek over at the coffee.


We recently adopted a sweet kitty named Quinn and I colored up my stamped kitty to look a bit like her. Quinn has become a part of the family. We just love her.


What do you think? I guess I could have gone a bit darker with my grays but I think it's similar enough. Anywho, Quinn loves the smell of coffee... at least she's always up on the counter sniffing the coffee pot. LOL! So I thought this stamp was perfect to color up in her likeness. Here's a quick list of the Copic markers I used to color up the kitty on the scrap white card stock:

Kitty ~ N0, N2, N4, C00, C1, C3, YR0000, YR21, YR12, R00, R20
Mug ~ BG000, BG02, G000, G14, E21, E25


I fussy cut the kitty and mug on the line and then colored up the edges with the side of my Memento Tuxedo Black marker. This is a great tip to make those edges look nice and neat. I then paper pieced the kitty on the panel by adhering it over the other stamped kitty. I die cut the paper pieced panel using the stitched rectangle die from the Frames & Flags Die Set. I added a bunch of foam tape to the back of the panel and popped it up on the card. Finished off the card by adding a few pink enamel dots - which also rounded out my color combo for the card. I love how this card turned out.


Now it's your turn to get your paws inky with your Newton's Nook Designs products and create a project with the color combo of Watermelon Red, Flamingo Pink, Parakeet Green, and Sea Foam Blue. Be sure to link up to the Inky Paws Challenge! Can't wait to see your projects!


Thanks so much for stopping by!
See ya next time.

Inky Hugs,
Crystal


{Please note that comment moderation is on. Your lovely comment will appear once approved.}

Wednesday, May 17, 2023

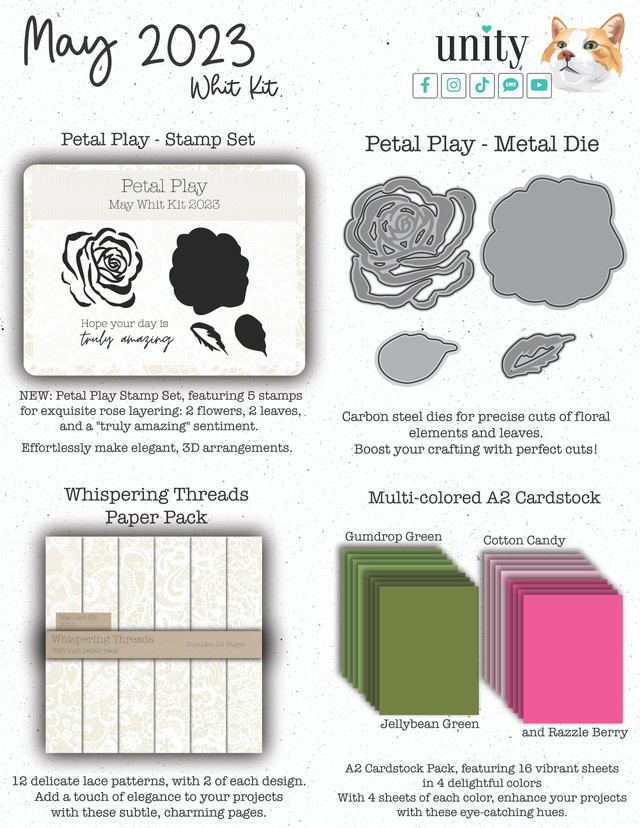
Membership Wednesday ~ May 2023 Whit Kit ~ Unity Stamp Co.

 Hello there crafty friend!
Today I'm sharing a super CAS card using the lovely Petal Play dies from the wonderful May 2023 Whit Kit membership along with the sentiment from the Petal Play stamps, also included in this month's card kit from Unity. I just couldn't help but play a bit more with my Distress Crayons. They've been so fun!


I hadn't planned on going quite so CAS with this one, but sometimes the card just dictates the design and this one was very loud. LOL! 


I created the background for the die cut using a handful of Distress Crayons and then die cut it with the beautiful Petal Play dies. The sentiment is stamped with the Seedless Preserves Distress Oxide ink directly on a white A2 top fold card base.


I used liquid glue to adhere the die cuts so that I could lift the flower easily and adjust the leaves as I needed to get them how I wanted. Another option would be to add a double sided tape to the distress crayon background before die cutting the flower and leaves. You could then adhere the leaves to the back of the flower before adhering them both to the card.

You can check out my process video here... Distress Crayon CAS Card | May 2023 Whit Kit | Unity Stamp Co.


Here's a look at the wonderful Whit Kit for May!! Gorgeous! This wonderful card kit is available for only $42.99. That includes shipping! You also get a $6.95 discount on every order from Unity over $45. Members are also able to purchase past Whit Kit stamp sets for just $14 and past Whit Kit paper packs for $2 off!! So awesome!!! 

That's it for me today! I'll be back next week with another card {or two!} using the May 2023 Whit Kit!! Loving this month's card kit!


Thanks so much for stopping by!
See ya next time.

Inky Hugs,
Crystal


{Please note that comment moderation is on. Your lovely comment will appear once approved.}

Saturday, March 4, 2023

~ Friends of Unity March 2023 Blog Hop ~

 Hello there crafty friend!
It's the first Saturday of March which means it's time for our Friends of Unity Blog Hop!! I've been so excited for this month's cue... 


because it's Winnie the Pooh!! I love Pooh Bear and can't wait to see what our friends created to share with us all. So fun! I had a fun idea to share all four seasons of Pooh Bear so I actually have four cards to share. There's a bunch of photos so I'll try to keep the chatter down to a minimum. :)


First up is Spring with the adorable Winnie the Pooh: How Do You Spell Love?
I paired this cute stamp up with a pretty paper pad filled with Spring colors... called Spring Fling by Echo Park Paper Co. 


Here's a quick list of the Copic Markers I used:

Pooh Bear ~ Y11, Y15, Y35
Piglet ~ RV10, RV21, RV14
Dandelions ~ C00, C2, YG11, G14
Grass ~ YG11, G14


I trimmed all my papers and adhered them to a white A2 top fold card base that I turned on its side. I trimmed two 1/8" strips of white card stock to adhere on either side of the daisy papers. The main panel was die cut with the smallest die from the Scallops & Rectangles {nesting dies}. I heat embossed the sentiment on one of the pattern papers with white pigment ink and white embossing powder. I trimmed and adhered the sentiment to the bottom of the main panel and then added foam tape to both and popped them up on the card.


Up next is Summer with the sweet Winnie the Pooh: Pooh Just Knew.
I went with a CAS design for this one. I stamped my sentiment on a card front measuring 4-1/4 x 5-1/2". And then I ink blended a bit of Wilted Violet Distress Oxide inks over the Cloud and Wave stencil being careful not to ink over the sentiment. I die cut the card front with the largest die from the Scallops & Rectangles {nesting dies} and adhered it to a Kraft A2 top fold card base.


I stamped Pooh and Piglet on a piece of white card stock and colored them up with Copic Markers. I then die cut the colored image with the Pooh Just Knew die set and adhered it directly to the card.


Here's a quick list of the Copic Markers I used for this card:

Pooh Bear ~ Y11, Y15, Y35
Piglet ~ RV10, RV21, RV14
Balloon ~ R000, R20, R14, R27
Butterfly ~ B000, B91, B93, Y15


For my Fall card I chose the sweet Winnie the Pooh: A Splendid Place.
And I just had to go with Kraft card stock for this one. I love copic coloring on Kraft for Fall images... the muted colors just scream Fall!


Here's a quick list of the Copic Markers I used for this card:

Pooh Bear ~ Y11, Y15, Y35
Pooh's Scarf ~ R20, R14, R27
Piglet ~ RV10, RV21, RV14
Piglet's Scarf ~ B91, B93, B97
Tree ~ E21, E23, E25
Leaves ~ Y06, YR15, YR68, YR27
Bees ~ Y15
Bee Hive ~ Y11, Y18, Y38
Grass ~ YG91, YG93, YG97
Sky ~ B000


Similar to my second card I did a bit of ink blending with the Cloud and Wave stencil. This time using the Tumbled Glass Distress Oxide ink. I didn't mask anything. I was just careful not to ink over the tree, Pooh or Piglet. I did get a bit on the tree... but it's barely noticeable. I trimmed my colored panel with the Tim Holtz Deckle Torn Edge Trimmer. Adhered it to a mat of Chocolate Chip card stock from Stampin Up. I then die cut a card front of Kraft card stock with the largest die from the Postage Stamp {nesting dies}. I adhered all my layers to a Kraft A2 top fold card base. The sentiment was heat embossed with white pigment ink and white embossing powder on Chocolate Chip card stock. I trimmed it and adhered it to the card.


Last but not least... it's actually my favorite of them all... Winter with the Winnie the Pooh: Feel the Merry. I stamped all of the WTP stamps using Black Amalgam ink from Gina K Designs. I fussy cut this one leaving a bit of a border around and the edges. I adhered the heat embossed sentiment over the image and popped it up on the card with a thin foam tape.


Here's a quick list of the Copic Markers I used for this card:

Pooh Bear ~ Y11, Y15, Y35
Pooh's Scarf ~ G40, G14
Pooh's Honey Pot ~ R20, R14, R27, Y11, Y18, Y38
Boy's Skin ~ E000, E00, E11, E04
Boy's Hair ~ E21, E23, E25
Boy's Jacket ~ R20, R14, R27, B91, B93, B97, B99
Boy's Scarf ~ N2, N4
Jeans ~ B91, B93, B97
Shoes ~ N2, N4, N6, N8
Book ~ C00, C2
Tree ~ YG11, G24, G46
Bench ~ E21, E23, E25
Grass ~ YG91, YG93, YG97


My card design was inspired by the {BYSHC} Sketch 1... I did alter the sketch a bit to make it work with this large image but I really love how this turned out. I paired up this sweet stamp with the My Favorite Christmas 6x6 papers from Echo Park Paper Co. My red card front is Pure Poppy card stock from Papertrey Ink.


All four Seasons of Winnie the Pooh. 
I had so much fun making these cards!! I hope you enjoyed them too. And I hope you're inspired to ink up your Winnie the Pooh stamps. If you do be sure to share your creations in the Unity Show & Tell. We would love to see what you create! And if you don't have any Winnie the Pooh in your collection yet now is the time to shop over at Unity Stamp Co. because all of the WTP stamps are on sale!! Woohoo! I love a good sale!

Now before we get to the hopping, I chose a lucky winner from the comments on last month's hop to win a fun prize and the lucky winner is...


... Meg Crawford!! Congratulations Meg!!
Please email me at crystalominkler@gmail.com to claim your prize. 
Prize must be claimed within two weeks. 

Well, that's it for me this time! Please hop along and enjoy some more inspiration from the Friends of Unity! I'm so excited to see all the creations from our friends!! I will be doing another fun giveaway this month!! Be sure to hop along and comment for a chance to win. {When you comment please leave your name just in case it posts as anonymous.} I'll announce the winner next month! 


Let's get to the hopping...


Crystal <--- you're here

up next ---> Amber


Thanks so very much for supporting our little hop!
We appreciate you!!

See ya next time.

Inky Hugs,
Crystal


{Please note that comment moderation is ON. Your comment will appear shortly.}