Wednesday, January 31, 2024

Membership Wednesday ~ January 2024 Uniquely Unity You Can Do This ~ Unity Stamp Co.

  Hello there crafty friend!
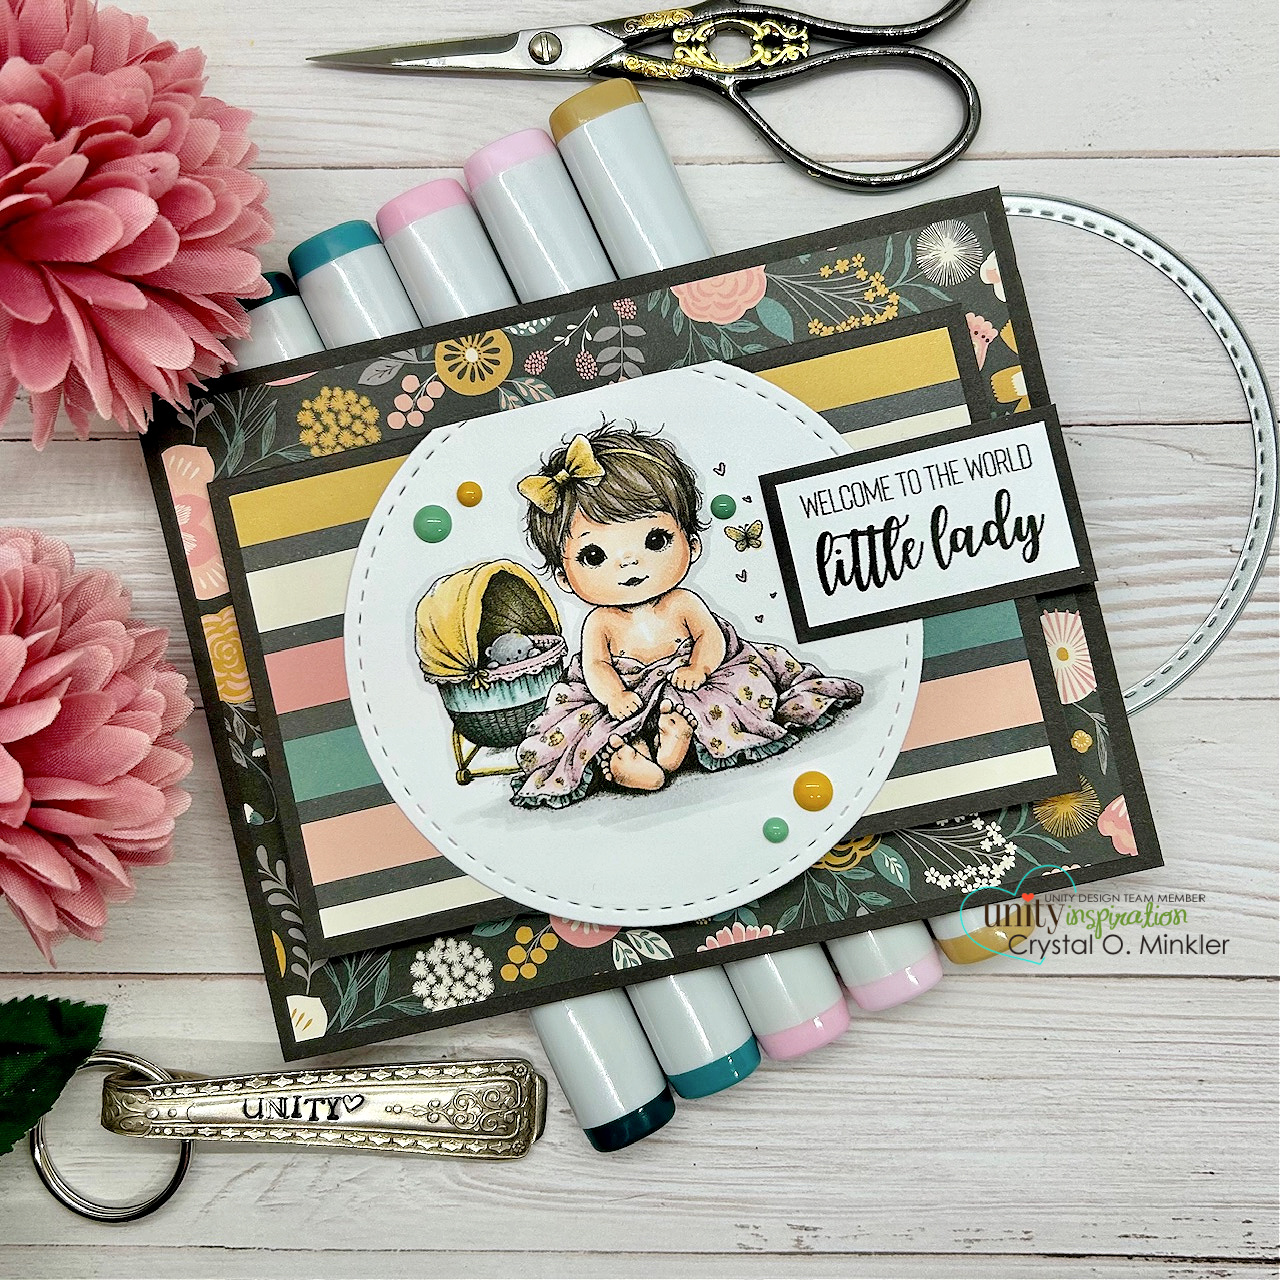
Today I'm sharing a quick CAS card using the pretty stamps from the fantastic January 2024 Uniquely Unity membership from Unity called You Can Do This. 


This is a pretty card design that is easy to make. I actually CASED one of my older cards only it was on white card stock. You can check that out here... Beautiful Things Change.


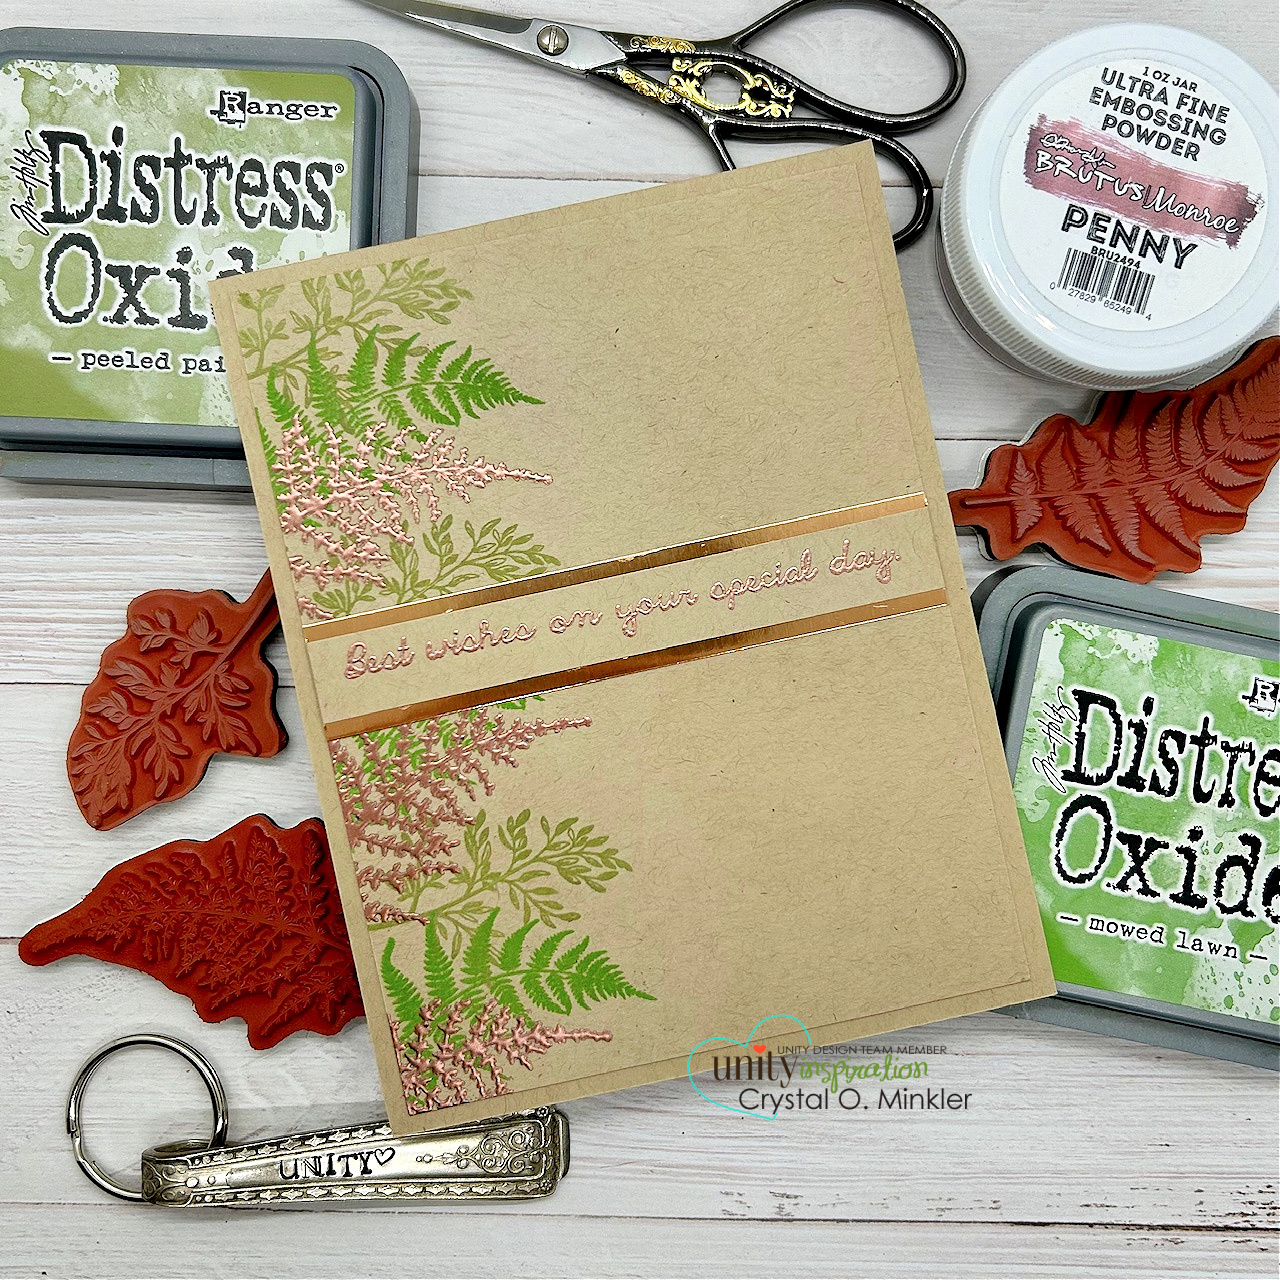
I wanted to see what this design would look like on kraft card stock. I do love my kraft!! I used Kraft card stock from Papertrey Ink along with Peeled Paint and Mowed Lawn Distress Oxide inks.


I heat embossed a few leaves and the sentiment using Wow Clear Embossing ink with Penny Embossing Powder from Brutus Monroe. I prepped my card stock with TE Anti Static Powder and melted the embossing powder with a Wagner Precision Heat Tool.


I mat the sentiment with a copper foil paper from Stampin' Up. In person it coordinates a whole lot better than it looks in the photo. I like how this one turned out but I think I like how this design pops on white card stock. What do you think?


Here's a quick look at the Uniquely Unity membership this month! So pretty! Well, that's it for me today! Next week I'll be sharing my Membership Wednesday card on my Instagram. If you don't want to miss it, follow me on my Instagram. Otherwise, I'll see you back here in two weeks for inspiration for the amazing February memberships! Have an ink-tastic day!


Thanks so much for stopping by!
See ya next time.

Inky Hugs,
Crystal


{Please note that comment moderation is on. Your lovely comment will appear once approved.}

Tuesday, January 30, 2024

Tawny Owl Paperie Inky Inspiration Sketch 18 ~ Minkie Christmas with HB2U Anya Sentiment ~ The Greeting Farm

 Hello there crafty friend!
Today I'm sharing a new sketch for the Tawny Owl Paperie Inky Inspiration Facebook group. I had fun with this card! Not only am I working to build up my stash of birthday cards, I am also trying to use up leftover papers from my days on the Scrapping for Less Design Team. I have had these leftovers for over 3 years now and they've just been sitting there taking up room. I want to reorganize and use that space for something else so I've resolved to use these leftover papers! I'll be sharing the cards I created throughout the month. Some will be using the TOPII sketches and others will just be ideas I came up with using the scraps. I hope you're inspired to not only play along with this month's sketch, but also use up those scraps right along with me!


Here's my sweet card using the sketch. I also had a fun idea to use stamps that I haven't inked up just yet! I adore the cute Minkie line of stamps from The Greeting Farm. This cutie is actually from the Minkie Christmas stamp set. I thought it would be great for a birthday card! What do you think? I love when stamps can be used for different occasions! I stamped the little Minkie with Memento Tuxedo Black ink and colored her up with a handful of Copic markers. I then die cut her out using a stitched circle die from the Scallops & Circles {nesting dies} from Unity. Here's a quick list of the Copic markers I used to color her up:

Skin: E000, E00, E11
Hair: E55, E57, E59
Mouth: R20, R14
Present: RV10, RV13, B0000, B00
Ground: C1, C3


Here's a look at the fun new sketch for Tawny Owl Paperie Inky Inspiration Sketch 18. A perfect sketch for those scraps of paper we all have in our stash! The sketch, as always, is meant to inspire not require. So let the sketch lead in your design, but don't feel limited by it. I have a few fun ideas for this sketch and I hope to play some more with it during the next few weeks.


So since these papers were in a mini card kit I have no idea where they are from. I would guess Echo Park Paper Co. but really it could be from somewhere else. The point is using those papers in your stash! Let's finish off some paper pads!


The cute little sentiment is from the HB2U Anya stamp set, also from The Greeting Farm {sadly, I don't see this set on the website}. Such a fun card to make! I hope you're inspired to play along with the sketch... and maybe even ink up some stamps that haven't been inked up yet AND let's use up those paper scraps and/or paper pads! Have a wonderful week!

Thanks so much for stopping by!
See ya next time.

Inky Hugs,
Crystal


{Please note that comment moderation is on. Your lovely comment will appear once approved.}

Monday, January 29, 2024

Inky Paws Challenge #215 ~ Color Challenge Reminder

 Hello there crafty friend!
 There's still time to play along with the Inky Paws Challenge #215 - Color Challenge! You have until this coming Friday, February 2nd to get your entries in for the challenge and a chance to win a $20 store credit to Newton's Nook Designs!


Here's another look at the fun colors... Pink, Teal, Ice Blue & Cookie Dough Brown.


I went with a simple card for today featuring the adorable Newton's Birthday Delights Stamp Set. The coordinating Newton's Birthday Delights Die Set came in super handy to die cut these cute kitty and ice cream!


I stamped kitty ice cream with Memento Tuxedo Black ink on white card stock and colored it all up with some Copic markers. I added some foam tape to the back of the image and sentiment and popped them up on the card. I mixed some papers from the Love & Chocolate 6x6 Paper Pad for my paper layers and adhered them to a kraft A2 top fold card base. 


I die cut the brown striped paper using the stitched and scalloped die from the Frames & Flags Die Set. I heat embossed the sentiment on kraft card stock using anti-static powder, white pigment ink, white embossing powder, and my heat tool. Here's a quick list of the Copic markers I used to color up the kitty ice cream:

Cherry: RV0000, RV10, RV13
Tortoise Shell Kitty: R00, R20, N0, N1, N3, YR21, YR15, Colorless Blender
Ice Blue Scoop: B0000, B00
White Kitty: R00, R20, C00, C1, C3
Pink Scoop: RV10, RV13
Grey Kitty: R00, R20, N0, N1, N3
Chocolate: E23, E25, E27
Teal Scoop: BG0000, BG11, BG34
Cookie Dough Brown Cone: E30, E31, E33


Now it's your turn to get your paws inky with your Newton's Nook Designs products and create a project with the color combo of Pink, Teal, Ice Blue & Cookie Dough Brown. Be sure to link up to the Inky Paws Challenge! Can't wait to see your projects!


Thanks so much for stopping by!
See ya next time.

Inky Hugs,
Crystal


{Please note that comment moderation is on. Your lovely comment will appear once approved.}

Saturday, January 27, 2024

Mischief Giggles Fun and Love ~ Little Mister ~ Unity Stamp Co.

Hello there crafty friend! 
I just had to ink up the adorable Little Mister stamp from Unity Stamp Co. I couldn't make a card with the baby girl and not also ink up the baby boy! Isn't he just darling!?


I paired him up with the adorable Little Adventurer paper pad from Pink Paislee. I've had these baby boy papers in my stash forever and it's so fun to finally use them!


I stamped the Little Mister cutie with Black Amalgam ink on Stampers Select White card stock from Papertrey Ink and colored him up with my Copic markers to coordinate with the fun papers.

Here's a quick list of the Copic Markers I used:

Skin: E000, E00, E11 
Hair: E70, E87, E74
Rug: B91, B93, B95
Outline: N0


 I die cut the sweet baby boy using a stitched square die from the Scallops & Squares {nesting dies}. My card stock mats are Stampers Select White card stock from Papertrey Ink. And the enamel dots are the Flora Enamel Dots from Carta Bella Paper Co. That's it for me today! Have an ink-tastic day!

Thanks so much for stopping by!
See ya next time.

Inky hugs,
Crystal

{Please note that comment moderation is on. Your lovely comment will appear shortly.}

Friday, January 26, 2024

{BYSHC} Sketch Challenge 41 ~ Let it Snow Globe ~ Angie Blom Digital Designs

Hello there crafty friend!
I'm sharing one last card for the {BYSHC} Sketch Challenge 41 hosted in the Build Your Stash Holiday Cardmakers Facebook group! Today I'm sharing a sweet Christmas card featuring the adorable snowman in a snow globe from the Let it Snow Globe Digital Stamp Set from Angie Blom Digital Designs! We're changing things up for 2024 and Angie Blom Digital Designs is Sponsoring our {BYSHC} Sketch Challenge 41!! Angie has generously offered up two $15 e-gift certificates in Canadian currency for our Sketch 41 prizes! Woohoo! Thanks again, Angie!


I started my card by combining and resizing the digital stamps from the Let it Snow Globe digi set in a Word Document. I printed them off onto white card stock. I once again remembered to pick out my pattern papers before coloring which made it so much easier when having to pick colors to color up my snow globe.


I paired up the Let it Snow Globe digi stamp with the Milk & Cookies Paper Pad from Doodlebug Designs. The red mat for my top pattern papers is Real Red card stock from Stampin' Up and measures 5 x 3-3/4". The trees paper measures 3-1/8 x 1-1/4". The Merry Christmas paper measures 3-1/8 x 2-1/8". And the hearts paper measures 1-1/2 x 3-1/2". The star paper in the background measures 5-1/2 x 4-1/4". All my measurements are from the {BYSHC} Sketch 41 except for the red mat... I went with a smaller piece than the sketch calls for.


I colored the snow globe with some Copic markers. Fussy cut it on the line and colored the edge of the fussy cut image with a Memento Tuxedo Black markers to make the fussy cutting look nice and neat. The snow globe needed something so I decided to die cut a circle from Real Red card stock using a die from the Scallops & Circles {nesting dies}. I just adhered all the layers to a white A2 card base. No foam tape or anything for this but I did add a couple scraps under the left side of the sentiment so it'll lay flat on the card. 

Here's a quick list of the Copic markers I used:

Snowman / Snow / Snowflakes: B000, B00
Hat: N0, N1, N3, N5
Holly: R20, R14, R46, YG11, G14
Scarf: BG000, BG11, BG32
Ornament / Button Hearts: R20, R14, R46
Snow Globe Base: E21, E23, E25
Twine: RV10, RV13


Here's a look at {BYSHC} Sketch Challenge 41 for the month of January. I am loving this sketch! So many possibilities depending on the papers you use. And the entries this month have been so amazing! I hope you'll join us and play along with the sketch! If you're interested in seeing a bunch more inspiration for this sketch, check out the amazing inspiration from the design team over on the {BYSH} Cardmakers blog! You won't regret it! The design team seriously had a blast with this one!


Thanks so much for stopping by!
See ya next time.

Inky hugs,
Crystal


{Please note that comment moderation is ON. Your lovely comment will appear shortly.}

Thursday, January 25, 2024

Fun Fold with a Fix ~ Ribbons & Ruffles ~ Unity Stamp Co.

Hello there crafty friend! 
Today I'm sharing a cute fun fold card featuring the adorable new Ribbons & Ruffles stamp from Unity Stamp Co. This stamp is just too cute!! I couldn't wait to play with her and had a spontaneous idea for a fun fold card so I didn't record my whole process, but just the assembling of the card with the fun fold element and, of course, the fix I needed to do to make it work.


Isn't this sweetie just darling!? So precious and sweet! I could use all the adjectives for this one! LOL! Anywho, as I mentioned above this is a fun fold card but you can't actually see how it works in the photos. So I hope you'll check out my video. But the floral layer is actually just a card front. The fold is in the center... so fun! *wink wink*

You can check out my short video showing the fun fold element of this card and how I had to fix it right here... Fun Fold Card with a Fix | Ribbons & Ruffles | Unity Stamp Co.


I stamped the Ribbons & Ruffles sweetie with Black Amalgam ink on Stampers Select White card stock from Papertrey Ink and colored her up with my Copic markers to coordinate with the pretty papers I had pulled for this card. So happy when I remember to find my papers before actually coloring my image! I die cut the baby girl using the largest stitched circle die from the Scallops & Circles {nesting dies}.

Here's a quick list of the Copic Markers I used:

Skin: E000, E00, E11 
Hair: E70, E87, E74
Blankie: RV91, RV93, Y26
Ribbon: Y23, Y26
Bassinet: Y23, Y26, BG70, BG72, BG75, RV91, RV93
Teddy Bear: N0, N1, N3, N5
Butterfly: Y23, BG72


 I paired up Ribbons & Ruffles with the Hello Darling paper pad from The Paper Studio {Hobby Lobby}. My card stock layers are Smokey Shadow from Papertrey Ink. And the enamel dots that just happened to coordinate with the papers is the Celebrate Autumn Enamel Dots from Echo Park Paper Co. Have an ink-tastic day!

Thanks so much for stopping by!
See ya next time.

Inky hugs,
Crystal

{Please note that comment moderation is on. Your lovely comment will appear shortly.}

Monday, January 22, 2024

Inky Paws Challenge #215 ~ Color Challenge

Hello there crafty friend!
It's time for a new Inky Paws Challenge... a beautiful Color Challenge
I sure hope that you'll join in the fun and play along with us with your Newton's Nook Designs products! You have until Friday, February 2nd to get your entries in for the #215 Color Challenge and a chance to win a $20 store credit to Newton's Nook Designs!


Absolutely gorgeous colors... Pink, Teal, Ice Blue & Cookie Dough Brown!! Love them!


I'm trying to ink up some stamps that I haven't used yet so I thought the Caffeinated Cats Stamp Set would be a cute stamp for this challenge. But I wasn't quite in a mood to color up the whole image so the Spotlight Technique was perfect for this card. I die cut the panel using the large postage stamp die from the Framework Die Set. And die cut a portion of the kitty panel using a stitched circle die from the Circle Frames Die Set. I also die cut a piece of Coastal Cabana card stock from Stampin' Up using the scalloped and stitched circle die also from the die set. 


Here's a quick list of the Copic Markers I used to color up the spotlight circle:

Cookie Dough Brown Cat: RV10, RV13, R00, R20, E30, E31, E33, Colorless Blender
White Cats: RV10, RV13, R00, R20, C00, C1, C3
Cookie Dough Brown & Ice Blue Cups: E30, E31, B000, B00
Ice Blue & Pink Cups: B0000, B000, B00, RV10, RV13
Teal & Pink Cups: BG0000, BG11, BG34, RV10, RV13


I heat embossed the sentiment with my go to combination of products... I applied TE Anti Static Powder to the Coastal Cabana card stock, stamped the sentiment with Sugar Cube Pigment ink from Taylored Expressions, added Alabaster White Embossing Powder to the ink from Brutus Monroe and melted the powder with my Wagner Precision Heat Tool. Once the sentiment was cooled I wiped off the excess anti static powder with a microfiber cloth, trimmed up the sentiment and popped it {and the spotlight circle} up on the card using Scrapbook Adhesive Crafty Foam Tape.


Now it's your turn to get your paws inky with your Newton's Nook Designs products and create a project using the color combo of Pink, Teal, Ice Blue & Cookie Dough Brown. Be sure to link up to the Inky Paws Challenge! Can't wait to see your projects!


Thanks so much for stopping by!
See ya next time.

Inky Hugs,
Crystal


{Please note that comment moderation is on. Your lovely comment will appear once approved.}

Sunday, January 21, 2024

Over the Rainbow Background with Anna Girl ~ Unity Stamp Co.

Hello there crafty friend! 
I got inky again with some fun stamps that haven't seen ink! Love when I can do that! I played with the Over the Rainbow background stamp and Anna Girl for a fun rainbow filled love card.


I recorded most of my card making process for this one. I did forget to hit record when I stamped the background stamp on the ink smooshed background. Ooopsie! Anywho, the ink smooshed background was created with Candied Apple, Carved Pumpkin, Mustard Seed, Mowed Lawn, Salty Ocean and Wilted Violet Distress Oxide inks. I stamped the Over the Rainbow background over the dried ink smooshed background with Black Amalgam ink. And then I die cut the ink smooshed background with the largest stitched die from the Scallops & Rectangles {nesting dies}.


Anna Girl and the sentiment were also stamped with Black Amalgam ink. I did a mix of paper piecing and copic coloring for Anna Girl. The bottom portion of her dress is paper pieced and adhered using the Bearly Art Precision Craft Glue. Such a fun way to mix things up! I fussy cut Anna Girl leaving a skinny white border around her.

Here's a quick list of the Copic Markers I used:

Skin: E000, E00, E11, E04
Hair: Y21, YR27, E25
Top of Dress: V000, V12, B91, B93
Jeans: B91, B93, B95, B97
Shoes: E21, E25
Hearts: R00, R20, R14, R46


I adhered the rainbow background to a 4-1/4 x 5-1/2" card front of True Black card stock from Papertrey Ink that I adhered to an A2 top fold card base of Stampers Select White card stock also from Papertrey Ink. I adhered the trimmed sentiment to the bottom of the card and adhered Anna Girl grounding her with the sentiment. And then I finished off the card with a few black enamel dots from the Travelers Notebook Enamel Dots from Echo Park Paper Co.

You can check out my process for this card {or atleast most of it} here... Spread Love | Over the Rainbow Background with Anna Girl | Unity Stamp Co.


 That's it for me today! I hope you've found some inspiration for this wonderful combination of stamps. Have an ink-tastic day!

Thanks so much for stopping by!
See ya next time.

Inky hugs,
Crystal

{Please note that comment moderation is on. Your lovely comment will appear shortly.}

Friday, January 19, 2024

Wishes Come True ~ Wishing and Wishing ~ Unity Stamp Co.

Hello there crafty friend! 
I got some inky time with an adorable mouse from Wishing and Wishing from Unity. I even had some time to do a video sharing some ink smooshing and copic coloring for this card. I hope you'll check it out! 


I love ink smooshing! I didn't want to go too crazy with the colors just doing a nice yellow and light orange for a pretty Spring card. I ink smooshed Mustard Seed and Spiced Marmalade Distress Oxide inks and stamped the fun Spring in Your Step Background using Crushed Olive Distress Oxide ink.


I stamped the sweet mouse directly on the front of my white A2 top fold card base. I was a bit concerned the copic coloring would bleed through but it wasn't bad at all.

Here's a quick list of the Copic Markers I used:

Mouse: R00, R20, W00, W1, W3, W5
Dandelion: C00, C1, C3
Stem: G12, G14, YG93


I heat embossed the sentiment in white on Prairie Grass Card Stock from Papertrey Ink. I used TE Anti Static Powder to prep the card stock. Stamped with Sugar Cube Pigment ink from Taylored Expressions. I added some Alabaster White Embossing Powder from Brutus Monroe and then melted the powder using a Wagner Precision Heal Tool.

You can check out my process in making this card here... Wishes Come True | Wishing and Wishing | Unity Stamp Co.


That's it for me today! I hope you've found some inspiration for this wonderful combination of stamps. Have an ink-tastic day!

Thanks so much for stopping by!
See ya next time.

Inky hugs,
Crystal

{Please note that comment moderation is on. Your lovely comment will appear shortly.}

Wednesday, January 17, 2024

Membership Wednesday ~ January 2024 BOM Butterfly Breeze Meadow ~ Unity Stamp Co.

  Hello there crafty friend!
Today I'm sharing a quick sympathy card featuring the January 2024 Background of the Month membership from Unity called Butterfly Breeze Meadow. Yesterday was a rare day where I just didn't feel like coloring and a monochromatic card sounded perfect.


I stamped the beautiful A2 background stamp on Stampers Select White Card Stock from Papertrey Ink using Lost Shadow Distress Ink. I trimmed the panel down to 3-3/4 x 5".


I die cut a piece of Smokey Shadow Card Stock from Papertrey Ink using the largest die from the Postage Stamp {nesting dies}, also from Unity. I adhered the stamped background to the postage panel and then adhered the panel to a Stampers Select White Card Stock A2 card base.


I could of sworn that Unity has or had a 'with sympathy' die but I looked through my stash and didn't find one and then I checked the website and didn't find one. Maybe I imagined it. I don't know, but I still wanted to go with a sentiment that conveyed the feeling of a sympathy card so I went with the On My Mind {die}. I die cut the sentiment from Weathervane Card Stock from Papertrey Ink two times. And then I die cut it from Smokey Shadow Card Stock. I adhered the layers of the sentiment together using the awesome Bearly Art Precision Craft Glue. I love the fine tip on this glue!! And it hasn't clogged up on me one time! Love, love, love it!!


Here's a quick look at the Background of the Month membership this month! So gorgeous!


 Well, that's it for me today! I'll be back next week with a card probably using a stamp from the January 2024 Kit of the Month. Not totally sure, but that's what I'm leaning towards. Until then, have an ink-tastic day!


Thanks so much for stopping by!
See ya next time.

Inky Hugs,
Crystal


{Please note that comment moderation is on. Your lovely comment will appear once approved.}

Monday, January 15, 2024

Inky Paws Challenge #214 ~ Warm & Cozy Theme Challenge Reminder

 Hello there crafty friend!
 There's still time to play along with the Inky Paws Challenge #214 - Warm & Cozy Theme Challenge!! You have until this coming Friday, January 19th to get your entries in for this fun challenge and a chance to win a $20 store credit to Newton's Nook Designs!


We're in the midst of some really cold weather that's dipping below zero... the perfect time for some warm and cozy cardmaking!


Nothing is more cozy during a super cold day than a roaring fire in the fireplace while drinking hot coffee, reading and sitting with all the critters hanging out. I just had to combine the sweet stamp from Sips & Stories Stamp Set with the adorable stamp from the Fireside Friends Stamp Set. Both were stamped with Memento Tuxedo Black ink and fussy cut with my Cutter Bee Scissors. I cleaned up the edges by coloring them with my Memento Tuxedo Black marker so my fussy cutting looks nice and neat.


I paired up this sweet scene with a pattern paper from A Cat's Life 6x6 Paper Pad. I thought the cute paw prints were just perfect as wallpaper. I grounded the scene with a piece of Weathervane Card Stock from Papertrey Ink. This grey card stock coordinates with the grey in the pattern paper really nicely.

Here's a list of the Copic Markers I used to color up my scene:
Bow / Rug / Chair: BG0000, BG000, BG02, BG45
Greenery: YG11, G24, G46
Fireplace: C00, C1, C3, N0, N1, N3, N5
Fire / Wood: Y06, YR21, YR15, YR68, E55, E57, E59
White Cat: R00, R20, C00, C1, C2
Orange Cat: R00, R20, YR0000, YR21, YR15, YR68
Dog: E51, E55, E57, E59
Skin / Hair: E000, E00, E11, E51, E55, E57, E59
Pajamas / Socks: YG11, G24, YR21, YR15
Pillows / Blanket: YG11, G24, BG0000, BG000, BG02, BG45, YR21, YR15, YR68, C00, C1, C3
Tortoise Shell Cat: R00, R20, N0, N1, N3, YR21, YR15
Mug / Coffee: YR0000, YR21, YR15, YR68, C00, C1, C3, E51, E55, E57
Book: C00, C1, C3


I die cut the pattern paper and the grey card stock using the large stitched scalloped rectangle die from the Frames & Flags Die Set. I then trimmed the grey card stock with my guillotine trimmer and adhered it to the pattern paper background. I added a little scrap of card stock to the back of the fireplace so the image would lay flat on the card. I added foam tape to the back of the girl in the chair and popped her up on the card. I like the dimension this gives the card but I think it also helps with the size difference between the images. To finish off the card, I stamped the sentiment and framed it with a grey card stock mat. I just adhered it directly to the card.


Now it's your turn to get your paws inky with your Newton's Nook Designs products and create a project using the warm & cozy theme. Be sure to link up to the Inky Paws Challenge! Can't wait to see your projects!


Thanks so much for stopping by!
See ya next time.

Inky Hugs,
Crystal


{Please note that comment moderation is on. Your lovely comment will appear once approved.}

Saturday, January 13, 2024

{BYSHC} Sketch Challenge 41 ~ Love Owl with Stitched Star Background ~ Angie Blom Digital Designs

Hello there crafty friend!
I'm back with another Christmas card for the {BYSHC} Sketch Challenge 41 for the Build Your Stash Holiday Cardmakers Facebook group. Today I'm featuring the brand new Love Owl and Stitched Star Background digital stamps from our wonderful challenge sponsor Angie Blom Digital Designs.


I combined and resized the Stitched Star Background and the Love Owl in a Word Document. I also added a sentiment from the Christmas Shop digital stamps and resized it. I ink smooshed a piece of white card stock using Squeezed Lemonade, Mustard Seed, and Wild Honey Distress Oxide inks being sure to keep the inks on the top half of the card stock. Dried the background with my heat tool and then I printed the combination of digital stamps onto the card stock.


I trimmed the Stitched Star Background and adhered it to a 5-1/4 x 4" piece of True Black card stock and then adhered my panel to a Stampers Select White card stock A2 card base. I colored up the sweet and adorable Love Owl using a handful of Copic markers. I fussy cut it and cleaned up the lines by coloring the edges with a Memento Tuxedo Black marker.

Here's a quick list of the Copic markers I used:
Owl: E53, E55, E57, BG0000, BG000, BG02, YR15, YR27, Y11, Y15
Scarf: Y11, Y15, Y35
Branch: E53, E55
Pine Needles: YG11, G24, G46
Berries: R20, R14


I die cut a piece of vellum card stock using the X Stitched Circle die from Gina Marie Designs. I trimmed off the bottom edge of the die cut circle which I think grounds the owl. It just didn't look right with the complete circle. I adhered the owl to the vellum circle and then adhered the circle to the card by just applying glue behind the owl. I trimmed up the sentiment and adhered it to the card. To finish off the card I added a few enamel dots.


Here's another look at {BYSHC} Sketch Challenge 41 for the month of January. If you're interested in seeing a bit more inspiration for this sketch, check out the amazing inspiration from the design team over on the {BYSH} Cardmakers blog!


Thanks so much for stopping by!
See ya next time.

Inky hugs,
Crystal


{Please note that comment moderation is ON. Your lovely comment will appear shortly.}