Showing posts with label #mermaidcard. Show all posts

Tuesday, July 16, 2024

July Scraps Cards ~ Just Keep Swimming plus More ~ Unity Stamp Co.

 Hello there crafty friend!
I finished up my latest batch of leftover scraps and turned them into four pretty simple cards. Yay! I also played with some stamps that hadn't seen ink yet which is always a great bonus! It feels so good to have some more papers done!


Here's a look at the four cards all together. All very different! I'd love to know if you have a favorite of the batch. If you have a moment, comment below and let me know.
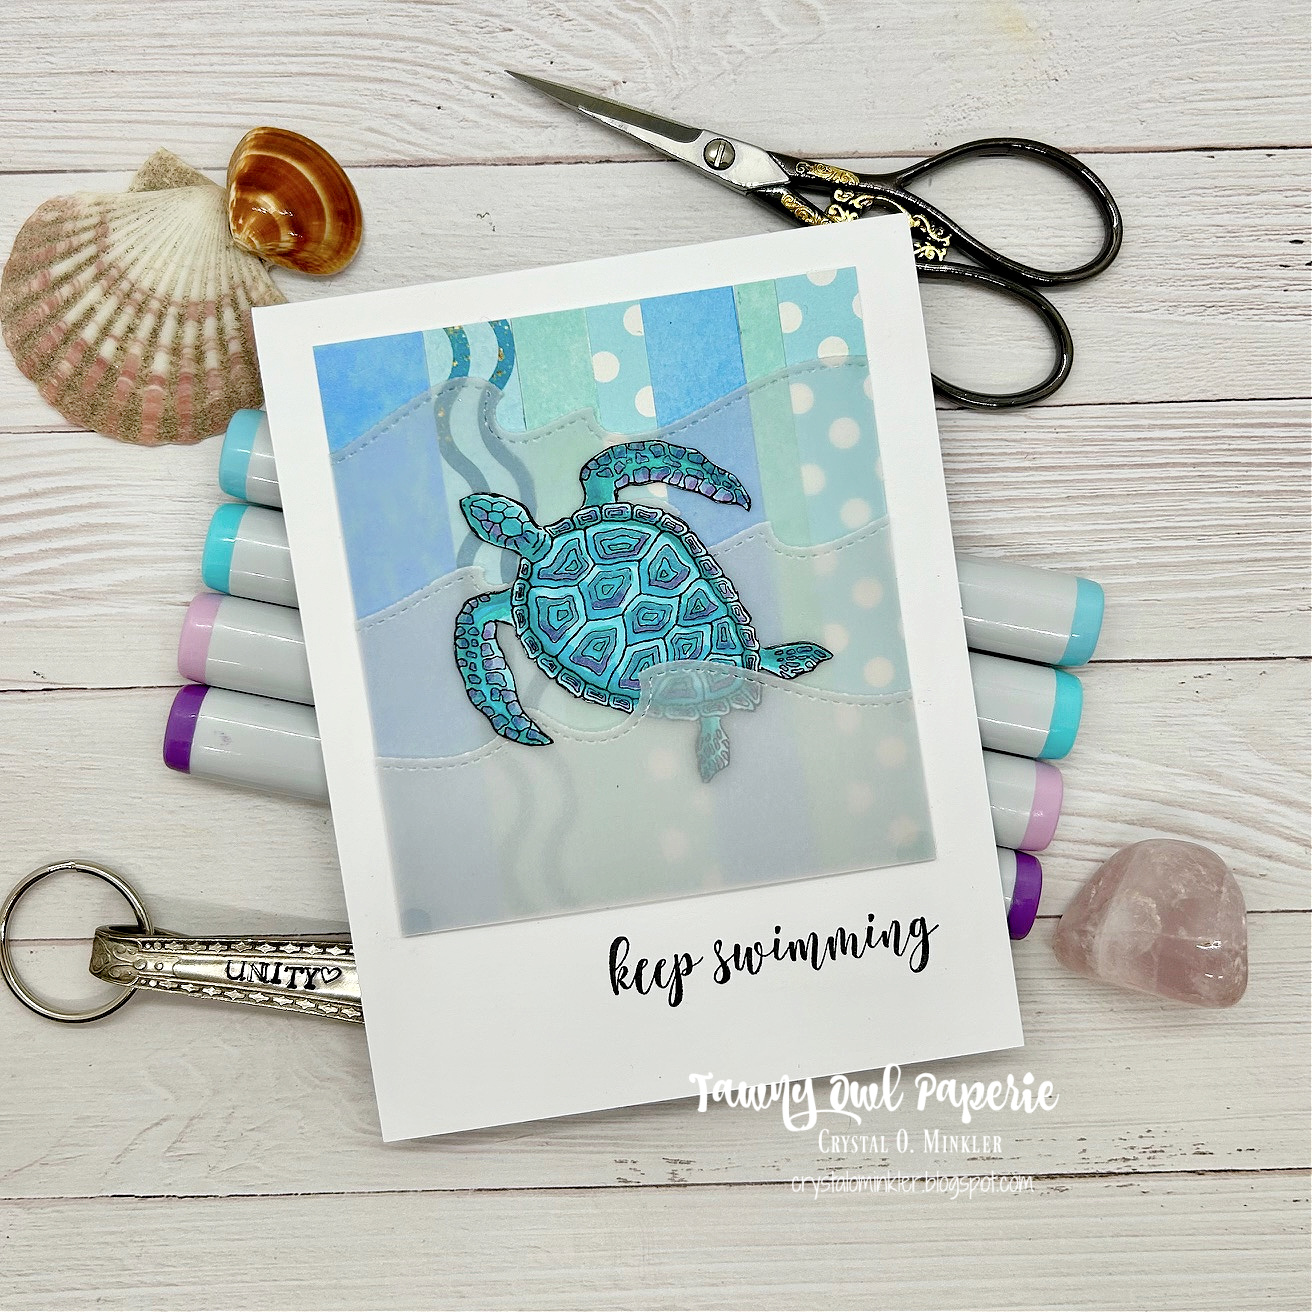

My first card features the beautiful turtle from the Just Keep Swimming stamps. I love this turtle! It's always so much fun to color too. As far as the scraps for this card, I had a bunch of paper strips that were different lengths and widths. I decided to combine them for a fun background. I adhered them all to a 3-1/2 x 3-7/8" piece of thin card stock. I trimmed off the excess paper strips and adhered the panel to a white A2 top fold card base. I die cut some Vellum Card Stock from Papertrey Ink using the Stitched Wave Borders dies from Lawn Fawn for a fun wave background for the turtle. 


I stamped the turtle with Black Amalgam ink from Gina K. Designs. I colored up the turtle using my Copic markers and then I fussy cut it on the line. I colored the edges of the fussy cutting using a Memento Tuxedo Black marker from behind the turtle just in case my marker slipped. I secured the vellum waves together using washi tape and then I trimmed the excess so they would fit over the 3-1/2 x 3-7/8" panel. I adhered the turtle tucking his bottom behind the last vellum wave. I adhered the vellum to the card by adding glue to the back of the turtle. Once it was a little dry and wouldn't shift anymore, I added a drop of liquid glue to the bottom corners of the vellum to secure it a tiny bit more. I also added tiny dots of glue under the stitches on the very edge of each layer. The stitches covered the glue pretty well. You can see the glue a tiny bit on those bottom corners but it's hardly noticeable in person. I finished this card by stamping the sentiment.

Copic Markers: BG000, BG01, BG15, BG05, BG57, V0000, V12, V15
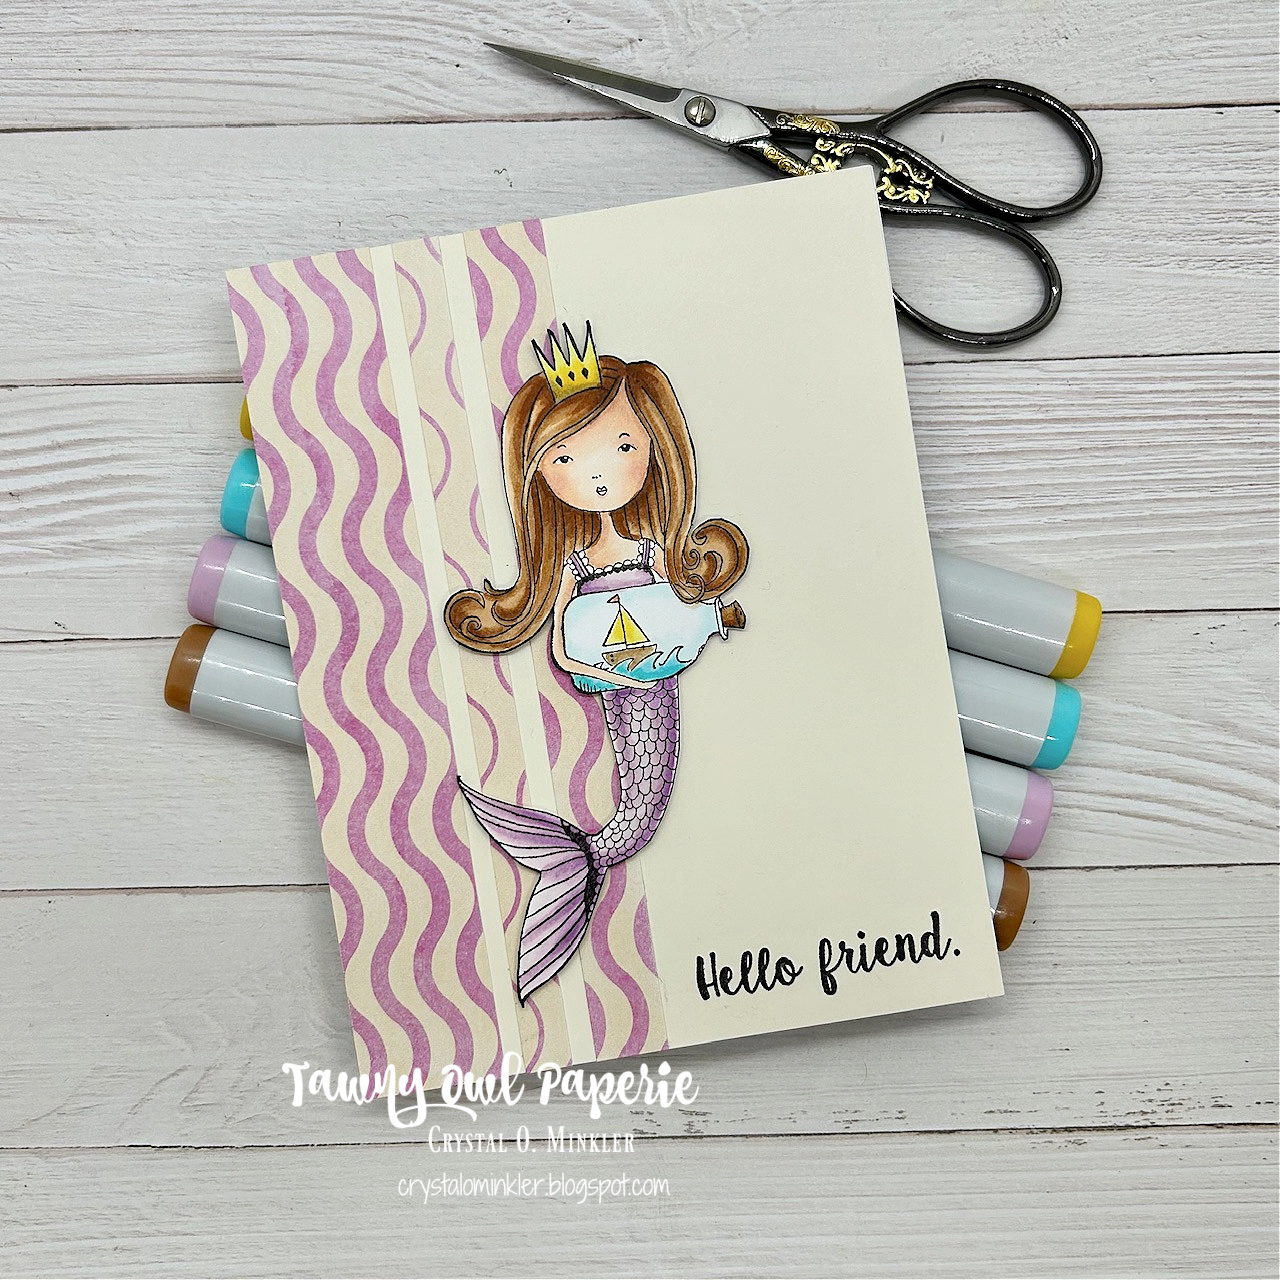

My second card uses three similar strips of pattern paper for a quick card design. I adhered them to a 4-1/4 x 5-1/2" piece of Vintage Cream Card Stock from Papertrey Ink. And then I adhered the card front to a white A2 top fold card base of Stampers Select White Card Stock, also from Papertrey Ink. I stamped the adorable mermaid from the Spirit of a Mermaid stamps using Black Amalgam Ink and I also stamped the sentiment on the card. Sadly, this is one of the retired stamp sets from Unity. I colored up this beauty with my Copic markers and fussy cut her just like I did with the turtle. I added a touch of Sakura White Gelly Roll pen to the whites of her eyes and the frill on her top. And I popped her up on the card using foam tape.

Here's a quick list of the Copic markers I used for the mermaid:
Skin: E000, E00, E11, R00, R20
Hair: E50, E30, E35, E37
Crown: Y11, Y15, Y28
Body / Tail: V0000, V000, V12, V15
Sailboat: Y11, Y15, R12, R05, E30, E35
Waves: BG000, BG01, BG15
Bottle: BG000
Cork: E30, E35, E37


My third card uses four rectangle scraps for an interesting background. I overlapped them just a bit and adhered them all to a white A2 top fold card base. I stamped the fish from the retiring Fishy Philosophy stamps with Black Amalgam ink and fussy cut them. The sentiment I stamped with Peacock Feathers Distress Ink. I added foam tape to the back of these fish and popped them up on the card. And I finished off the card with a few clear drops from my stash.

Copic Markers: Y11, Y15, YR15


My last card also features the cute fish from the Fishy Philosophy stamps. I love this cute stamp set! I had one last large piece of scrap pattern paper from these papers so I just adhered it directly to white A2 top fold card base that I turned on it's side for a landscape card. This was such a simple card! I stamped the fish and the sentiment using the Black Amalgam ink. I fussy cut the fish just like the others and popped it up on the card, too.

Copic Markers: Y11, Y15, R12, R05


I'm so excited to have another paper pack done! Woohoo! What do you think of the card designs this time? Do you have a favorite? I love the simple designs of all of them so it's hard for me to choose a favorite. Well, I'm excited to pick out another pattern paper pack to finish off. I'll definitely pick one out to use with the upcoming Tawny Owl Paperie Inky Inspiration Sketch 24 that will start in a couple of weeks. Have a wonderfully inky week!

Thanks so much for stopping by!
See ya next time.

Inky Hugs,
Crystal


{Please note that comment moderation is on. Your lovely comment will appear once approved.}

Tuesday, July 9, 2024

Tawny Owl Paperie Inky Inspiration Sketch 23 ~ Sammy Girl ~ Unity Stamp Co.

 Hello there crafty friend!
Today I'm sharing a another card for the Tawny Owl Paperie Inky Inspiration Sketch Challenge 23 in the Tawny Owl Paperie Inky Inspiration Facebook group. I'm still using up some of my leftover papers from old card kits from my Scrapping for Less days a few years ago. I made another mermaid card! The papers kind of dictated the theme of this card.


And the papers actually dictated a landscape card rather than a portrait card because of the direction of the images in my scraps. My bottom layer is a little smaller than the sketch calls for but I made it work. I cut mats for the small rectangle pieces because they seemed to get lost in the background papers. I used Tempting Turquoise card stock from Stampin' Up for my mat and card front layers. 


Here's a look at the fun sketch for Tawny Owl Paperie Inky Inspiration Sketch Challenge 23. The sketch, as always, is meant to inspire not require. So let the sketch lead in your design, but don't feel limited by it. A great example is how I turned the sketch for a landscape card.


Sammy Girl is stamped with Black Amalgam ink from Gina K. Designs. I also stamped the sentiment on a scrap of white card stock. I colored up Sammy Girl with my Copic markers and fussy cut her on the line. I used a Memento Tuxedo Black marker to color the edges of the fussy cutting. This helps to make the fussy cutting look nice and neat. I added some texture to my coloring by adding dots of Copic marker and then I added some Sakura White Gelly Roll pen dots too.  

Here's a quick list of the Copic markers I used: 
Skin: E000, E00, E11
Hair: Y21, YR23, E97, E99
Mermaid: B000, B00, B02, B04, V12, V15, Y11, Y15
Shell Necklace: B000, B00, B02, B04


I die cut a circle of vellum card stock using a die from the Scallop & Circles {nesting dies}. All of my layers are adhered directly to the card front. No foam tape for this one. My card front is adhered to a white A2 top fold card base. I finished off the card with a few glitter enamel dots from my stash. I hope you all have fun with this sketch! Have an ink-tastic week!

Thanks so much for stopping by!
See ya next time.

Inky Hugs,
Crystal


{Please note that comment moderation is on. Your lovely comment will appear once approved.}

Tuesday, July 2, 2024

Tawny Owl Paperie Inky Inspiration Sketch 23 ~ Sea Babies ~ Avery Elle

 Hello there crafty friend!
Today I'm sharing a couple more cards for the Tawny Owl Paperie Inky Inspiration Sketch Challenge 23 in the Tawny Owl Paperie Inky Inspiration Facebook group.  I had a look through my old card kits from my Scrapping for Less days a few years ago. These are the kits I've been pulling my leftover papers from and I grabbed a cute kit that had a decent amount of paper. But what I was really drawn to was the adorable mermaid. I didn't create anything for Mer-May so I'm late but I'm excited I finally made a mermaid card... actually two! 


I cut my papers to the measurements on the sketch except for the small rectangles on the pink mermaid card {right side}. Those rectangles were scraps and I just went with them. I adhered my background papers together and then adhered them to a 4-1/4 x 5-1/2" card front of Island Indigo card stock from Stampin' Up. After copic coloring the mermaids and fish. I fussy cut the fish on the line and cleaned up my cutting by coloring the edges of the fish with a Memento Tuxedo Black marker. I adhered the fish to the focal panel and adhered the focal panel to the small rectangles. And then I added foam tape to the back of the whole thing, including little pieces for the fish tails.


Here's a look at the fun sketch for Tawny Owl Paperie Inky Inspiration Sketch Challenge 23. The sketch, as always, is meant to inspire not require. So let the sketch lead in your design, but don't feel limited by it. 


I adhered the fish to the focal panel and adhered the focal panel to the small rectangles. And then I added foam tape to the back of the whole thing, including little pieces for the fish tails. I removed the backing from the foam tape and popped them up on the card. 

Here's a quick list of the Copic markers I used: 
Skin: E000, E00, E11
Hair: Y21, E95, E97
Purple Mermaid: V000, V12, V05, RV0000, RV10, RV11
Pink Mermaid: RV0000, RV10, RV11, V000, V12, V05
Yellow/Orange Fish: Y11, Y06, Y15, YR21, YR15, YR16
Orange Fish: YR21, YR15, YR16


I added a couple flat back pearls to the cards to finish them up. These were in the kits so I'm not really sure where they are from. My card fronts are adhered to a white A2 top fold card base. I hope you all have fun with this sketch! I can't wait to see what you create with it. Have an ink-tastic week!

Thanks so much for stopping by!
See ya next time.

Inky Hugs,
Crystal


{Please note that comment moderation is on. Your lovely comment will appear once approved.}

Wednesday, June 7, 2023

Always Find a Way ~ Wrinkle & Mystical Mermaid ~ Unity Stamp Co.

Hello there crafty friend!
Today I'm participating in a fun Instagram hop for a new release and collaboration between Unity Stamp Co. and Brutus Monroe. There's prizes and a whole bunch of inspiration so head over there to check it out. I just wanted to share a bit more information for my cards. First up is my mermaid card... 
 

I actually made the background for this card trying to figure out what colors I wanted to use for my typewriter card. It was not right for the typewriter card. BUT when I looked at it again, I thought it would be fun for a mermaid. It's different, for sure. 


The background was created by first ink smooshing Salty Ocean Distress Oxide ink on a white card front measuring 4-1/4 x 5-1/2". I then inked up the awesome new Wrinkle background stamp with Saltwater Taffy and Kitsch Flamingo Distress Oxide inks and just stamped it right over the inks smooshed card front. I also ink blended the Salty Ocean ink around the edges.


The sentiment and mermaid from the Mystical Mermaid stamps were stamped on white card stock with Black Amalgam ink. I also stamped the mermaid onto the background. I colored up the mermaid on the white card front with the following Copic Markers:

Skin ~ E00, E11
Hair ~ E70, E71,  E74
Tail ~ V000, V12, V15, V17, Y15, YR15, YG11, G14, G05, B00, B02
Rock ~ N0, N2, N4
Jelly Fish (on background) ~ V15
Bottom edge of Rock ~ B02

Once I was done coloring the mermaid, I fussy cut her on the line. Since I had stamped the mermaid on the background I was able to cut away the jelly fish and the dots... I even cut on the line between her hand and the rock and cut the little wisps of hair off. All those details came back when I paper pieced the mermaid to the background. I also cut between the fins. To make the whole piece nice and neat, I colored the edges black with a Memento Tuxedo black marker. All EXCEPT under the rock... there I colored the edge with a B02 copic marker. It helps make the rock look like it's in the water.


I added a bit of glitter to the mermaid's tail and the jelly fish using a Nuvo Glitter Gloss Aqua Shimmer pen. It's very subtle and does not show up in the photos, sadly. This card was so fun to make. I almost set this background aside but I'm glad that I used it. Head on over to the Insta Hop!! You have got to check out all the amazing cards! I'm sharing four cards over there... this one, plus my Father's Day Card from the Friends of Unity blog hop and two more cards. I'll be sharing the last two cards here on my blog soon. Be sure to subscribe to my blog so you don't miss my posts {on the right hand side - just enter your email address}. I'll also be sharing a process video for my Masculine Birthday card from the Insta Hop on my YouTube so be sure to subscribe to my channel {link ^^^ at the top of my blog under the heading}. Ok. Well, that's it for me. Have an inktastic day!!


Thanks so much for stopping by!
See ya next time.

Inky hugs,
Crystal


{Please note that comment moderation is on. Your lovely comment will appear once approved.}