Showing posts with label Snowflakes. Show all posts

Monday, October 13, 2025

Hot Cocoa Kisses ~ Preview Day 3 ~ The Greeting Farm

 Hello there crafty friend!
It's the final day of previews at The Greeting Farm for the October release! Today we're introducing HOT COCOA KISSES... today's super cute and adorable stamp set includes four sweet little snowmen with a cute hot cocoa stand and a bunch of accessory stamps! All so super cute and fun!


I stamped the adorable snowmen with Memento Tuxedo Black ink and colored them all with Copic markers. Fussy cut each of them on the line and then colored the edges with a Memento Tuxedo Black marker making the edges nice and neat.

Here's a quick list of the Copic markers I used:
Snowmen: C0, C1, C3, R00, R20
Brown Hat: E21, E23, E25
Ear Muffs: N2, N4, N6, R20, R14, R29
Green Scarf: YG11, G24, G46
Red Cup: C0, C1, R20, R14, R29
Black Cap: N2, N4, N6, E21, E23, E25, R14, R29
Red Scarf: R20, R14, R29
Book: YG11, G24, G46
Green Santa Hat: C0, C1, C3, YG11, G24, G46
Plaid Scarf: R20, R14, R29, G24, G46
Green Cup: YG11, G24, G46, C0, C1


I dry embossed a card front of white card stock measuring 4-1/4 x 5-1/2" using the Starry Snowfall Embossing Folder from Spellbinders. I used the embossing folder and dry embossed a scrap of white card stock. I trimmed the scraps to 2 x 1-1/4" and adhered them to a 2-1/4 x 4-1/4" piece of white card stock.


Inspiration for my card came from the Tawny Owl Paperie Inky Inspiration Sketch 36. Though this is a great sketch for scraps of pattern paper, I was curious to see how it would look as a CAS card with an all white background. I love it!


I stamped and trimmed the sentiment. Popped it up on the card with foam tape and then I also popped up the snowmen on the card to finish it off. I usually struggle with white on white for my card, but I think I nailed this one. Love it!


The release goes live in the store on Wednesday the 15th at 12am EST! Woohoo! Be sure to come back then for the release Blog Hop!! One lucky winner will receive a $50 gift card to The Greeting Farm. All you have to do is comment on every stop of the hop! Yay!

Thanks so much for stopping by!

Inky Hugs,
Crystal


Wednesday, October 1, 2025

{BYSHC} Sketch Challenge 62 ~ Christmas Cheer ~ Gina K. Designs

Hello there crafty friend!
It's time for a new sketch challenge over in the Build Your Stash Holiday Cardmakers Facebook group! Today I'm sharing a fun Christmas card featuring a super cute stamp set and coordinating dies from our awesome Sponsor Gina K. Designs! This month's prize is a $25 gift card to Gina K. Designs! Yippee!


I created a fun background for this card using the four snowflake stamps from the Christmas Cheer Stamp Set. I heat embossed them on Powder Blue card stock from Gina K. Designs. I used an anti static powder tool to prepare the card stock and then I stamped the snowflakes with a white pigment ink. Now my white embossing powder is old so it wasn't working as well so I found I had to heat emboss a few of the snowflakes twice. It was a little extra work but worth it to have nice snowflakes in the background.


I heat embossed the snowflakes on a 4 x 5-1/4" piece of the Powder Blue card stock being sure to only stamp the snowflakes around the outer edge. The center panel measured 3 x 4-1/2" and then I trimmed it to the measurements noted on the sketch {below}. I trimmed a piece of Blue Denim card stock, also from Gina K. Designs, to 8-1/2 x 5-1/2 for an A2 card base. I adhered the card front to the card base. And then I trimmed another piece of Blue Denim card stock to 3-1/2 x 4-3/4" and adhered the broken panels to that mat and then adhered that to the card base. Easy peasy.


I could have left it at that but the snowman was wanting to be stamped so I obliged. I stamped the snowman with Memento Tuxedo Black ink and colored him up with just a handful of Copic markers: {snowman} C0, C2, {nose} YR15, {hat} N2, N4, N6, B000, B02, {scarf} B000, B02. I heat embossed one more snowflake on a scrap of the Powder Blue card stock and die cut it and the snowman using the coordinating dies from the  Christmas Cheer Die Set. They didn't quite pop on the card so I die cut a piece of vellum with a stitched circle die and popped the duo on top of the vellum. I was then able to add glue just behind the snowflake and snowman to adhere the vellum circle to the card. All that was left was the sentiment... I heat embossed it on the Denim Blue card stock and die cut it with the coordinating die. And I popped it up on the card with foam tape.


Here's a look at {BYSHC} Sketch Challenge 62 for the month of October. If you're interested in seeing a bunch more inspiration for this sketch, check out the amazing inspiration from the design team over on the {BYSH} Cardmakers blog!

Thanks so much for stopping by!

Inky hugs,
Crystal

Sunday, September 7, 2025

Skate Paw-ty ~ STAMPtember Collab ~ Newton's Nook Designs & Simon Says Stamp

 Hello there crafty friend!
Today I'm so super excited to be sharing a cute card featuring stamps from the adorable STAMPtember collaboration stamp called Skate Paw-ty from Newton's Nook Designs that's available over at Simon Says Stamp!! Oh my gosh... I just can't handle the cuteness in this set!


I made a fun wintry card featuring one of the pups and the kitty from the stamp set. I stamped them with Memento Tuxedo Black ink and colored them with Copic markers. I die cut them both using the Skate Paw-ty coordinating dies.

Here's a quick list of the Copic markers I used:
Kitty: C0, C2, R00, R20
Pup: E000, E00, E11, E23 N0, N2, N4
Blues: B000, B00
Purples: BV000, BV02
White: B000, B00


I used a scrap piece of card stock to mask the top portion of my card base and blended lightly with Tumbled Glass Distress Ink to create the ice for our skaters. And then stamped a bunch of snowflakes on the card. I also stamped three on a scrap piece of paper and die cut them using the coordinating dies.


I adhered the skaters and snowflakes with liquid glue and the I stamped the sentiment with the same Tumbled Glass Distress ink to finish off the card.


 Be sure to head over to Simon Says Stamp to get yours before they are all gone! These exclusive cuties will not be restocked! Once they are gone.. they are gone!!

Thanks so much for stopping by!

Inky hugs,
Crystal

Sunday, December 22, 2024

Unity Advent Calendar 2024 Day 22 ~ Unity Stamp Co.

Hello there crafty friend!
It's Day 22 of the 2024 Advent Calendar from Unity!! Just a couple days to Christmas! What's on your agenda?! I need to finish wrapping gifts! Yikes!


Today's stamp is a super cute snowman. I stamped him with Black Amalgam ink. And fussy cut him leaving a bit of a border around the top of the snowman but I cut on the line for the bottom. Here's a quick list of the Copic markers I used: C00, C1, C3, B000, B00, B91, YR21, YR15, Y28.

You can check out my video revealing the Advent Calendar Day 22 stamp and my process in making this card here... Unity Advent Calendar 2024 Day 22 | Unity Stamp Co.


Inspiration for my card came from the {BYSHC} Sketch 34! I had fun with this sketch! 


A sweet holiday card and it's a fun fold!! The card opens in the center just under the snowman's hands.


I paired up the cute snowman with the Snowy Winter Greetings {paper pack}. The sweet sentiment is from the Simple Little Wishes {itty bitty} stamps.

I'll be back tomorrow for Day 23 of the 2024 Advent Calendar from Unity!
Have an inkredible day!


Thanks so much for stopping by!
See ya next time.
 
Inky Hugs,
Crystal


{Please note that comment moderation is on. Your lovely comment will appear once approved.}

Friday, July 28, 2023

Christmas in July 2023 {BYSHC} Linky Party ~ Snowflake Net Stencil ~ A Colorful Life Designs

 Hello there crafty friend!
I'm back with my last card for the Christmas in July 2023 {BYSHC} Linky Party! It's also my last card for the {BYSHC} Sketch Challenge 35. My card for today features a mix of products from a few of our wonderful Linky Party Sponsors again.


I wanted a simple plaid background using the Plaid Cover Dies Bundle from Sponsor Pink & Main. I love how combining these two A2 sized dies with different card stock colors makes for such an easy background. I die cut the Plaid Cover Die Panel A from Cool Caribbean card stock from Stampin' Up. I die cut the Plaid Cover Die Panel B from Orchid Opulence card stock, also from SU.


Next, I ink blended Seedless Preserves and Broken China Distress Oxides over the fabulous Snowflake Net Stencil from Sponsor A Colorful Life Designs onto a 6 x 6" piece of white card stock. I die cut a portion of it with the second largest die from the Pleated Lace Mini Slimline die from Sponsor Gina Marie Designs. Not sure yet what I'll do with the other portion. I also die cut a scrap of white card stock that I trimmed and adhered to the stenciled panel. 
 

Here's a look at this month's {BYSHC} Sketch 35. I turned the sketch for my card... mostly for the sentiment to sit at the bottom of the focal panel. There's still a bit of time to play along with the sketch!! Entries must be submitted prior to July 31st at 11:59pm PST in the Build Your Stash Holiday Cardmakers Facebook group.


The sentiment from the Wishing You Mini Stamp Set from Sponsor Gina K. Designs was then stamped on the bottom white portion of the panel with Seedless Preserves Distress Oxide ink. I stamped two snowflakes from the Wishing You Mini Stamp Set... one with the Seedless Preserves and the other with Broken China Distress Oxide ink. I fussy cut them leaving a tiny bit of a white border and then adhered them together using the iCraft UltraBond Adhesive from our wonderful Sponsor Therm O Web. I adhered the snowflakes to the stenciled panel and then I popped up the panel and snowflakes on the card using 3D Foam Squares from Sponsor Therm O Web. I finished off the card by adding a few white rhinestones from the Frosty Rhinestones from our Sponsor Gina Marie Designs to the centers of the snowflakes. 


I have had SO much fun playing along with the Christmas in July 2023 {BYSHC} Linky Party! I hope that you've been inspired to make a few Christmas cards to relieve some of the holiday stress. I know that I am feeling great about the 8 cards and 3 tags that I made. If you missed the tags I shared on my Instagram you can check them out here... 3 Holiday Tags. Thank you ALL so much for stopping by my blog and commenting on my cards. I've truly enjoyed each of the comments. And I hope that you'll stop by the Linky Party and check out the cards that have been linked up. So many amazing and wonderful cards!! And if you have a bit of time today you could still enter into the Linky Party... it ends at 11:59pm PST tonight.

Thanks so much for stopping by!
See ya next time.

Inky hugs,
Crystal


{Please note that comment moderation is on. Your lovely comment will appear once approved.}

Thursday, April 27, 2023

Spring into Christmas 2023 {BYSHC} Linky Party ~ Snowflake Cover Plate ~ Gina K Designs

 Hello there crafty friend!
I can't believe that it's Day 7 of the Spring into Christmas 2023 {BYSHC} Linky Party! It's gone by so fast! I'm sharing card number 7 today and I'm featuring a few of our Sponsors again. 


I used the beautiful Snowflake Cover Plate die from return Sponsor Gina K Designs. I die cut a piece of white card stock using the die and poked out all the little pieces. I did end up using a shim with the die. I had a couple stubborn pieces that didn't want to cut but I added a thin card stock layer to my "sandwich" and ran it through my Big Shot again and they all popped out easy peasy. I blended Tumbled Glass and Shaded Lilac over the die cut piece using TE Blender Brushes from Sponsor Taylored Expressions.


I splattered a bit of water on the die cut background for the oxides to react. I dabbed it with a paper towel to pick up the rest of the water. Once the background was dry, I adhered it to a white A2 top fold card base measuring 4-1/4 x 11"; scored at 5-1/2".


I stamped the sentiment from the Bethlehem's Light stamp set from Sponsor Colorado Craft Company using Sugar Cube Pigment ink from Sponsor Taylored Expressions. Love the mix of fonts on this sentiment and I thought it would look fab with the snowflake background. I added some white embossing powder and melted it with my heat tool. I trimmed it up and then adhered it to the card. I finished off the card by adding three black enamel dots from the 9 Color Rainbow Mirror Foil Enamel Dots from Sponsor Gina Marie Designs.


Be sure to stop by Gina K Designs and Colorado Craft Company to check out their fabulous products! I did see a few holiday products on clearance over at Gina K Designs. And Colorado Craft Company has an awesome BOGO sale happening on their digital stamps... use code BOGODIGIS. I may have snagged a couple awesome holiday digital stamps myself! Have you stopped by the Spring into Christmas 2023 {BYSHC} Linky Party yet?! I sure hope you will... so many wonderful cards being shared!


Thanks so much for stopping by!
See ya next time.

Inky Hugs,
Crystal


{Please note that comment moderation is ON. Your comment will appear shortly.}

Thursday, December 29, 2022

Ink Swipe Technique with Oxides ~ December Challenge ~ Kindness Is Like Snow ~ Unity Stamp Co.

 Hello there crafty friend!
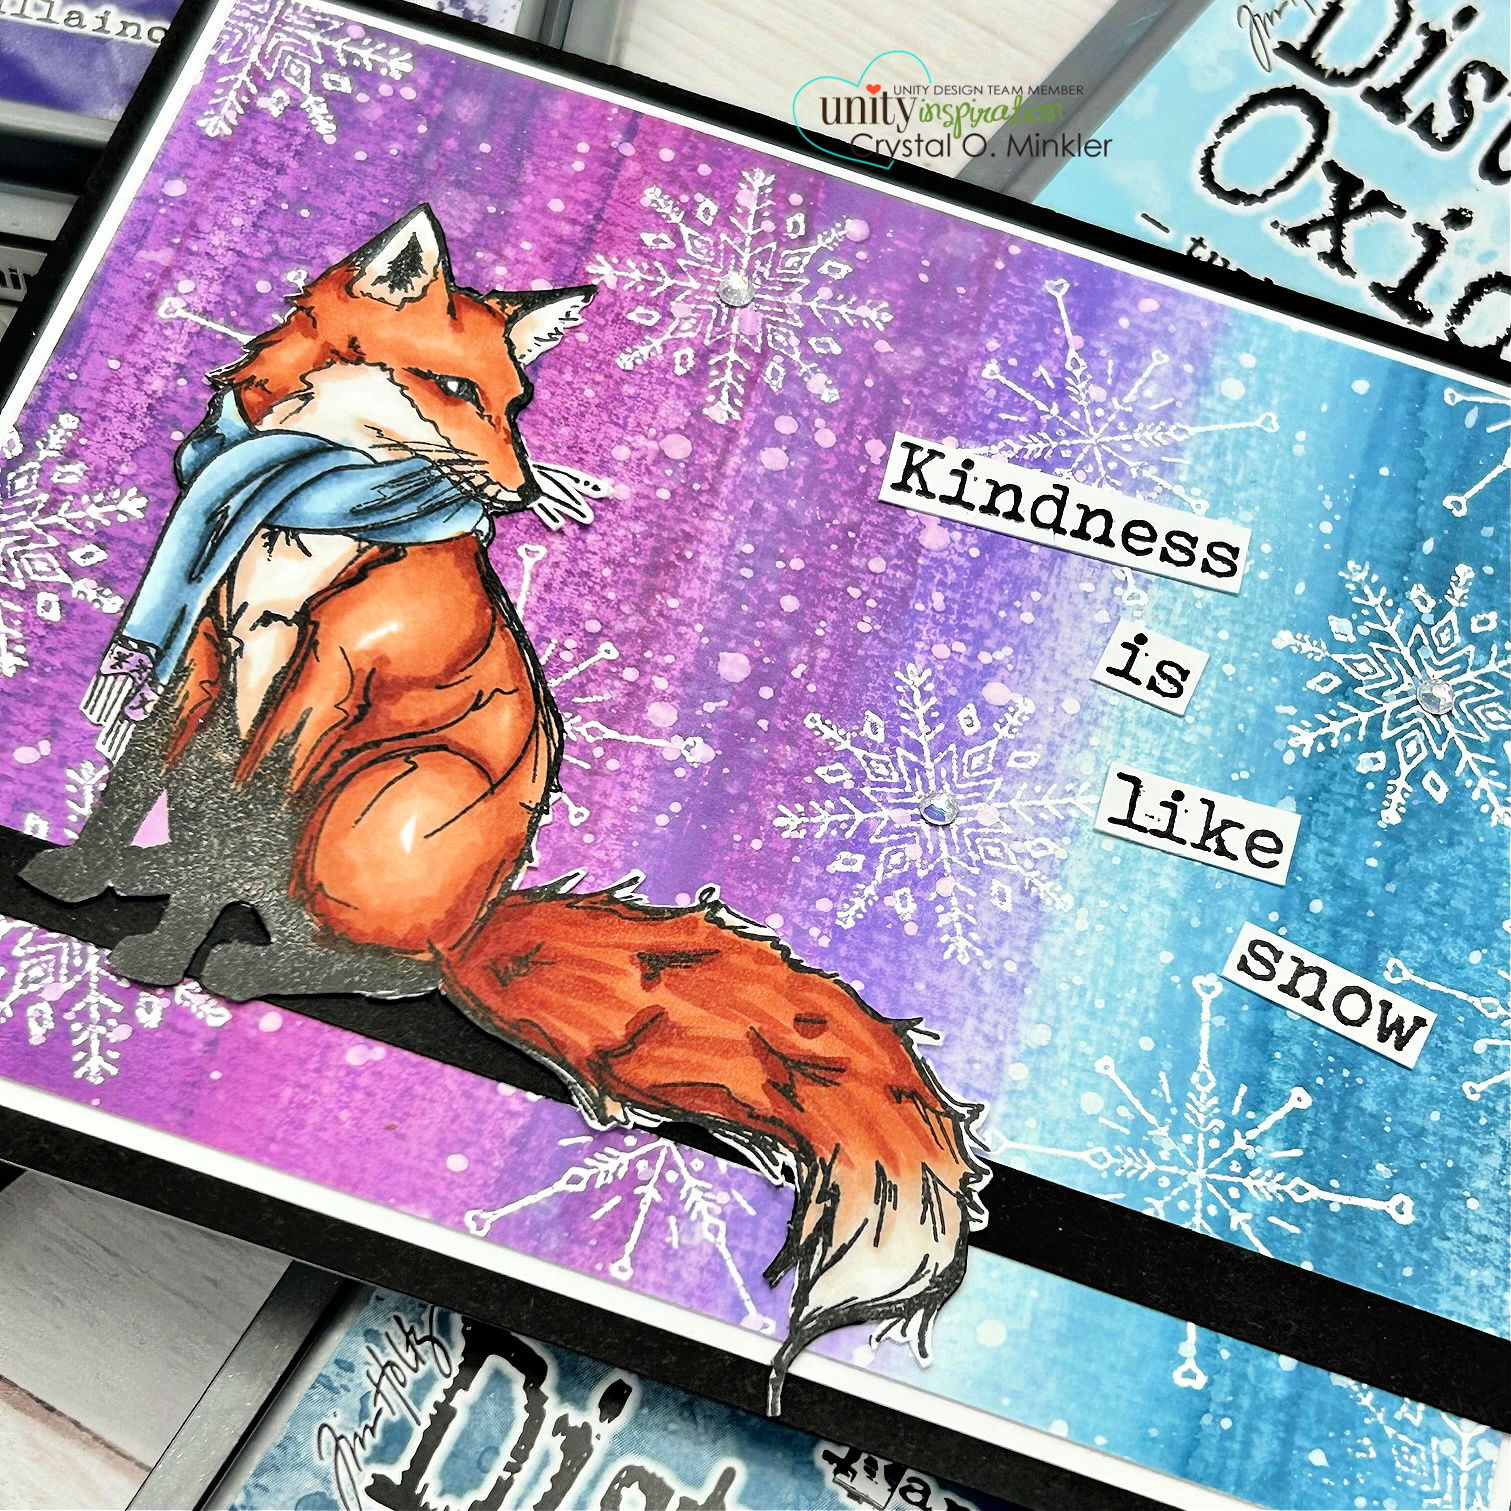
Today I'm sharing more inspiration for the December challenge over in the Unity Show & Tell group. It's All About Backgrounds this month!! I got inky with the beautiful Kindness Is Like Snow stamps. I adore this fox!


The background was created by swiping oxide inks directly onto a piece of distress watercolor paper measuring 4-1/4 x 5-1/2". I inked it up with Villainous Potion, Seedless Preserves, Wilted Violet, Tumbled Glass and Uncharted Mariner Distress Oxide inks. I then blended the inks with some water and a paint brush.


A bit of water splatters and white acrylic paint splatters to add more snow in the background. I then dried the background completely with a heat tool. Applied some anti static powder and stamped the snowflakes from the Kindness Is Like Snow stamps with white pigment ink. And then I added some white embossing powder over the snowflakes and heat embossed them with my heat tool.


Next I stamped the beautiful fox from the Kindness Is Like Snow stamps. I colored him up with the following Copic markers:

Fox ~ E95, E97, E09, W00, W1
Scarf ~ B000, B91, B95, B97, B99, V12, V17

You can check out my Copic coloring video here... Fox Copic Coloring | Kindness Is Like Snow | Unity Stamp Co. {My process video is further down in the blog post}


I continued the sentiment inside the card by masking the top portion with a post-it note.


What do you think of the ink swiping technique with the oxide inks?! I am in love!! I have a feeling I'll be playing with this technique often! The All About Backgrounds challenge is coming to an end. I can't believe how fast December has flown by. I hope you can find some time to play along and be sure to enter your card into the album before the challenge ends on December 31st. I'd love to see what you create so please share your cards in the Unity Show & Tell group and tag me too!! I have had a blast sharing inspiration for the last three months. I hope you all have also enjoyed the inspiration. Echo will be starting up a new challenge next Thursday... how exciting! I can't wait to see what she has in store for us all!

Thanks so much for stopping by!
See ya next time.

Inky Hugs,
Crystal


{Please note that comment moderation is on. Your lovely comment will appear once approved.}

Thursday, December 15, 2022

Shake Your Flakes ~ December Challenge ~ Unity Stamp Co.

 Hello there crafty friend!
Today I'm sharing more inspiration for the December challenge over in the Unity Show & Tell group. It's All About Backgrounds this month!! I got inky with the fabulous Shake Your Flakes {December 2022 Sentiment Kit}.


The background was created by first stamping the cluster of snowflakes all over the white card front measuring 4-1/4 x 5-1/2". I inked it up with white pigment ink. I then added some white embossing powder to the card front and melted it with a heat tool. 


I blended Shaded Lilac, Wilted Violet and Villainous Potion Distress Oxide inks over the background. When I blend oxides I like to go over the blends a few times until I'm happy with the colors.


Next I stamped the background with the awesome Criss Cross Grunge December 2022 Background of the Month stamp. I wiped off the embossed flakes with a microfiber cloth and the lines of the background stamp moved to the back of the card like magic! Love the magic of heat embossing! I finished off the background with some water splatter and some white acrylic paint splatters. I wanted to break up the background a bit so I cut it on a diagonal and adhered the background to a white A2 top fold card base.

You can check out my process video here... Shake Your Flakes | December Callenge | Unity Stamp Co.


I stamped the sweet sentiment with Wilted Violet oxide ink. Next, I die cut it with the smalled stitched circle die from the Scallops & Circles {nesting dies}. I also die cut a stitched scalloped circle from white card stock and adhered the layers before popping it up on the card. To finish off the card, I added some pretty rhinestones to some of the snowflakes centers.


I've used a few background stamps the last few weeks for this challenge but you can create a background without using background stamps!! Repetitive stamping, like I did with the snowflakes cluster, is a great way to use your stamps for a wonderful background. The possibilities are seriously endless!! I hope you get a chance to play along. I'd love to see what you create. Be sure to share your cards in the Unity Show & Tell group and also add them to the December challenge album in the group to be entered for a prize!! See you back here next Thursday for more inspiration for the All About Backgrounds challenge!

Thanks so much for stopping by!
See ya next time.

Inky Hugs,
Crystal


{Please note that comment moderation is on. Your lovely comment will appear once approved.}

Saturday, December 3, 2022

~ Friends of Unity December 2022 Blog Hop ~

 Hello there crafty friend!
It's the first Saturday of December and you know what that means... it's time for our Friends of Unity Blog Hop!! But today is not just a regular monthly blog hop... it's our 5th Anniversary of hopping!! Can you believe that?! 5 years has gone by so fast!! We've shared so many wonderful cards and projects over the last 5 years and added so many new friends!! I'm so grateful to my friends that help make this hop amazing each month and I'm also very grateful to the friends that come and hop along with us. All your love and comments each month mean so much to us. We appreciate you all!! I'll try to keep my blog as short and sweet as possible but be sure to read to the end because there's an amazing giveaway you don't want to miss out on. First, let's get to the cue...


... Glitter & Glitz!! The perfect cue for a 5th anniversary celebration!! I had fun with this cue!


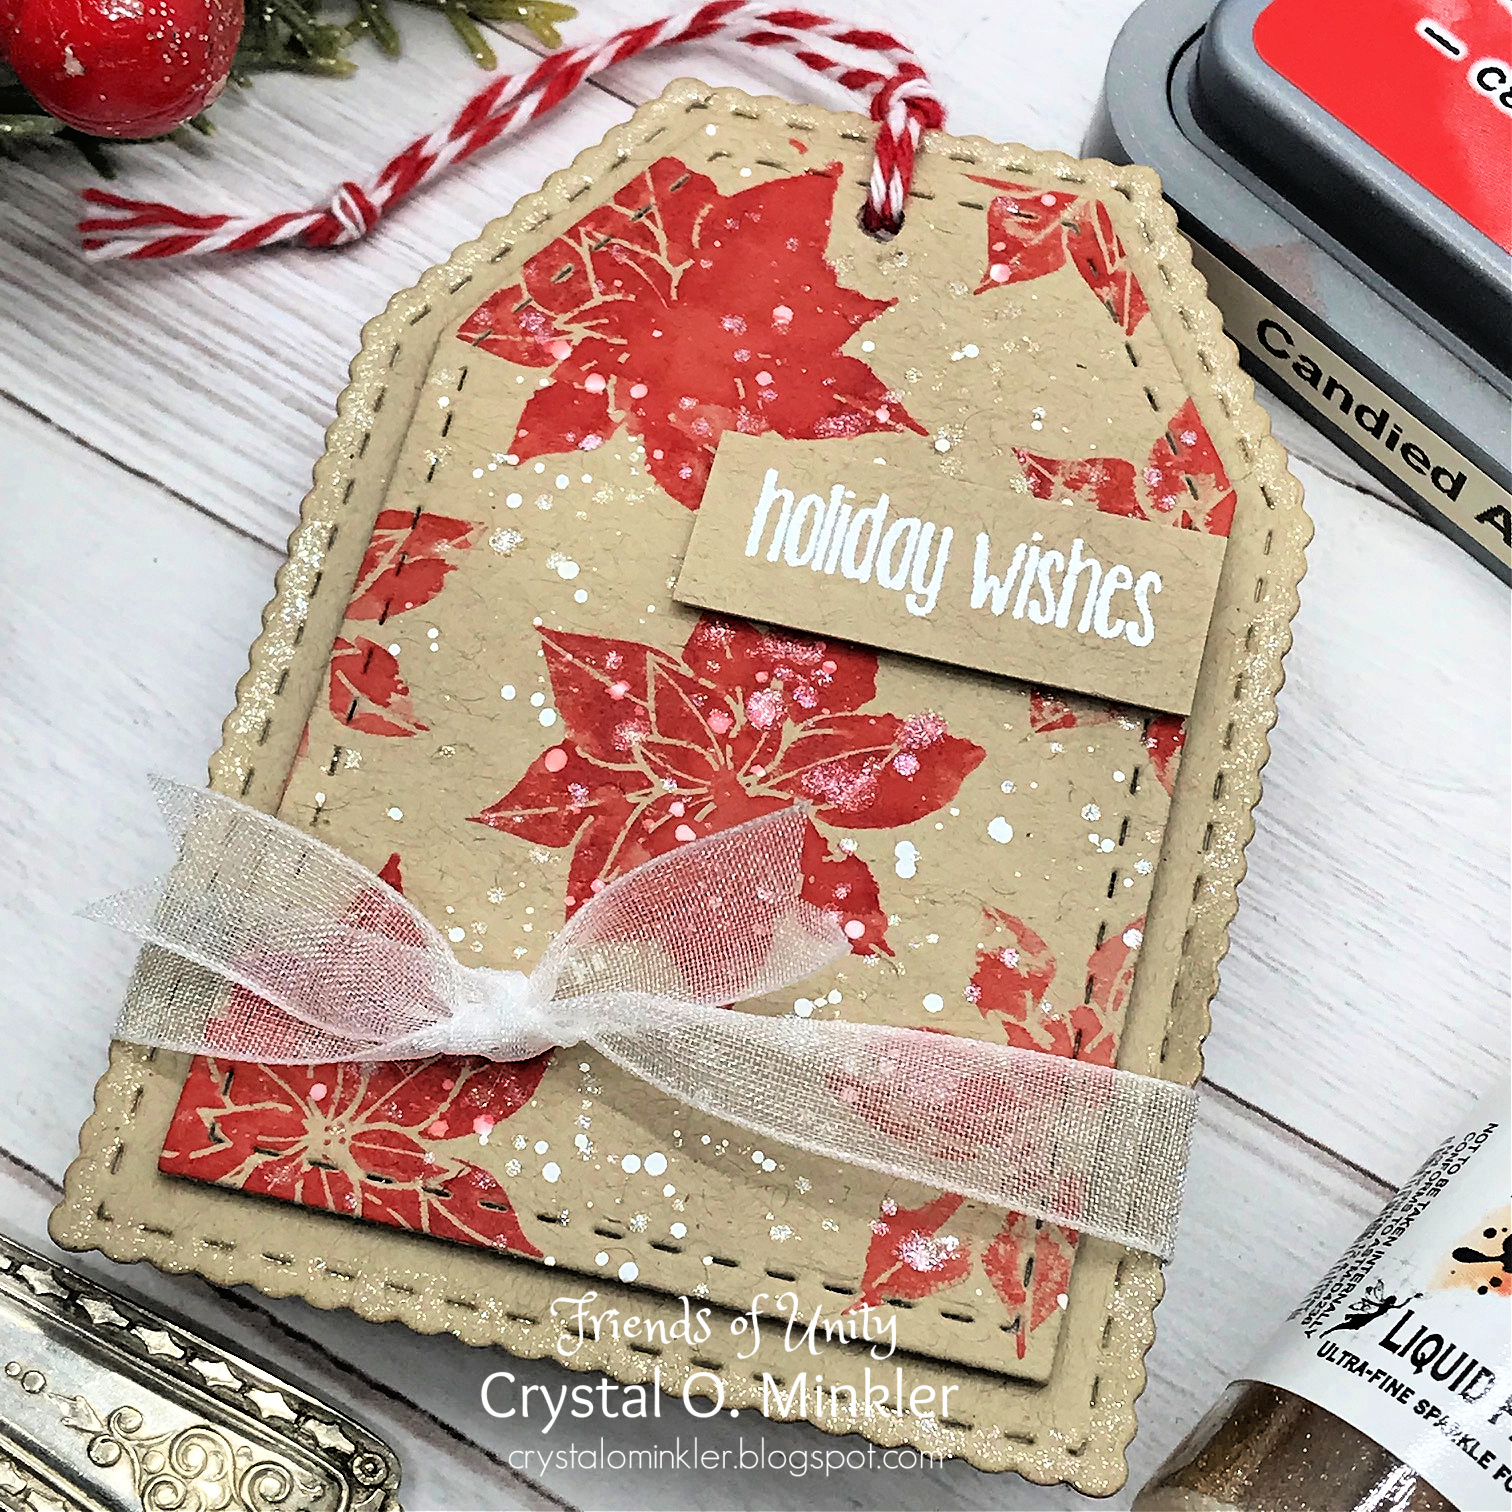
My first project is a cute tag using the Advent Calendar Day 3 stamp!! How sweet is this beautiful poinsettia! I just love it! Did you get the Advent Calendar? It's so fun opening each little door... I just love it! There's still some in stock... just saying!!!


I inked up the stamp with Candied Apple Distress Oxide ink, spritzed it with a bit of water and stamped it on a piece of Kraft card stock that I had die cut with the smallest tag die from the Make a Tag die set {looks like it's currently out of stock}. I did a mix of first and second generation stamping - which basically means that I inked up my stamp and stamped directly on the paper {first generation stamping} and without reinking the stamp, I stamped it again leaving a lighter impression of the stamp {second generation stamping}.


I used my heat tool to dry the tag. I added a bunch of white acrylic paint splatters. And then I went nuts with some Liquid Pixie Dust splatters. Just two drops on my palette with a spritz of water went a loooong way!! It's so gorgeous in person... I think you can see some of the shine on that center poinsettia. I had some of the Liquid Pixie Dust left over so I brushed some along the edge of the larger tag. I popped the smaller tag up on the larger tag with some foam tape, tied an organdy ribbon around it and cut fish tails on the ends. And then I stamped the sentiment from the Poinsettia Wishes Itty Bitty stamp... I masked it and only partially stamped the sentiment with Sugar Cube pigment ink and then heat embossed Alabaster White Embossing powder. I trimmed it and then popped it up on the tag, too. To finish off the tag, I punched a hole in the top with my Crop-a-Dile and added some twine. So pretty!
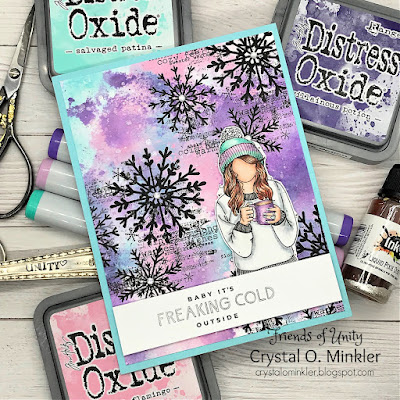

My second project is a card I made using a couple new releases from the Cyber Week Sale!! Have you guys been enjoying all the releases for Brown Thursday/Black Friday and Cyber Week?! OMG!! SO many new and amazing stamps! I want them ALL!! LOL Anywho, for this card I ink smooshed Kitsch Flamingo, Salvaged Patina and Villainous Potion Distress Oxide inks on Stampers Select White card stock from Papertrey Ink. I dried my background completely with a heat tool. I then stamped the gorgeous new snowflake clusters from the December 2022 Sentiment Kit called Shake Your Flakes with Ranger Jet Black Archival ink. And then I went nuts splattering it with some Liquid Pixie Dust. I love this stuff!!! 


I set the background aside to dry and stamped the beautiful new Angie Girl and sentiment from the Freaking Cold stamps with Black Amalgam ink from Gina K. Designs. I colored the girl up with the following Copic Markers:

Skin ~ E000, E00, E11, E04
Hair ~ E95, E97, E08, E09
Sweater ~ C00, C2, C3
Hat ~ BG0000, BG10, BG23, BG34, BG13, V000, V12, V17, C2, C3
Mug ~V000, V12, V15, V17, E21, E27
Rings / Nails ~ BG0000, BG23, BG34, C3


I fussy cut the girl leaving some of the dots and hearts around the outline. I trimmed up the sentiment so it would fit across the background. It measures about 7/8 x 4". I then adhered the bottom portion of the girl to the sentiment. I added lots of foam tape to the back of both and set them aside.


I trimmed the background to 4 x 5-1/4" and adhered it to a card front of Cool Caribbean card stock from Stampin' Up. I then adhered the panel to a white A2 top fold card base. I removed the backing from the foam tape and popped up the sentiment and girl on the card. And to finish it off I added five rhinestones to the centers of the snowflakes. I love using purples and blues for winter cards and I think it really works with this sentiment. Doesn't she look cold?! LOL

To celebrate 5 years of hopping with our friends we got to thinking that it would be fun to share our favorite card from the past five years... well, I couldn't pick just one. I had about a dozen saved. I was able to narrow it down to five which I thought was reasonable for a 5 year anniversary. So here are my five favorites in no particular order...


Do you have a favorite card that I've made over the past five years?! I would love to hear which one is your favorite. Be sure to share in the comments which card has been your favorite for a chance to win a fun giveaway. I'll choose one lucky winner for this giveaway and announce the winner next month. 


Now before we get to the hopping, I chose a lucky winner from the comments on last month's hop to win a fun prize package and that lucky winner is...


... Jenni S!! Congratulations, Jenni!!
Please email me at crystalominkler@gmail.com to claim your prize. 
Prize must be claimed within two weeks. 

That's it for my cards this month! AND in addition to the giveaway I mentioned above, I'm having another giveaway!!! Woohoo!! I will be announcing the winner for both my giveaways next month for our January 2023 blog hop!!

Thank you all so much for your continued support of our little hop for these 5 fantastic years!!! I really, truly do appreciate each and every one of your sweet comments! 

A few of my friends are having giveaways on their blogs too, so be sure to hop and comment on each of our blogs!! And now the amazing giveaway that I mentioned at the beginning of my blog post... Angela has generously offered (3) $25 Unity gift cards to giveaway for our 5 year anniversary celebration!!! How amazing is that?! If you'd like a chance to win one of these gift cards be sure to hop and comment on EACH of our blogs... three winners will be randomly chosen from the comments and they could be chosen from any of the blogs participating in the hop, not just mine!! So be sure to hop and comment by December 10th!! The winners for the (3) $25 Unity gift cards will be announced here on my blog and on the Unity Show & Tell Facebook group on December 11th. On a side note, as you hop along and comment, I wanted to recommend using Google Chrome as your browser. We've been having issues for awhile now with some hoppers only being able to comment as Anonymous and if you use Google Chrome you should be able to log in and comment as you hop. If you're still only able to comment as anonymous PLEASE add your name to the comment. I will only choose winners with a name included if not signed in with a google account. I hope this helps some of you. I know that it's been very frustrating!


Let's get to the hopping...


Crystal <--- you're here

up next ---> Eileen


Thanks so very much for supporting our little hop!
We appreciate you!!

See ya next time.

Inky Hugs,
Crystal


{Please note that comment moderation is ON. Your comment will appear shortly.}