I was so excited about this adorable stamp set that I bought the Furmidable Love stamps AND I bought the awesome From Grandma's Lap Bundle that includes the awesome stamps and the super sweet Sunday at Grandma's {paper pack}!! LOL! Talk about buying duplicates... geez! Anywho, I stamped these cuties and colored them up with Copic markers.
Here's a quick list of the Copic markers I used:
Skin: E000, E00, E11, R00, R20
Hair: B000, B00, C00, C2
Lips: R00, R20, R22
Head Band: YR20, YR02, YR15
Earrings: G21, G94
Blouse: Y11, Y15
Jacket: R00, R20, R22
Kitty: C0, C2, R00, R20, N0, N2, N4, YR20, YR15
I die cut these cuties using a die from the Dashes and Frills Hearts {die set}. I distressed the edges of the heart and the sentiment with the ink on my blending brush. I set it aside and started my background. I cut three pieces of pattern paper from the Sunday at Grandma's {paper pack}. I adhered them to a Kraft A2 card base with the darker papers on the outside.
Here's a look at the fun sketch for Tawny Owl Paperie Inky Inspiration Sketch Challenge 37. The sketch, as always, is meant to inspire not require. So let the sketch lead in your design, but don't feel limited by it. This sketch challenge ends in just a few days on Monday, November 24th.
I adhered the sentiment to the heart and popped them both up with foam tape. I finished off the card with some Glossy Accents on the Gma's glasses. I love how this turned out! Sure hope you've been inspired to play!
I used papers from the Spectrum Gardenia 12 x 12 Collection from 49 and Market. The white distressed background paper measures 5-1/2 x 4-1/4". The orange strips measure 3/4 x
Here's a look at the fun sketch for Tawny Owl Paperie Inky Inspiration Sketch Challenge 34 Extended. The sketch, as always, is meant to inspire not require. So let the sketch lead in your design, but don't feel limited by it. I turned the sketch today and moved the sentiment.
And the cluster of ephemera is from the coordinating Spectrum Gardenia Ephemera Bits pack. I wrote 'Love' on the tab and stapled it to the ephemera using the Tim Holtz Idea-ology Tiny Attacher Mini Stapler. The sentiment is adhered directly to the ephemera piece and the butterfly was popped up with foam tape.
I adhered the four orange strips to the card and popped up the large ephemera piece with foam tape. I'm having a blast with this sketch! Now there's more time to play along... I hope you'll join in the fun! Have an ink-tastic week!
I’m back as a guest designer for the month of February for the Coffee Loving Papercrafters!
Today I'm sharing a set of caffeinated seasonal cards that I created using awesome papers and fun ephemera from Not 2 Shabby. I am a huge fan of Not 2 Shabby's papers and coordinating ephemera. I have oodles and oodles and was happy to finally play with some of my stash.
First up is a lovely Valentine's Day card I created using the Lattes of Love 6x6 Paper Pad and the coordinating Lattes of Love Ephemera. I used all kinds of papers from the pack for all of my layers even the mats for my panels. And I used five different ephemera pieces for my focal piece.
Up next is a wonderful card for Summer... I used the gorgeous Make It Iced 6x6 Paper Pad and coordinating Make It Iced Ephemera. So many fab girls and summer drinks in this one! Love it! I used three pieces of ephemera for the focal image for this one and then a sentiment I added near the bottom of the card.
My third card features one of my favorite paper pad and ephemera pairings... the gorgeous Give Thanks 6x6 Paper Pad and coordinating Give Thanks ephemera. I love the beautiful pumpkins in these papers. I used three ephemera pieces for this one.
My card design was inspired by one of my favorite sketch from the {BYSHC} group... {BYSHC} Sketch 7. Lots of fun layers and endless possibilities! All of my measurements are directly from the sketch.
Lastly, I just had to share a Christmas card. I love making them all year long! I used the adorable Brewing It Up 6x6 Paper Pad along with the Brewing It Up Ephemera. I used just two ephemera pieces for my focal image and then I fussy cut the sentiment from a third ephemera piece. So cute and so much fun to make! I hope you've been inspired to get crafty with some coffee papers and ephemera in your stash.
Thanks so much for stopping by!
See ya next time.
Inky hugs,
Crystal
{Please note that comment moderation is on. Your lovely comment will appear once approved.}
I'm also sharing a sweet Valentine featuring a fab new digi set called Struck by Cupid from The Greeting Farm! This adorable digi set includes a super cute little Cupid Bean along with some bunny friends, lots of hearts, and sentiments. Just too cute!
I created a sweet background of pink clouds using the Clouds Stencil from Newton's Nook Designs. I die cut the background using a die from the Labels 6 Cloud Like dies from Gina Marie Designs. And it's adhered to a white A2 top fold card that I turned on the side for a landscape card.
I combined and resized all of the fun images and sentiment in a Microsoft Word Document and then I printed them off on white card stock. I colored them up with Copic Markers. Fussy cut the hearts, bunny, and Cupid Bean. Colored the edges of the fussy cutting with a Memento Tuxedo Black marker. Here's a quick list of the Copic markers I used:
Skin: E000, E00, E11, E04, R00, R20
Hair: E40, E43, E44
Eyes: YG11, YG23, G05, C00, C1
Wings: YG21, YG23
Cloud: RV0000, RV52
Bow: E51, E55, E57
Arrows: N0, N2, N5, RV10, RV11, RV02, RV14
Hearts: RV10, RV11, RV02, RV14
Gray Bunny: W00, W1, W3, R00, R20
Bunny Wings: B0000, B000
I finished off the card with a few glittery green enamel dots. Such a fun card to make!
This cutie is available now in the shop so you can get started on your Valentine's Day cards! Woohoo!
Thanks so much for stopping by!
See ya next time.
Inky Hugs,
Crystal
{Please note that comment moderation is on. Your lovely comment will appear once approved.}
Today's goodies are snowflake embellishments and beautiful heart brads. I used a few of the heart brads on my love card. Here's a quick list of the Copic markers I used: R00, R20, W0, W2, W4, W5.
Inspiration for my card came from the {BYSHC} Sketch 35! I altered the sketch and made a mini slimline card.
I found the perfect sentiment for this cute card from the Born to Be Loved stamps.
Did you check out my video? If you did, you saw me add the beautiful snowflake embellishments to this card and the next one below. I love the added texture! If you missed this card, you can check it out here... Advent Calendar Day 14.
I also added a few snowflake embellishments to this card. Love the added shimmer it adds to the card! If you'd like to check out more info on this card you can see it here... December 2024 Whit Kit Card.
I paired up the beautiful heart brads with the Gosh I Love You {paper pack}. I think it's a fun pairing with a heart theme.
I'll be back tomorrow for Day 16 of the 2024 Advent Calendar from Unity!
Have an inktastic day!
Thanks so much for stopping by!
See ya next time.
Inky Hugs,
Crystal
{Please note that comment moderation is on. Your lovely comment will appear once approved.}
It's the first Saturday of September! Time for our Friends of Unity Blog Hop!!
This month's cue is so much fun! It's something I've been playing with each month actually so it was hard for me to narrow down my options but I went with my go-to. I hope you'll hop along and enjoy some wonderful inspiration from our friends!
It's all about Techniques this month! My go-to technique is definitely Ink Smooshing. If I need a quick card or just a quick background, I ink smoosh. And as it happens I needed something quick for this hop!
My first card features the adorable new Whimsy Warmth stamp... so excited to have new Phyllis Harris stamps available!! Love her illustrations! The girls and sentiment were stamped with Black Amalgam ink and I colored up the girls with the following Copic markers:
Skin: E000, E00, E11, E04
Red Hair: YR23, YR27, R59, G14 {rubber band}
Brown Hair: E43, E44, E47, E49, R43 {barrette}
Purple Shirt: V000, V12, V15, V17, YG11, G14
Yellow Shirt: Y11, Y15, Y35, R11, R43, R27
I wanted a soft background for these sweet girls so I ink smooshed Scattered Straw, Speckled Egg, and Uncharted Mariner Distress Oxide Inks. I've been challenging myself to play with inks that I haven't really used or wouldn't normally combine. So that was why I picked these. And I'm SO glad I did! I love the background I created.
I added some adhesive to the ink smooshed background and wound some gold thread around sticking it to the adhesive. Just to add a bit of interest to the background. I trimmed the background to 4 x 5-1/4". I should have done that before adding the thread but sometimes ideas don't come in the right order. Haha! I die cut the main panel using a die from the Deckle & Stitches Nesting Dies. I added a bunch of foam tape to the main panel and popped it up on the ink smooshed background. And then I adhered the whole panel onto a white A2 top fold card base that I turned on the side for a landscape card.
My second card features another new release... the adorable Galactic Dino Party stamps!! Eeek!! How stinkin' cute are these dinos!?! Love, love, love them!! Since I decided to play with some ink smooshing, I was thinking these cuties needed to go to outer space with a fun galaxy background. So fun! And they fit so perfectly in a fun mini slimline card.
I stamped the dinos, stars, planet, moon and sentiment with Black Amalgam ink. Here's a quick list of the Copic markers I used:
Green Dino: YG11, G14, G16, Y11, Y15
Yellow Dino: Y11, Y15, Y35, YG11, G14
Purple Dino: V000, V12, V15, V17, G14
Purple Balloon: V000, V12, V15
Green Balloon: YG11, G14, G16
Yellow Balloon, Moon and Stars: Y11, Y15, Y35
Planet: V000, V12, V15, R11, R43, R27
I fussy cut all the colored images. I left a bit of a white border around the balloon strings and the ring around the planet. To make the black line edges all nice and neat, I colored them up with a Memento Tuxedo Black marker. Just where black lines from the stamp were on the edge though.
The galaxy background was created using Mustard Seed, Lumberjack Plaid, Chipped Sapphire and Black Soot Distress Oxide Inks. I ink smooshed all four colors and then blended some Chipped Sapphire and Black Soot inks around the edges to darken it up. To finish off my galaxy background, I added some white acrylic paint splatters. I think it turned out pretty cute. I die cut the background using the Wonky Stitched Mini Slimline die from Gina Marie Designs. Adhered it to a 3-1/2 x 6-1/2" mini slimline card front of True Black card stock from Papertrey Ink. I then adhered the card front to a 7 x 6-1/2" mini slimline card base that was scored at 3-1/2". So cute!
Now before we get to the hopping, I chose a lucky winner from the comments on last month's hop to win a fun prize and the lucky winner is...
... Linda Abel!! Congratulations Linda!!
Please email me at crystalominkler@gmail.com to claim your prize.
Prize must be claimed within two weeks.
Well, that's it for me this time! Please hop along and enjoy some more inspiration from the Friends of Unity! I'm so excited to hop and check out what techniques each of our friends played with to create their projects. I will be doing another fun giveaway this month!! Be sure to hop along and comment for a chance to win. {When you comment please leave your name just in case it posts as anonymous.} I'll announce the winner next month!
Sharing a fun new sketch for the month of February in my Tawny Owl Paperie Inky Inspiration Facebook group. This sketch is pretty versatile as I think it can be used for a super CAS card or you could add pretty papers for a background layer like I did for my first card using the sketch.
What do you think? As with all the sketches I share the measurements and elements are not required. Just the basic design is supposed to be a help to boost inspiration.
I was inspired to play with the new fabulous Big Candy Heart!! I couldn't wait to ink up this beautiful heart. I inked it up with Black Amalgam ink and colored it up with a handful of Copic markers. I also inked up the adorable ladybug from the Little Lady Greetings Itty Bitty stamps. I've had this cute stamp in my stash forever and just now inked it up! Using new goodies with old goodies in my stash is always so much fun!
Here's a quick list of the Copic Markers I used to color up the big heart and the ladybug:
My background layers were created using the gorgeous Enveloped in Love {paper pack}!! Love love love these gorgeous papers! I've had them set aside for awhile to play and make some Valentine's Day cards. I cut the pretty pink papers to 4-1/4 x 5-1/2" for my card front layer and adhered it to my white A2 top fold card base measuring 4-1/4 x 11"; scored at 5-1/2".
I die cut the 'i love you' pattern papers with the second largest postage stamp die from the Postage Stamp {nesting dies} also from Unity (currently out of stock). I adhered it directly to the card. I adhered the ladybug to the bottom of the heart with a bit of liquid glue and then added foam tape to the back of both. I popped them up on the card and then finished it off with a few Translucent enamel dots from Gina Marie Designs. I think it turned out pretty cute!
Thanks so much for stopping by!
See ya next time.
Inky Hugs,
Crystal
{Please note that comment moderation is on. Your lovely comment will appear once approved.}
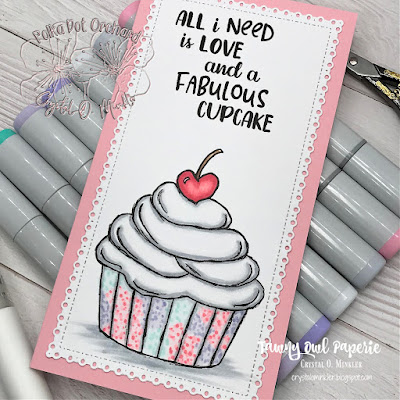
I started by combining and resizing the digi stamps in this set in a Word Document. When I plan to make a mini slimline I usually turn my images sideways and keep them at the top of the document. I do this for two reasons... first, to keep the images at either end of the paper so I'm not wasting a full sheet of card stock printing it off. And second, so that I can use the rulers that are available in Word to help me get the size just right.
I die cut the image with the beautiful Pleated Lace Mini Slimline die from Gina Marie Designs. And then I got to coloring with the following Copic markers:
I kept this card very simple and just adhered the die cut and colored panel to a pink mini slimline card base measuring 6-1/2 x 7"; scored at 3-1/2". Done... a quick and easy Valentine's Day card!
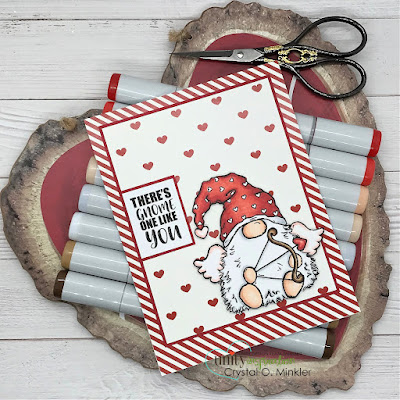
I made my first Valentine's card of 2022 using another sweet new release from Unity Stamp Co. called To Gnome You! Another adorable new gnome stamp designed by the talented Jeanie Hays!!
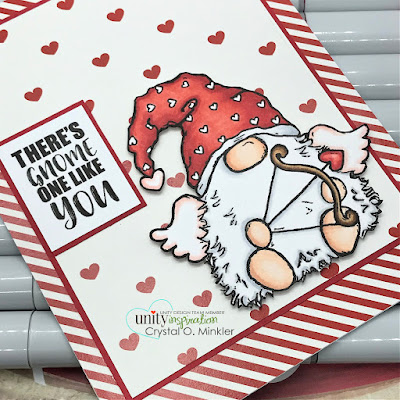
I just couldn't wait to ink this stamp up!! I adore the cute wings and that bow and arrow!
Oh. My. Cuteness!!
I paired the cute stamp up with the Love Is All Around Us {paper pack} that's also from Unity. I used a fun new sketch challenge from the Paper Craft Artist Facebook group in designing my card.
I stamped the cupid gnome with Gina K. Black Amalgam ink and colored it up with the following Copic markers:
Skin ~ E000, E00, E11
Beard ~ C00, C2
Hat ~ R000, R14, R20, R27
Wings ~ R000, R20
Bow / Arrow ~ E55, E57, E59, R14, R20, R27
Love this adorable new gnome!! Head over to the Unity Stamp Co. website to check out all the amazing new releases and of course, check out the fab sale!!
Thanks so much for stopping by!
See ya next time.
Inky Hugs,
Crystal
{Please note that comment moderation is ON. Your comment will appear shortly.}
It's one of my favorite times of the month... time for the Friends of Unity Blog Hop!! We changed things up and moved our hop to the second Saturday since last Saturday was New Year's Day. I definitely needed the extra time to get inky for this month's hop! December and the holidays were SO busy but they were also wonderful. No complaining here. Well, enough of my babbling! Let's have a peek at our cue this month...
...CAS Cards! If you're not familiar with CAS, it means Clean & Simple.
One of my favorite kinds of cards to make are CAS cards. I was so excited to get inky for this hop and I'm even more excited to hop along and see the inspiration being shared by all our friends!
My first card features a beautiful CAS pattern paper and sentiment from the December 2021 Whit Kit called Trust in its Wings. The papers and stamp kit are now available separately and are also called Trust in its Wings.
I cut the pattern paper to a card front measuring 4-1/4 x 5-1/2". I stamped the sentiment directly on the pattern paper with Gina K. Black Amalgam ink.
I die cut the pattern paper with the largest stitched scallop dies from the new Scallops & Rectangles {nesting dies} and adhered it to a white A2 top fold card base. Super quick and CAS!!
My second card also features papers and a stamp from the Trust in its Wings {paper pack} and stamp kit. My first card was so fast I couldn't help but make another with the same kit.
The background on this paper is perfect for a CAS card. The image is colored up very simply with the following Copic Markers:
Branch ~ YG03, YG63, YG97, E25
Berries ~ R02, R56, R59
Bird ~ C00, C1, C3, C5, YR24, E37
I used the coordinating die to die cut the image. The sentiment is stamped on True Black card stock with Wow Clear embossing ink and then I heat embossed some Alabaster White embossing powder from Brutus Monroe. I trimmed the sentiment and then I adhered the birds tail and the end of the branch onto the front of the sentiment strip and the tips of the leaves to the back of the sentiment strip. I like how this grounds the bird but also gives it a bit of dimension.
My last card is a new release called Lollipop Love... I love this cute lollipop! *wink*wink* I kept this one CAS by adding just a bit of ink blending over the Heart Confetti stencil with Villainous Potion Distress Oxide ink. I just used a piece of purple tape on top of the stencil over the heart lollipop to mask it. I was too lazy to do a regular mask and the tape covered most of the image well enough.
I colored the heart lollipop with the following Copic Markers:
Heart ~ RV10, RV14, RV21, RV29
Ribbon ~ BV0000, V20, V22, V25
Stick ~ C00, C2
Similar to my first card, I finished this one off by die cutting the panel with the new Scallops & Rectangles {nesting dies} and adhered it to a white A2 top fold card base. Three CAS cards done!
I sure hope you're inspired to use those CAS pattern papers or maybe a stencil from your stash along with your Unity stamps to make some fun CAS cards!
In celebration of our 4th Anniversary last month, I chose a lucky winner to win a fun prize package and that lucky winner is...
...Carla Hundley!! Congratulations, Carla!
Please email me at crystalominkler@gmail.com to claim your prize.
Prize must be claimed within two weeks.
Well, that's it for me this time! Please hop along and enjoy some more inspiration from the Friends of Unity... I can't wait to see how our friends were inspired by the cue! I'm doing another fun giveaway this month!! Be sure to hop along and comment for a chance to win! I'll announce the winner next month!


.png)
.png)
.png)
.png)