Showing posts with label #byshcsketchchallenge24. Show all posts

Sunday, December 21, 2025

Advent Calendar 2025 Day 21 ~ Unity Stamp Co.

Hello there crafty friend!
It's Day 21 of the 2025 Advent Calendar from Unity!! Just a few days left! I know it's a very busy time and just getting busier as we get closer and closer to Christmas. I hope you've had some down time maybe playing along with the Advent Calendar or just gazing at the pretty lights on your Christmas tree. I love the early morning hours just enjoying our Christmas tree.


Today's stamp is the most adorable puppy ever. I stamped him with Black Amalgam ink. I then die cut him with a square die from the Scallops & Squares {nesting dies}

Here's a quick list of the Copic markers I used: 
Puppy: N0, C0, C1
Ground: R00, R14, E07, E11
Background: E40

You can check out my video revealing the Advent Calendar Day 21 stamp and my process in making this card here... Unity Advent Calendar 2025 Day 21 | Unity Stamp Co.


Inspiration for my card came from the {BYSHC} Sketch 24! Such a fun sketch... I love it! 


I share the measurements for my papers in the video. But I basically follow the sketch for this one. Easy Peasy!


I paired up the cute pup with the Timeworn Paws Anthology {paper pack}. The sweet sentiment is from the Oliver - Rescue Tales stamps.

I'll be back tomorrow for Day 22 of the 2025 Advent Calendar from Unity!
Have an INKredible day!


Thanks so much for stopping by!
 
Inky Hugs,
Crystal

Friday, July 22, 2022

Christmas in July 2022 {BYSHC} Linky Party ~ Christmas Wishes Pinecones ~ Angie Blom Digital Designs

  Hello there crafty friend!
I'm so excited to share my first card for the Christmas in July 2022 {BYSHC} Linky Party!! For my first card I'm featuring the wonderful Christmas Wishes Pinecones digital stamp from returning Sponsor Angie Blom Digital Designs. I adore this beautiful stamp! There's just something about pinecones for Christmas... I can almost smell cinnamon and cloves in the air!


I started this card by first resizing my image and sentiment in a Word Document. I then print them off on a piece of white card stock. Next, I chose the gorgeous White Winter {paper pack} from returning Sponsor Unity Stamp Co. for my paper layers. I cut all my paper layers including a kraft card stock mat for the star pattern paper. 


I adhered all my pattern papers together and then adhered them to an A2 top fold card base of Kraft card stock from Papertrey Ink. I just love the mix of patterns in this paper pack... so soft & beautiful!


I colored up the beautiful pinecone image with the following Copic markers:

Berries ~ R20, R14, R27
Leaves ~ YG13, YG67
Pine Needles ~ YG13, YG67, YG97
Pinecones ~ E21, E23, E25, E29


I used a variation of our current {BYSHC} Sketch Challenge 24 for my card design today switching out the square for my fussy cut focal piece. I hope you'll join in the fun and play along with our sketch challenge. We have new challenges each month in the Build Your Stash Holiday Cardmakers Facebook Group. A great way to get ahead on those holiday cards!


Yay!! I'm also a Sponsor for the Christmas in July 2022 {BYSHC} Linky Party and this is the fabulous prize package that I am offering for one lucky winner. For a chance to win this fun prize make a Christmas card and link it up to the Christmas in July 2022 {BYSHC} Linky Party blog post on the Build Your Stash Holiday Cardmakers blog.


Before you leave, be sure to stop by Angie Blom Digital Designs ~ Angie is having a wonderful sale on all her Christmas digital stamps!! Woohoo!! I love a great sale! And if you haven't already, stop by the Christmas in July 2022 {BYSHC} Linky Party to check out all the wonderful Holiday inspiration being shared!! I'm so excited to continue building my stash of holiday cards for 2022... I hope you'll join in the fun and play along! Let's build our stash of holiday cards this week!!


Thanks so much for stopping by!
See ya next time.

Inky Hugs,
Crystal


{Please note that comment moderation is ON. Your comment will appear shortly.}

Friday, July 15, 2022

{BYSHC} Sketch Challenge 24 ~ Nutty or Nice? ~ Lawn Fawn

 Hello there crafty friend!
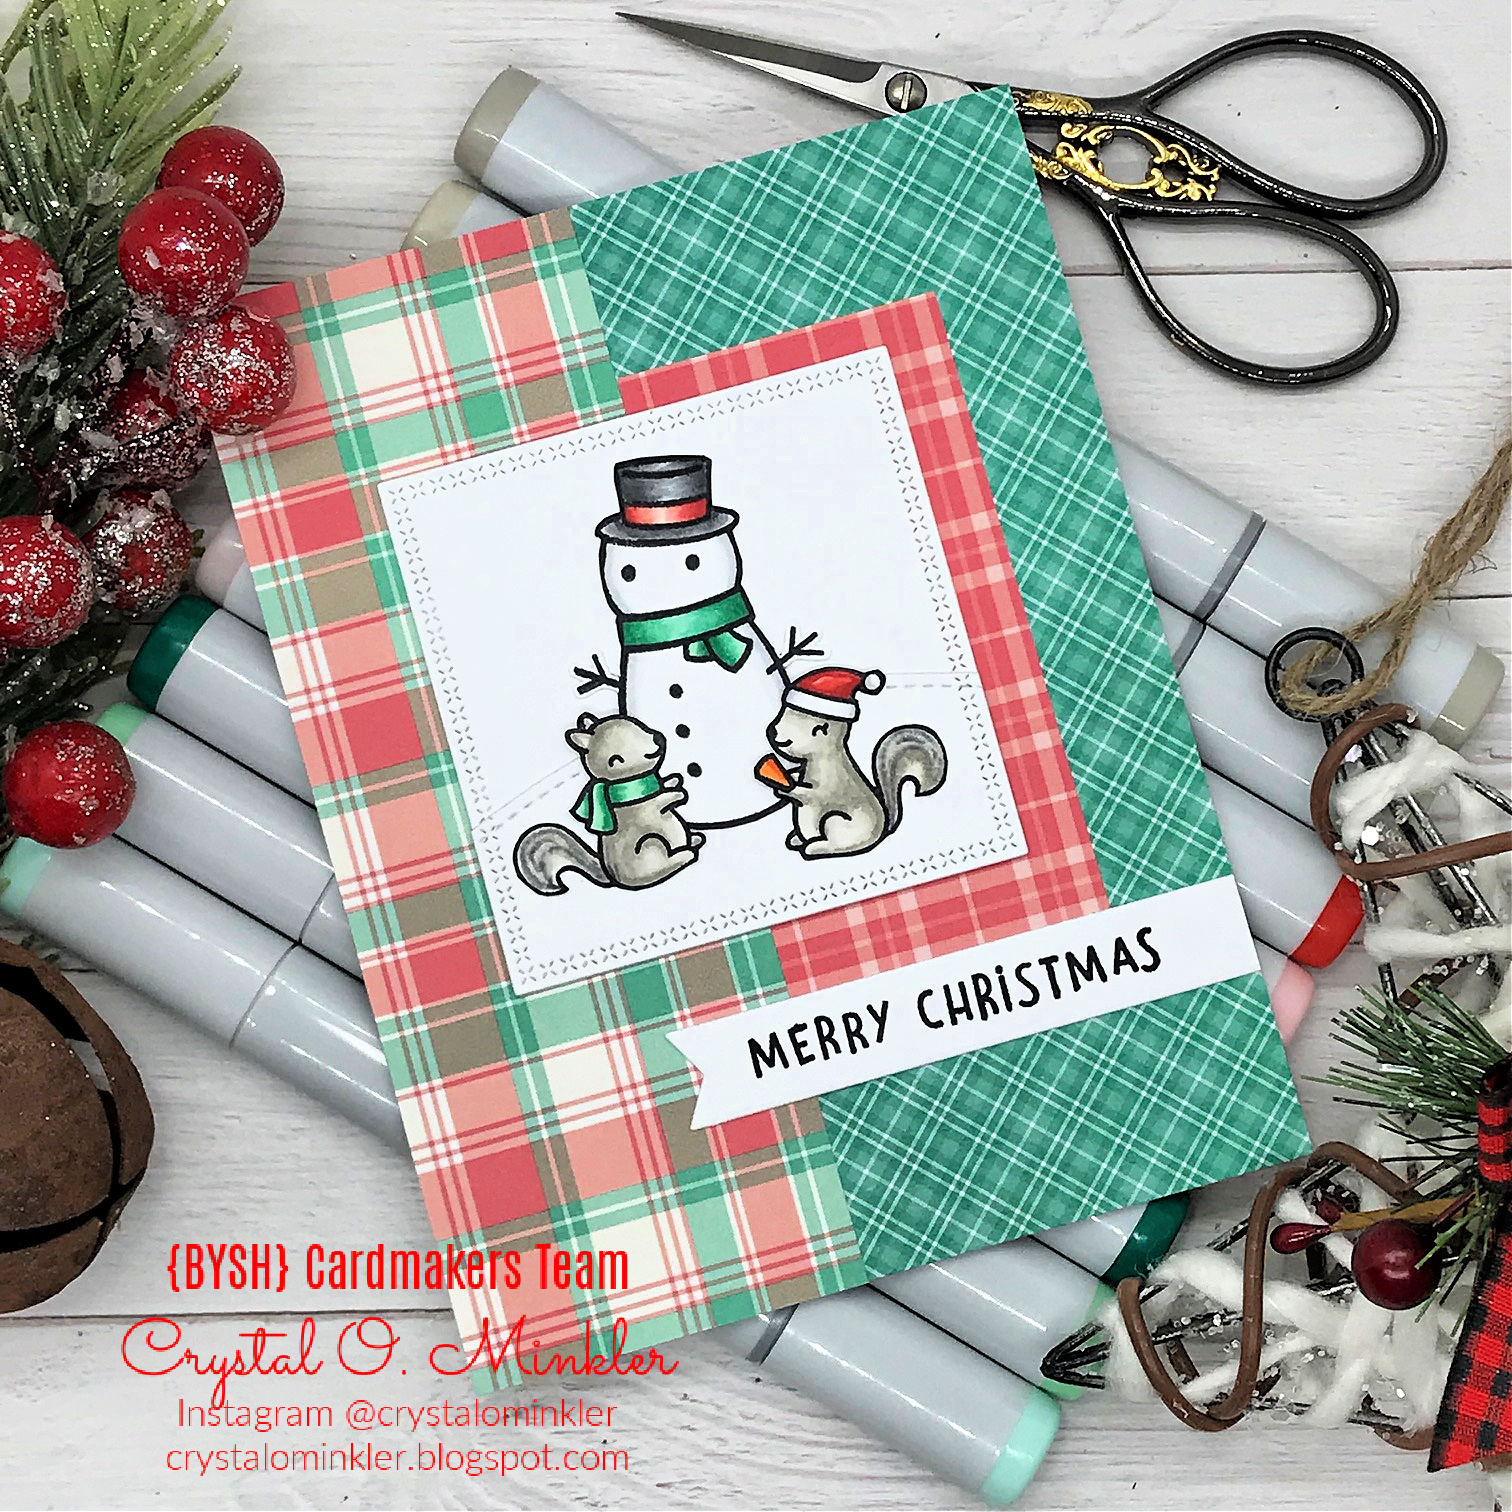
I am back with my weekly Christmas card and this time I was excited to play with a sweet stamp set that I got during the 2018 STAMPtember celebration!! I just love STAMPtember and the Lawn Fawn stamp sets are a must have each year!! I can't believe that I got this cute stamp set 4 years ago and I just now inked it up... so glad that I've been inking up my neglected stamps this year!


These cuties are from the adorable Nutty or Nice? STAMPtember stamp set from Lawn Fawn for Simon Says Stamp. I paired them up with the Perfectly Plaid Christmas paper pack by Lawn Fawn... one of my absolute favorite Christmas papers!! So sad that they aren't available anymore.


I stamped the snowman and squirrels on scraps of white card stock with Memento Tuxedo Black ink and then I colored them up with the following Copic markers:

Snowman ~ C00, C2 
Green Scarves ~ G00, YG41, G16
Snowman Hat ~ N1, N3, N5, N7, R000, R20, R14, R27
Squirrels ~ W00, W1, W3
Santa Hat ~ R20, R14, R27, C00, C2
Carrot Nose ~ YR15, YR68 


I used the {BYSHC} Sketch Challenge 24 from the Build Your Stash Holiday Cardmakers group for the design of my card. I love all the fun layers in this sketch! It's perfect for all those pretty Christmas papers! If you're interested in seeing a bit more inspiration for this sketch, stop by the {BYSH} Cardmakers blog and check out the beautiful inspiration from the design team!


I die cut a piece of Stampers Select White card stock from Papertrey Ink with the X Stitched Square dies from Gina Marie Designs. I then found a scrap piece of white card stock and die cut it with the Stitched Hillside Borders die from Lawn Fawn to create my little hill. I die cut that same piece with the X Stitched Square die and adhered it to the square. I stamped the 'Merry Christmas' sentiment from the Nutty or Nice? stamp set with Memento Tuxedo Black ink and die cut it with the Everyday Sentiment Banners dies from Lawn Fawn. I adhered all my layers together and then adhered them to a white A2 top fold card base. 


I'm entering my Christmas card into the awesome Lawn Fawnatics Christmas in July Challenge #128. So excited to find this fun challenge the other day! There's a couple more days to play along if you want to check it out! Well, that's it for me this time! I'll be back next week with my weekly Christmas card using this month's fun {BYSHC} sketch!


Thanks so much for stopping by!
See ya next time.

Inky hugs,
Crystal


{Please note that comment moderation is ON. Your lovely comment will appear shortly.}

Friday, July 8, 2022

{BYSHC} Sketch Challenge 24 ~ September 2021 KOM Looking Forward ~ Unity Stamp Co.

 Hello there crafty friend!
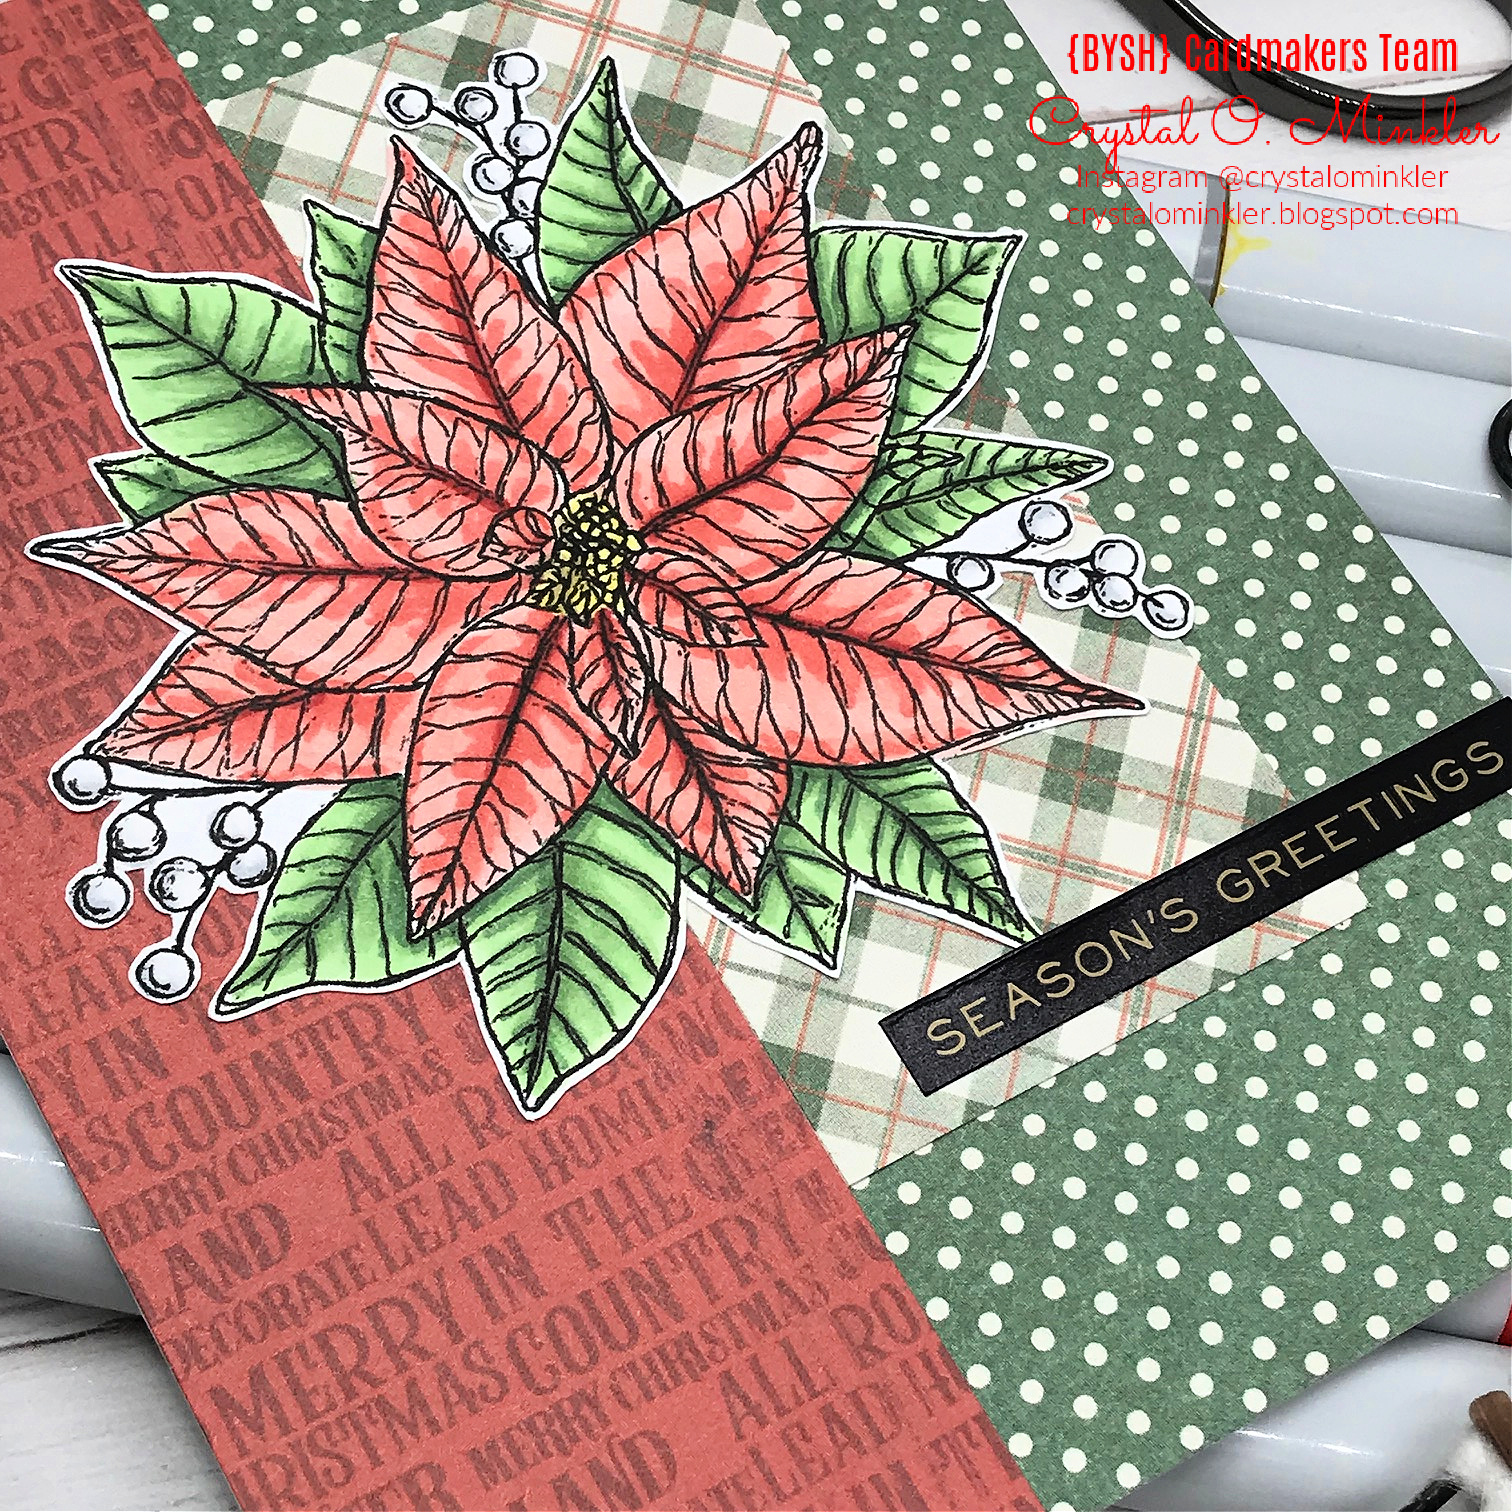
I'm back with my weekly Christmas card using the {BYSHC} Sketch 24 from Build Your Stash Holiday Cardmakers and this week I was excited to finally color up the gorgeous poinsettia from the September 2022 Kit of the Month called Looking Forward from Unity!! Love this beautiful stamp!!


I paired up this gorgeous poinsettia with the beautiful Simple Vintage Country Christmas 6 x 8" paper pad from Simple Stories. I cut my green polka dot papers to cover the entire card front measuring 4-1/4 x 5-1/2". The red sentiment paper was cut just as the sketch calls for ~ 1-3/4 x 5-1/2" and I adhered it to the green polka dot paper. I cut the green and red plaid paper slightly larger than the sketch calls for ~ 1-3/4 x 3-7/8". Making sure that some of the pretty plaid showed around the poinsettia.


I stamped the beautiful poinsettia with Gina K. Design Black Amalgam ink on Stampers Select White card stock from Papertrey Ink.


I colored up the poinsettia with the following Copic markers:

Poinsettia Center ~ Y11, Y15, Y28
Reds ~ R20, R14, R27
Greens ~ YG11, G24, G46
Berries ~ C00, C3


I fussy cut the poinsettia with my EK Success Cutter Bee Scissors leaving a skinny white border around the image. I adhered the poinsettia directly to the card. I was going to use the beautiful Christmas Wishes sentiment from the KOM but it was a little too big and would have covered up that pretty plaid paper... SO I decided to go with a quick and easy Holiday Talk metallic sentiment sticker from Tim Holtz / Idea-ology.


Here's a look at the fun {BYSHC} Sketch 24 for the month of July!
I hope you'll join us and play along with the sketch! If you're interested in seeing a bit more inspiration for this sketch, stop by the {BYSH} Cardmakers blog and check out the beautiful inspiration from the design team! I'll be back next week with my weekly Christmas card using this fun sketch!


Thanks so much for stopping by!
See ya next time.

Inky hugs,
Crystal


{Please note that comment moderation is ON. Your lovely comment will appear shortly.}

Friday, July 1, 2022

{BYSHC} Sketch Challenge 24 ~ Sweet Christmas Wishes ~ Unity Stamp Co.

 Hello there crafty friend!
It's time for a new Sketch Challenge over at Build Your Stash Holiday Cardmakers and I have a sweet Christmas card to share using an adorable stamp from Unity Stamp Co. called Sweet Christmas Wishes. I was super excited to attend a Unity Lovers gathering last Friday and I took a few images to color up while I was there. I thought the adorable penguin in this Itty Bitty stamp set would be perfect for this month's sketch... and he took no time to color up!!


I paired up this cute stamp with the A Perfect Winter paper pad from Echo Park Paper Co. These papers are one of my absolute favorites!! I love the mix of colors and the designs so much! I used a few different ones for my background that I think compliments the focal image.


I stamped the cute Sweet Christmas Wishes penguin and sentiment with Gina K. Design Black Amalgam ink and colored up the penguin with the following Copic Markers:

Penguin ~ C00, C2, YR15, YR68
Hat ~ C00, C2, R20, R14, R27
Candy Cane ~ C00, C2, R20, R14, R27
Snowflakes ~ B000, B02


I trimmed up my pattern papers for my background exactly as the sketch calls for... the wood grain paper is 1-3/4 x 5-1/2" and the snowflakes are 4-1/4 x 5-1/2". I adhered the wood grain paper onto the snowflake paper. Now if you'd prefer not to cover up any of your paper and waste it really... you can cut your second paper (the one that would be on the right side) at 2-1/2 x 5-1/2". Just make sure that your cuts are straight and adhere them both to your card base. I did make my candy cane striped paper a bit bigger than the sketch calls for since my focal image was also larger. My focal image was die cut with a 2-7/8" stitched square die. My candy cane striped paper measures 2 x 4-1/4". And then my last adjustment was my sentiment which was bigger so I didn't want to cover up a lot of the pattern paper. I just trimmed it down and moved it closer to the middle.


Here's a look at the fun {BYSHC} Sketch 24 for the month of July!
I hope you'll join us and play along with the sketch! If you're interested in seeing a bit more inspiration for this sketch, check out the amazing inspiration from the design team over on the  {BYSH} Cardmakers blog! I'll be back next week with my weekly Christmas card using this fun new sketch!


Thanks so much for stopping by!
See ya next time.

Inky hugs,
Crystal


{Please note that comment moderation is ON. Your lovely comment will appear shortly.}