Showing posts with label #eastercard. Show all posts

Tuesday, March 19, 2024

Tawny Owl Paperie Inky Inspiration Sketch 19 ~ Good Days ~ Unity Stamp Co.

 Hello there crafty friend!
Thankfully, I am finally starting to feel better. This nasty cold had me exhausted and coughing up a lung. Ugh! It seemed to last forever, too! So I'm excited to be back with inspiration for the Tawny Owl Paperie Inky Inspiration Sketch 19 for the Tawny Owl Paperie Inky Inspiration Facebook group. I'm continuing to use up those leftover papers from my days on the Scrapping for Less Design Team - over 3 years ago now! These leftover papers have just been taking up room in my studio so I challenged myself to start using them all up!! So, I'll be sharing the cards I create throughout the month. Some will be using the TOPII sketches and others will just be ideas I came up with using the last few scraps. I hope you're inspired to not only play along with this month's sketch, but also use up those scraps right along with me!


Because I love a challenge... I've also challenged myself to use stamps that haven't seen ink yet. So I inked up the adorable bunny from the Good Days stamps from Unity Stamp Co. Isn't that bunny and the cute chicks just too sweet?! I wanted to keep a simple color scheme since my papers were basically monochromatic.

Here's a quick list of the Copic markers I used to color:

Bunny: RV0000, RV10, RV13, C00, C1, C3
Baby Chicks: Y11, Y15, Y35
Flowers: RV0000, RV10, RV13, BG0000, BG11, BG01
Ground: BG0000, BG11


Here's a look at the fun sketch for Tawny Owl Paperie Inky Inspiration Sketch 19. Did you know I host a monthly sketch challenge in my group? The sketch, as always, is meant to inspire not require. So let the sketch lead in your design, but don't feel limited by it. I've really enjoyed the simplicity of this sketch. This sketch challenge is actually ending next Monday so if you want to play along get your entry in!


I used another large strip of pattern paper from my leftovers and matched it up with a card front of Coastal Cabana card stock from Stampin' Up. I trimmed it to 4 x 5-1/4". The white scallops are die cut using a scallops die from the Blueprints 22 dies from My Favorite Things {can't seem to find it on their website so it must be retired}. I just die cut a couple of long scraps from my stash of white card stock and adhered them behind the pattern paper strip. 


I fussy cut the bunny scene cutting the bunny on the black line and cutting a border around the grass, flowers, and chicks. Adhered the bunny scene to a vellum oval die cut using the Pleated Oval Die Set from Gina Marie Designs. I was then able to add glue behind the bunny scene and adhere the oval to the card - a great trick for adhering vellum. The sentiment is from the Sweet Easter Gnome stamps from Unity that I used for my card a couple weeks ago. I just love that font and stamped a few to have on hand. I added foam tape under the word happy and just adhered the other half of the sentiment using glue. This way the sentiment lays flat on the card.

 I hope you're inspired to play along with the sketch... and maybe even use up some of those paper scraps and/or paper pads! Stay healthy and have a wonderful week!

Thanks so much for stopping by!
See ya next time.

Inky Hugs,
Crystal


{Please note that comment moderation is on. Your lovely comment will appear once approved.}

Monday, March 11, 2024

Inky Paws Challenge #218 ~ Color Challenge Reminder

 Hello there crafty friend!
 There's still time to play along with the Inky Paws Challenge #218 - Color Challenge! You have until this coming Friday, March 15th to get your entries in for the challenge and a chance to win a $20 store credit to Newton's Nook Designs!


Here's another look at the fun colors... Violet, Lavender, Yellow, and White.


This time I played with the super cute Newton's Peeps Stamp Set. We just recently got some baby chicks and they are just the cutest!! For the color challenge I just colored them all yellow, but ours came as a mix of yellow, brown and black. All so cute! I fussy cut the cute little chick because I don't have the coordinating dies, but you better believe I added the dies to my wishlist! LOL

Inspiration for my card comes from the current Tawny Owl Paperie Inky Inspiration Sketch 19. Having this fun sketch in mind, I was able to whip up a cute Easter card really quick. Love how it turned out!


I stamped the sweet kitty and peeps with Memento Tuxedo Black ink on white card stock and colored it all up with some Copic markers. Die cut the kitty using a stitched die from the Circle Frames Die Set. Stamped the sentiment on a scrap of white card stock and trimmed it. Adhered the sentiment to the circle and then added foam tape to the back of both and popped them up on the card.

 Here's a quick list of the Copic markers I used to color up the kitty ice cream:

Kitty: R00, R20, C00, C1, C3
Kitty's Collar: V000, V12, V15, V17, Y15, Y28
Basket: V000, V12, V15, C00, C1, C3
Bow: V000, V12, V15, V17
Peeps: Y11, Y15, YR15
Ground: N0, N1, N3


I used the pretty postage stamp die from the Framework Die Set to die cut the yellow and purple pattern papers from the Spring Blooms 6x6 Paper Pad. I trimmed the purple paper and adhered it to the center of the yellow paper for my background. I adhered the pattern paper layers to a card base of Orchid Opulence card stock from Stampin' Up {may be retired, not sure}. I've been using some of my colored card stocks for bases lately. I just go through so much white card stock! I have to supplement a bit to make it all stretch... 


Now it's your turn to get your paws inky with your Newton's Nook Designs products and create a project with the color combo of Violet, Lavender, Yellow, and White. Be sure to link up to the Inky Paws Challenge! Can't wait to see your projects!


Thanks so much for stopping by!
See ya next time.

Inky Hugs,
Crystal


{Please note that comment moderation is on. Your lovely comment will appear once approved.}

Tuesday, March 5, 2024

Tawny Owl Paperie Inky Inspiration Sketch 19 ~ Sweet Easter Gnome with Egg Hunt ~ Unity Stamp Co.

 Hello there crafty friend!
Today I'm sharing more inspiration for the TOPII Sketch 19 for the Tawny Owl Paperie Inky Inspiration Facebook group. A sweet Easter card using one of the adorable gnomes in the Sweet Easter Gnome stamps from Unity Stamp Co.


I'm still trying to finish off the paper pack I found last week. It may take longer to finish off this paper pack only using one strip of pattern paper per card for this sketch though! LOL! I did also use a scrap of white card stock from my old Scrapping for Less days. It's just slightly different from the Stampers Select White card stock from Papertrey Ink that I used for my card base. I think it's still ok.


I stamped the adorable gnome and sentiment using Black Amalgam ink from Gina K. Designs and copic colored the gnome. I also stamped three eggs using stamps from the Egg Hunt stamps. I stamped them using Kitsch Flamingo, Salvaged Patina, and Mustard Seed Distress Oxide inks.

Here's a quick list of the Copic Markers I used:

Skin: E000, E00, E11
Beard: C00, C1, C3
Hat / Feet: C00, C1, C3, RV0000, RV10, RV13
Easter Egg: Y11, Y15, Y35, RV0000, RV10, RV13, BG0000, BG11, BG01


Here's a look at the fun sketch for Tawny Owl Paperie Inky Inspiration Sketch 19. The sketch, as always, is meant to inspire not require. So let the sketch lead in your design, but don't feel limited by it. I have another fun idea for a card to share next week using the sketch. And then I may only have tiny pattern papers bits to play with... so I'll have to figure out what I'll do with those this time.


I fussy cut the gnome and cleaned up the edges by coloring them with a Memento Tuxedo black marker. I also fussy cut the eggs but I left a thin white border around the eggs. I adhered them all together and then adhered them to the card. I popped up the sentiment with foam tape. A pretty simple but cute card for my Easter card stash! Woohoo!

 I hope you're inspired to play along with the sketch... and maybe even use up some of those paper scraps and/or paper pads! Have a wonderful week!

Thanks so much for stopping by!
See ya next time.

Inky Hugs,
Crystal


{Please note that comment moderation is on. Your lovely comment will appear once approved.}

Monday, March 4, 2024

Inky Paws Challenge #218 ~ Color Challenge

Hello there crafty friend!
It's time for a new Inky Paws Challenge... a beautiful Color Challenge
I sure hope that you'll join in the fun and play along with us with your Newton's Nook Designs products! You have until Friday, March 15th to get your entries in for the #218 Color Challenge and a chance to win a $20 store credit to Newton's Nook Designs!


Such beautiful Spring colors... Violet, Lavender, Yellow, and White!! Love them!


I started by die cutting a piece of Stamper's Select White card stock from Papertrey Ink using the stitched rectangle die from the Frames & Flags Die Set. I then lined up the first stencil from the Bunny Tails Stencil Set centering it on the panel and secured it to the back of the die cut panel using purple tape.


I then blended Shaded Lilac and Wilted Violet Distress Oxide inks over the stencil. I dried the ink with my heat tool and replaced the stencil with the second stencil in the set. I used a crafty palette knife to apply Distress Textured Paste Sparkle. Now, I actually thought I grabbed just the regular textured paste for white bunny tails. Oops! I do like the sparkle! Interesting how it changed the purple inks to pink. I did add one cute little white pom pom to the bottom bunny. Just for some interest and dimension on the card.


I die cut a piece of Perfect Plum card stock from Stampin' Up using the banner die from the Frames & Flags Die Set. I then heat embossed the sentiment from the Spring Pile Up Stamp Set using white pigment ink, white embossing powder and a heat tool. I die cut the purple stripes paper from the Springtime 6x6 Paper Pad using the largest stitched and scalloped die from the Frames & Flags Die Set. I placed a scrap of the yellow pattern paper over top of the die cut piece and laid the large die over top. I secured the yellow pattern paper to the die using washi tape and then ran it through my big shot. All that was left was to adhere all of my layers together onto a Perfect Plum card front measuring 4-1/4 x 5-1/2" that I adhered to a white A2 top fold card base measuring 4-1/4 x 11", scored at 5-1/2".


Now it's your turn to get your paws inky with your Newton's Nook Designs products and create a project using the color combo of Violet, Lavender, Yellow, and White. Be sure to link up to the Inky Paws Challenge! Can't wait to see your projects!


Thanks so much for stopping by!
See ya next time.

Inky Hugs,
Crystal


{Please note that comment moderation is on. Your lovely comment will appear once approved.}

Thursday, March 30, 2023

Sweet Easter Gnome ~ March Sketch Challenge ~ Unity Stamp Co.

 Hello there crafty friend!
Today I'm sharing my last bit of inspiration for the Unity March Sketch Challenge that I'm hosting in the Unity Show & Tell Facebook group. I'm sharing a cute Easter card using the super adorable Sweet Easter Gnome stamps. And I'm sharing another bonus card so be sure to read through to the end!


Eeep!! Isn't this Easter card just the cutest?! It turned out better than I hoped. Paired up the adorable Sweet Easter Gnome with the Hippity Hoppity paper pad from Doodlebug Design. I did consider using the new Plaid Builder {layering stencils} to make my own plaid but I'm afraid that time was not on my side so I went with the pattern paper.


The cute little clouds in the background are from the March 2023 Kit of the Month called A Good Man & Some Butterflies. I just adore the detail in these cute clouds!!


The Easter gnome and clouds were stamped with Black Amalgam ink and then colored up with Copic markers. Here's a quick list of the Copic markers I used to color up the adorable gnome:

Skin ~ E000, E00, E11, E04
Beard ~ C00, C1, C3
Hat ~ RV10, RV13
Ears / Feet ~ R000, R00, R20, C00, C1, C3
Easter Egg ~ YG11, G14, BG10, BG23, YR21, YR15, RV10, RV13


This time I decided not to use a die for my focal image. Just went with straight edges but I used a corner rounder punch for both of my focal image layers. The ground for my gnome was created by die cutting the green grass papers with the Land Borders Die Set from Newton's Nook Designs.

You can check out my process video here... Sweet Easter Gnome | March Sketch Challenge | Unity Stamp Co.


Also sharing a BONUS card!! Our family has been considering get a kitty and I am smitten with the tortoiseshell cats. Love the pretty mix of colors in their fur. 


I found a cute picture online and tried to replicate the coloring… it turned out okay. I do like how the eyes turned out though. Here’s a quick list of the Copic markers I used to color up the kitty:

Fur ~ YR21, YR15, YR16, N0, N2, N4, N6, C00, C1, C3
Nose ~ R00, R20, R14
Ears ~ R00, R20, N0, N2
Eyes ~ YG11, YR21, E00


 I die cut the Copic colored kitty with the third largest die from the Big and Little Pierced Chain Rectangle dies from Gina Marie Designs. Another paper pad of Spring papers made my background and my mat for the kitty layers. I used the Spring Market paper pad from Carta Bella. The sentiment was stamped, trimmed and then popped up on the card with thin foam tape. A few touches of white gel pen on the eyes, nose, and whiskers finish off my card.


Here's another look at the sketch! Today and tomorrow are the last days to play along with the sketch!! Please know that the sketch is meant to inspire and not require. Feel free to alter it to work for your creation just as I did for both of my cards! Most importantly have some inky fun! I can't wait to see what you create! Be sure to share your cards in the Unity Show & Tell group and also add them to the sketch challenge album in the group to be entered for a prize!! I have had so much fun hosting the challenges in the group for the last couple of months. Hope you all had fun too! Thank you all so much for playing along! 


Thanks so much for stopping by!
See ya next time.

Inky Hugs,
Crystal


{Please note that comment moderation is on. Your lovely comment will appear once approved.}

Monday, March 20, 2023

Inky Paws Challenge #194 ~ Color Challenge

Hello there crafty friend!
It's time for another fun Inky Paws Challenge... a Color Challenge! 
I sure hope that you'll join in the fun and play along with us with your Newton's Nook Designs products! You have until Friday, March 31st to get your entries in for the #194 Color Challenge and a chance to win a $20 store credit to Newton's Nook Designs!

How beautiful are these colors... Bubblegum Pink, Lilac, Spring Green and White


I do love the look of a Clean & Simple {CAS} card with a lot of white and even though this card has a lot of white I don't think it's considered a true CAS card because of all the layers. Still... it works for our current color challenge. 


A white A2 card base measuring 4-1/4 x 11"; scored at 5-1/2" for my bottom layer. Another white layer that was die cut with the largest postage stamp die from the Framework Die Set. My main white panel measures 3-1/4 x 4-1/2" and I die cut some white clouds with a die from the Sky Borders Die Set. Just a touch of the pink and purple and a pop of green with some die cut grass using the Land Borders Die Set


I stamped the sweet critters from the Spring Pile Up stamp set with Memento Tuxedo black ink. I colored them up very simply with my Copic Markers and then die cut them with the coordinating Spring Pile Up Die Set. Here's a quick list of the Copic Markers I used to color up the sweet critters:

Birdie ~ V000, V12, V17, YR15
Bunny ~ C00, C1, C3, RV000, RV10, RV13, RV14
Tulips ~ RV000, RV10, RV13, RV14, YG11, YG23
Sheep ~ C00, C1, C3, N0, N2, N4, RV000, RV10, RV13
Basket ~ E21, E23, E27
Eggs ~ RV000, RV10, RV13, RV14, V000, V12, V17, YG11, YG23

You can check out my process video here... Hippity Hoppity Easter | Spring Pile Up | Newton's Nook Designs.


Now it's your turn to get your paws inky with your Newton's Nook Designs products and create a project using the color combo of Bubblegum Pink, Lilac, Spring Green, and White. Be sure to link up to the Inky Paws Challenge! Can't wait to see your projects!


Thanks so much for stopping by!
See ya next time.

Inky Hugs,
Crystal


{Please note that comment moderation is on. Your lovely comment will appear once approved.}

Thursday, March 16, 2023

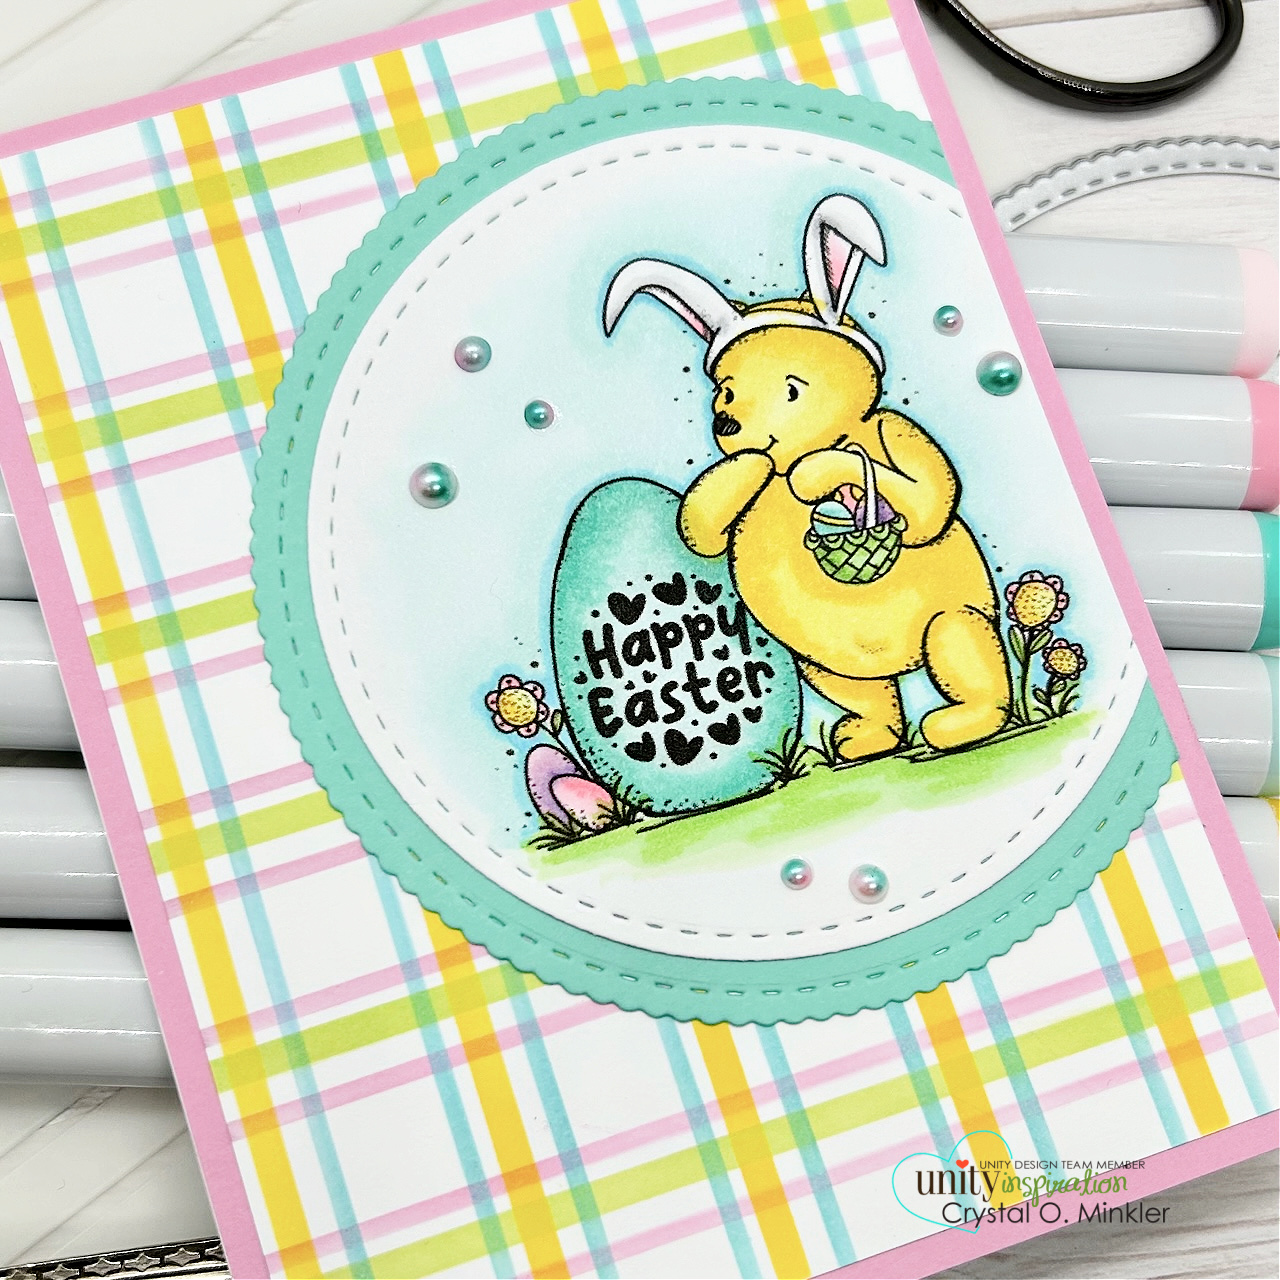
Winnie the Pooh: Pooh's Bunny Hop ~ March Sketch Challenge ~ Unity Stamp Co.

 Hello there crafty friend!
Today I'm sharing more inspiration for the Unity March Sketch Challenge that I'm hosting in the Unity Show & Tell Facebook group. I'm sharing another Easter card but this time I'm featuring two new releases that will hit the Unity website later today!! Yay!!


First up... notice the plaid in my background?! Unity is releasing an awesome Plaid Builder {layering stencil}!! It's so easy to use and the possibilities are endless. So many color combinations!! And then, of course, a new adorable Winnie the Pooh stamp. This one is called Winne the Pooh: Pooh's Bunny Hop. Love it!


To create the plaid background I blended Kitsch Flamingo, Salvaged Patina, Twisted Citron and Mustard Seed Distress Oxide inks over the plaid stencils. I trimmed the background to 4 x 5-1/4" and adhered it to a pink card front. The panel was then adhered to a white A2 top fold card base.


Winnie the Pooh was stamped with Black Amalgam ink on white card stock. I also stamped the sentiment inside the egg with the same black ink. Here's a quick list of the Copic markers I used to color up this cute stamped image:

Pooh ~ Y11, Y15
Pooh's Ears ~ C00, C1, C3, RV000, RV10, RV13
Pooh's Basket ~ YG11, YG23
Eggs ~ Y11, Y15, RV000, RV10, RV13, V000, V12, V17, BG000, BG10, BG23
Flowers ~ RV10, RV13, Y11, Y15, YG11, YG23
Grass ~ YG11, YG23
Sky ~ BG000, BG10, BG01


The sketch calls for a rectangle but I thought a circle would be a fun change so I die cut Winnie the Pooh with the Scallops & Circles {nesting dies}. And then I die cut a piece of aqua card stock with the largest die from the same die set. Adhered the circle layers together and then cut the edge off. Next I adhered the circle layers to the plaid background. I finished off the card with a few pretty flatback pearls from my stash.


Here's another look at the sketch! Please know that the sketch is meant to inspire and not require. Feel free to alter it to work for your creation just as I did for mine today. Most importantly have some inky fun! I can't wait to see what you create! Be sure to share your cards in the Unity Show & Tell group and also add them to the sketch challenge album in the group to be entered for a prize!! I'll see you back here next Thursday with more inspiration for this month's sketch challenge.

Thanks so much for stopping by!
See ya next time.

Inky Hugs,
Crystal


{Please note that comment moderation is on. Your lovely comment will appear once approved.}

Thursday, March 9, 2023

Luck To Go + No Bunny Compares ~ March Sketch Challenge ~ Unity Stamp Co.

 Hello there crafty friend!
Today I'm sharing more inspiration for the Unity March Sketch Challenge that I'm hosting in the Unity Show & Tell Facebook group. And I have two cards to share!! A fun St. Patrick's Day card and a sweet Easter card.


I've altered the measurements of the sketch for both of these cards so the images would work.


First up is the St. Paddy's Day card. I found some fun papers in my stash called Pot o' Gold from Doodlebug Designs. The plaid background is 4 x 5-1/4". Now the Luck to Go stamp is a bit taller and skinnier than the sketch calls for so my main panel measures 2-1/4 x 3-1/2" and the shamrock mat measures 2-1/2 x 4".


I centered the stamp on my main panel and stamped it with Black Amalgam ink. And then I colored it up with the following Copic markers ~ YG11, YG23, G14, G05, C00, C1, C3.


I adhered all my layers together also adhering them to a white A2 top fold card base. Stamped the sentiment on a scrap of white card stock with the same black ink. Trimmed it up and adhered it directly to the card with liquid glue.


Next up is a sweet Easter card using the adorable No Bunny Compares. I found another fun pack of papers in my stash with an Easter theme called Hoppy Easter from Doodlebug Designs. I cut my pink background paper to 4 x 5-1/4". The sweet girl and her bunny are a tad bigger than the sketch so for this one the main panel measures 3-1/4 x 3-1/4". The Easter egg paper mat measures 3-1/2 x 3-3/4".


I centered the sweet image on my main panel and stamped it with the same black ink. And then I colored up this one with the following Copic markers:

Skin ~ E000, E00, E11, E04
Hair ~ E21, E23, E25, E29
Shirt / Bow RV000, RV10, RV13
Bunny ~ C00, C1, C3, RV000, RV10, RV13


The sentiment for this one is from the Pretty Easter Find itty bitty. It's trimmed up and popped up on the card with some thin foam tape.


Here's another look at the sketch! Please know that the sketch is meant to inspire and not require. Feel free to alter it to work for your creation just as I did for mine today. Most importantly have some inky fun! I can't wait to see what you create! Be sure to share your cards in the Unity Show & Tell group and also add them to the sketch challenge album in the group to be entered for a prize!! I'll see you back here next Thursday with more inspiration for this month's sketch challenge.

Thanks so much for stopping by!
See ya next time.

Inky Hugs,
Crystal


{Please note that comment moderation is on. Your lovely comment will appear once approved.}

Saturday, February 4, 2023

~ Friends of Unity February 2023 Blog Hop ~

  Hello there crafty friend!
It's the first Saturday of February which means it's time for our Friends of Unity Blog Hop!! I had a whole bunch of fun with this month's cue...


Say It ~ All About the Sentiment!! We're playing with sentiments this month! So fun! So I went a little nuts with my cards. I have a lot of photos... I'll try to keep the chatter down to a minimum. :)


First up is a card featuring the gorgeous new Zinnia stamp. I wanted to include the flowers but also focus on the sentiment so I stamped the zinnias close to the sentiment.


And then to bring the focus to the sentiment I die cut the sentiment with a portion of the flowers using one of the scalloped hearts dies from the Dashes and Frills Hearts {die set}. I debated cutting a mat for the heart but I wanted to go for more of an eclipse vibe. 


If you look at the card straight on you can't really see the eclipse effect, but if you turn it you can see the sentiment wrapped with the heart die. I love how this turned out! Here's a quick list of the Copic markers I used to color up the zinnias:

Orange Zinnias ~ Y11, Y15, YR15, YG68
Pink & White Zinnia ~ RV10, RV21, RV14
Peach Zinnias ~ R00, R12, R22, R32
White Baby's Breath ~ C00, C1, C3


Using the Eclipse Technique on the first card got me thinking about doing something similar for a word bubble on my second card. This one is a slimline with all the adorable bunny butts and the sweet bunny from the newly released Oh Hello Spring.


I wanted to go with more of a CAS design leaving lots of white. I think it helps the eclipse-ish sentiment pop! 


I stamped the bunnies in a row and then stamped the sentiment leaving room so I could die cut it. I colored the bunnies very simply... all the bunny butts are colored with W00, W1, W3 for a warm white coloring. All the tails are with C00, C1, C3 for a cool white coloring. To make the last bunny a little different and stand out a bit more, I colored it with the cool white copics and a touch of pink with RV000, RV10, and RV21.


I die cut the bunny panel with the third largest die from the No Frills Plain Slimline dies from Gina Marie Designs. I used an oval die to cut out the sentiment and popped it up using foam tape. The pink card stock was die cut with the largest slimline die from the Scalloped Stitched Slimline dies, also from Gina Marie Designs.


My last few cards are actually a set of three cards that were really quick to make. I stamped each of the sentiments from the Faith Over Fear stamps with Black Amalgam ink on kraft card stock. I colored them very simply with Copic markers using colors to coordinate with the Pretty Polka's {paper pack} that I chose for my background layer.


Copic markers I used for this sentiment ~ RV21, RV14, G00, G02, Y15


I then die cut the sentiments with the third smallest postage stamp die from the Postage Stamp {nesting dies}. I added foam tape to the top and bottom of the die cut sentiments. I also added some tear tape to the center of the sentiments to adhere the burlap ribbon. 


Copic markers I used for this sentiment ~ RV21, RV14, G00, G02, Y11, Y15, V20, V22


I die cut each of the polka dot papers using the largest postage stamp die. I adhered them to kraft A2 top fold card bases. And then I popped up the sentiment on the card to finish each of them off.


Copic markers I used for this sentiment ~ G00, G02, V20, V22, Y15

You can check out my quick video here for my cards... Simple Set of Cards | Faith Over Fear | Unity Stamp Co.


This set of cards would make a wonderful gift for a friend. You could make two of each design using different colored polka dot papers. I think I may do that and send to one of my friends that doesn't make cards. I'm sure she'll like having them to send out to her family and friends. Well, that's it for my cards this time.

Now before we get to the hopping, I chose a lucky winner from the comments on last month's hop to win a fun prize and the lucky winner is...


... MadeByMeghanK!! Congratulations Meghan!!
Please email me at crystalominkler@gmail.com to claim your prize. 
Prize must be claimed within two weeks. 

Well, that's it for me this time! Please hop along and enjoy some more inspiration from the Friends of Unity! I'm so excited to see all the creations from our friends!! I will be doing another fun giveaway this month!! Be sure to hop along and comment for a chance to win. {When you comment please leave your name just in case it posts as anonymous.} I'll announce the winner next month! 


Let's get to the hopping...


Crystal <--- you're here

up next ---> Amber


Thanks so very much for supporting our little hop!
We appreciate you!!

See ya next time.

Inky Hugs,
Crystal


{Please note that comment moderation is ON. Your comment will appear shortly.}