I'm back with another Technique Tuesday! On the 2nd Tuesday of each month I'll be sharing a bit of inspiration and a video featuring a fun technique. I hope that you'll be inspired to get inky and play along with some of the techniques that I share.
Today's technique is all about quick and fun backgrounds with Distress Crayons!! I was chatting with a crafty friend about Distress Crayons and how we HAD to have them but we haven't played with them much, at all! So I thought, what better time to play with them and have some fun than for Technique Tuesday!
And they were so much fun! AND quick!! That's the key word when you're in need of a card ASAP. Am I right?
For my first card I made a Spring version using Mustard Seed, Kitsch Flamingo and Salvaged Patina Distress Crayons. These are my go-to colors for Spring.
I stamped the lovely silhouette stamp from the Meadow of Hope {April 2023 Whit Kit} with VersaFine Onyx Black ink. It's a tiny smidge crooked... but the crafty friend I'm sending it to won't mind. An easy fix would be to trim the panel and adhere it to a white base. Or cut a skinny strip of black card stock to run across that bottom. But I left it as is.
I just love the font on this sentiment. Stamped so beautifully!
For my second card I made a Winter version... I know. I know. Enough with Winter. I can't help myself. I love Winter. I'd much rather snuggle up in a blanket by a fire to stay warm during the Winter than to lay absolutely still under the ceiling fan just to get some relief from the heat of Summer. Hahaha... but that's just little ole me.
For this background I used Seedless Preserves, Shaded Lilac, Tumbled Glass, and Chipped Sapphire Distress Crayons. Love love love this combo!! I will be using this combo again.
I used the gorgeous Shake Your Flakes {Front & Center stamps} for this card. One of my favorite Winter kits. I smudged this one up when I adhered it to the card base. I was devastated! Check out how I fixed it in my video down below.
These Distress Crayon backgrounds were SO much fun! If you give this fun technique a try, I'd love to see what you create so please share your cards in the Unity Show & Tell group and tag me. Have an ink-tastic day!
Thanks so much for stopping by!
See ya next time.
Inky Hugs,
Crystal
{Please note that comment moderation is on. Your lovely comment will appear once approved.}
Here's another look at the fun colors... Royal Blue, Olive Green, Sunshine Yellow, and White.
Trucks are one of my obsessions when it comes to stamps so I just had to play with the Spring Haul Stamp Set again. I thought the truck would love lovely in a Royal Blue... what do you think? I meant to use the Spring Haul Die Set to die cut the truck and pop it up on the card for a bit more dimension but I was in a groove and forgot. I think it still turned out pretty nice. My background layer is the lovely yellow gingham paper from the Spring Blooms Paper Pad. It's cut down to 4-1/4 x 5-1/2" and adhered to a white A2 top fold card base measuring 4-1/4 x 11; scored at 5-1/2".
Here's a quick list of the Copic markers I used:
Truck ~ B000, B00, B05, B24, B28, C00, C1, C3
Brake Lights ~ R20, R17
Tires ~ N0, N2, N4, N6
Blanket ~ C00, C1, YG03, G99
Plant Pots ~ N0, N2, N4
Watering Can ~ N0, N2
Daffodils ~ Y06, Y15, C00, C2
Tulips ~ Y06, Y35
Daisies ~ Y06, Y35
Leaves / Grass ~ YG03, G99
I die cut a scalloped circle from Daffodil Delight card stock from Stampin' Up using one of the dies from the Circle Frames Die Set. I also die cut the truck using the next smallest die in the set. I adhered those together and then adhered them directly to the card. I stamped the sentiment onto white card stock and trimmed it cutting fishtails on either end. I then I die cut a piece of Old Olive card stock using one of the flag dies from the Frames & Flags Die Set. I adhered them together and then adhered them to the card. I love how this card turned out.
Now it's your turn to get your paws inky with your Newton's Nook Designs products and create a project with the color combo of Royal Blue, Olive Green, Sunshine Yellow and White. Be sure to link up to the Inky Paws Challenge! Can't wait to see your projects!
Thanks so much for stopping by!
See ya next time.
Inky Hugs,
Crystal
{Please note that comment moderation is on. Your lovely comment will appear once approved.}
It's the first Saturday of May which means it's time for our Friends of Unity Blog Hop!! I've been so excited for this month's cue but I struggled to narrow down what I would create. It's such a fun cue. I hope that you all enjoy it and hop along to see all the wonderful inspiration. Now, onto our cue this month...
... Inspired By. This wonderful cue was Bobbie Sue's idea and I just love it! I find inspiration in so many places... from blogs, websites, challenges, and even day to day things like store ads. One fabulous source of inspiration that we all share in is the Unity Show & Tell. We are so lucky to have inspiration shared there daily in this wonderful group. If you're not a part of this group on Facebook, I hope you'll join us. I found three wonderful creations in the group that inspired my cards. Let's get to it...
First up is this gorgeous card that our sweet friend, Gaylynn, shared in the Unity Show & Tell group. The beautiful background that Gaylynn created inspired the background for my card.
I used the Vintage Script Embossing Folder to emboss my grey card stock measuring 4-1/4 x 5-1/2". I lightly rubbed the embossed (or raised) portion with a white pigment ink pad. I also added a bit of white acrylic paint splatter on the background focusing the splatters diagonally across the background.
Have you seen this new gorgeous stamp from the birthday release? It's called Bittersweet Graduation and it's illustrated by the wonderfully talented Angie Blom. I colored it up with the following Copic Markers:
Grad Cap ~ N0, N2, N4, N6, Y06, Y35
Flowers ~ RV10, RV13, RV14, RV19, RV66
Berries ~ RV10, RV14, RV66, RV69
Leaves ~ G000, G24, G99
Background ~ C00, C1
I trimmed the bottom of the focal panel with my guillotine trimmer and started the cuts on the sides with my trimmer, as well. I then fussy cut the rest of the edge up to the script and flowers and continued fussy cutting leaving a bit of a white border around the image. The focal panel didn't look quite right just on the background. So I die cut a piece of vellum card stock using the second smallest die from the Scallops & Rectangles {nesting dies}. I adhered the main panel to the vellum layer and then adhered both layers to the card by only adding glue behind the main panel. I finished off the card with a few black gems from my stash. I did end up adding a dot of glue behind that top gem just to help the vellum layer lay flat.
The next card that inspired me is this stunning card shared by Sandra van Blaricum. I was inspired by the flowers and the fussy cut front panel. I love the colors but I went with a different color palette.
My second card features the gorgeous Birthday Blooms... I love this gorgeous big floral stamp! This stamp can be purchased on its own or you can snag the wonderful Peony {Stamp & Stencil} Bundle that includes the gorgeous stamp and a stencil. If you don't like coloring, the stencil is perfect for ink blending over this beauty! AND Unity just released the Birthday Blooms {coordinating die}... unfortunately, it's out of stock already! Wow! That was fast!
I stamped the peony with Black Amalgam ink and colored it up with the following Copic Markers:
I fussy cut the Birthday Blooms on the line and then cleaned up the edges by coloring them with a Memento Tuxedo Black marker. I've paired up the stamp with the amazing Vintage Whispers {paper pack} for a square vintage Mother's Day card. I started with a 5 x 10" white card base, scored at 5". I adhered my papers to the front and the inside of the card. Trimmed them up and then I adhered the flower. Now, when I went back to fussy cut around the flowers all these layers were pretty thick. If I was to redo this I would definitely adhere the flowers to the pattern paper and then trim. Adhere it to the card base and then trim off the extra card base. Just my two cents. The sentiment from the recently released The Very Best Gal was stamped with white pigment ink and then I applied some white embossing powder and melted it with my heat tool. I trimmed it up and adhered it directly to the card. To finish off this card, I added a few rhinestones from last month's Whit Kit.
And inspiration for my last card comes from this darling card by Robin Stanton. I just love the background she created for this card! I had to give it a try!
I kinda love how this one turned out! Hope you like it too! This card features the sweet All Ears stamp that just released for Unity's 15th Birthday! I love this pup! So fun and easy to color. I paired him up with the super sweet Cozy Textiles {paper pack}.
I die cut the papers using the largest die from the Scallops & Rectangles {nesting dies}. I ended up turning them around so the pup could set on the yellow line. Not at all my typical straight and perpendicular lines... love it! Here's a quick list of the Copic Markers I used to color up the pup:
I enjoyed this card design so much that I decided to turn it into a sketch. I'm also hosting a sketch challenge for this one with a prize in my Tawny Owl Paperie | Inky Inspiration Facebook group. I've been blessed the last couple weeks with so many crafty goodies from crafty friends... it just makes sense to do a sketch challenge and have a prize!! I hope that you'll join in the fun! The sketch challenge will run from today, May 30, and will end June 26th at 11:59pm PST. Entries must be added to the challenge album in the Tawny Owl Paperie | Inky Inspiration Facebook group to be eligible for a prize. The winner will be chosen randomly from the entries and I'll announce the winner in the group. Hope you'll play along!
I fussy cut the pup for my card but I did see that Unity released an All Ears {coordinating die}... that's going on my wishlist! I adhered all my layers to a white A2 top fold card that I turned on its side for a horizontal card. And I decided to not add any bling or anything. I think it's cute how it is.
Now before we get to the hopping, I chose a lucky winner from the comments on last month's hop to win a fun prize and the lucky winner is...
... Wilma DeGraffenreid!! Congratulations Wilma!!
Please email me at crystalominkler@gmail.com to claim your prize.
Prize must be claimed within two weeks.
Well, that's it for me this time! Please hop along and enjoy some more inspiration from the Friends of Unity! I'm so excited to hop and check out all the pretty creations shared by our friends!! I'm also interested in seeing how each of our friends were inspired. I will be doing another fun giveaway this month!! Be sure to hop along and comment for a chance to win. {When you comment please leave your name just in case it posts as anonymous.} I'll announce the winner next month!
I have a cute mini slimline Father's Day card to share today using a super cute new stamp that just released over at Unity Stamp Co. I kept the design simple for this one... pretty much CAS {Clean & Simple} but with a bit of color in the background.
I just adore this new BBQ Gnome from Unity. He's so cute with his spatula and BBQ sauce. And so much fun to color!
Here's a quick list of the Copic markers I used to color up the cute gnome:
Skin ~ E000, E00, E11, E04
Beard / Hat ~ C00, C1, C3
Oven Mitt ~ N4, N6, R20, R17, R27
Spatula ~ C00, C1, N0, N2, N4, N6
Grill ~ N0, N2, N4, N6, E42, E44, E49
BBQ Sauce / Kebabs ~ E42, E44, E49
Grass ~ YG11, YG23
Sky ~ B0000, B00
I die cut the panel using the Wonky Stitched Mini Slimline Die from Gina Marie Designs. I cut a piece of plaid pattern paper from the Let Your Soul Wander {paper pack} to 5-3/4 x 3-3/8" and adhered it to a to the right side of a 6-1/2 x 3-1/2" black card front. Next, I adhered it to a white mini slimline card base measuring 7 x 6-1/2"; scored at 3-1/2".
A simple and pretty quick Father's Day card. Be sure to stop by Unity for their big birthday sale and new release!! Lots of wonderful new goodies!
Thanks so much for stopping by!
See ya next time.
Inky hugs,
Crystal
{Please note that comment moderation is on. Your lovely comment will appear once approved.}
We are celebrating Unity's 15th Birthday ALL month!! Woot Woot! Happy Birthday Unity!!
The party kicks off today with an actual Live Release Party on the Unity Stamp Co. page. So excited! I thought it was fitting to celebrate with a birthday card.
I used the sweet new Planner Gal: Simply Perfect Birthday. Isn't she the cutest?! I stamped her with Black Amalgam ink on white cardstock and colored her up with the following Copic markers:
I also used the wonderful new Falling Confetti Layering Stencil for my background. Blended a bit of Kitsch Flamingo Distress Oxide ink over the stencil to create my pretty background. Die cut the background using the largest die from the Scallops & Rectangles {nesting dies}. I adhered it to a white A2 top fold card that I turned on it's side for a horizontal card.
I found a couple strips of pattern paper from the Birthday Party {paper pack}, along with a couple strips of Sweet Sugarplum card stock from Stampin' Up. I adhered them to the Confetti background. I die cut the sweet birthday girl with the smallest die from the Scallops & Rectangles {nesting dies} and adhered her over the scraps. I also die cut the sentiment with the smallest circle die from the Scallops & Circles {nesting dies}. I finished off the card by adding a few Taffy Purple Pearls from Gina Marie Designs.
The TOP Inky Inspiration Sketch 11 inspired my card for today. It's a great sketch for those scraps and bits of pretty paper we have in our stash.
I hope you'll stop by Unity and check out the new releases and the wonderful sale!! Have a wonderful evening friends!
Thanks so much for stopping by!
See ya next time.
Inky hugs,
Crystal
{Please note that comment moderation is on. Your lovely comment will appear once approved.}
It's time for a new sketch challenge over in the Build Your Stash Holiday Cardmakers! Today I'm sharing a Christmas card with a vintage vibe using a beautiful stamp from Unity Stamp Co. called A Beautiful Sight. I love this pretty stamp!
I paired up this itty bitty stamp with the Old World Winter paper pack from The Paper Studio. It's one of my favorites and I just love the colors in these papers! I distressed the edges a bit with Vintage Photo Distress Ink.
I stamped the tree background with Antique Linen, Evergreen Bough, and Forest Moss Distress Oxide inks. I inked up different sections of the stamp with each color and then stamped it. I repeatedly stamped it until I was happy with the colors.
I wanted the tree to stand out a bit more so I used Antique Linen, Evergreen Bough, and Vintage Photo Distress Crayons to color the tree. It was super easy and I love how the tree pops. I mat a couple of my layers with Kraft card stock. And finished off my top layer by wrapping it a few times with a pretty Ivory burlap string. I tied a pretty bow and the I popped up the top layer with a thin foam tape.
Here's a look at {BYSHC} Sketch Challenge #33 for the month of May. I hope you'll join us and play along with the sketch! If you're interested in seeing a bit more inspiration for this sketch, check out the amazing inspiration from the design team over on the {BYSH} Cardmakers blog!
Thanks so much for stopping by!
See ya next time.
Inky hugs,
Crystal
{Please note that comment moderation is ON. Your lovely comment will appear shortly.}
It's time for a new Inky Paws Challenge... a Color Challenge!
I sure hope that you'll join in the fun and play along with us with your Newton's Nook Designs products! You have until Friday, May 12th to get your entries in for the #197 Color Challenge and a chance to win a $20 store credit to Newton's Nook Designs!
How beautiful are these colors... Royal Blue, Olive Green, Sunshine Yellow, and White
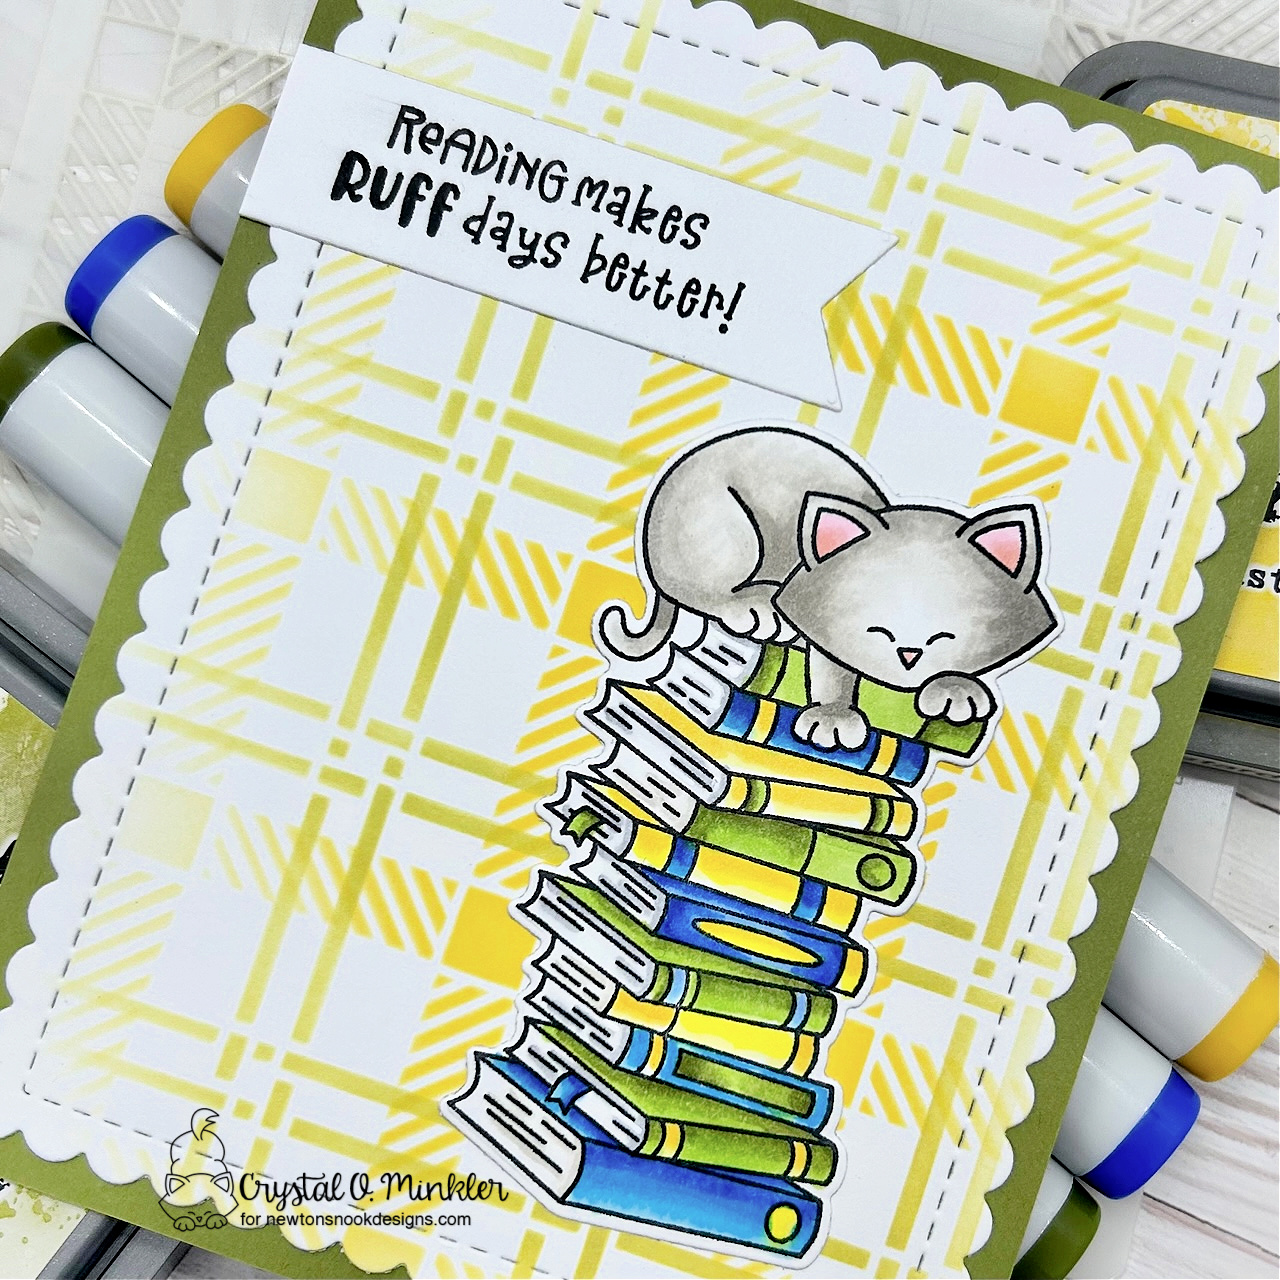
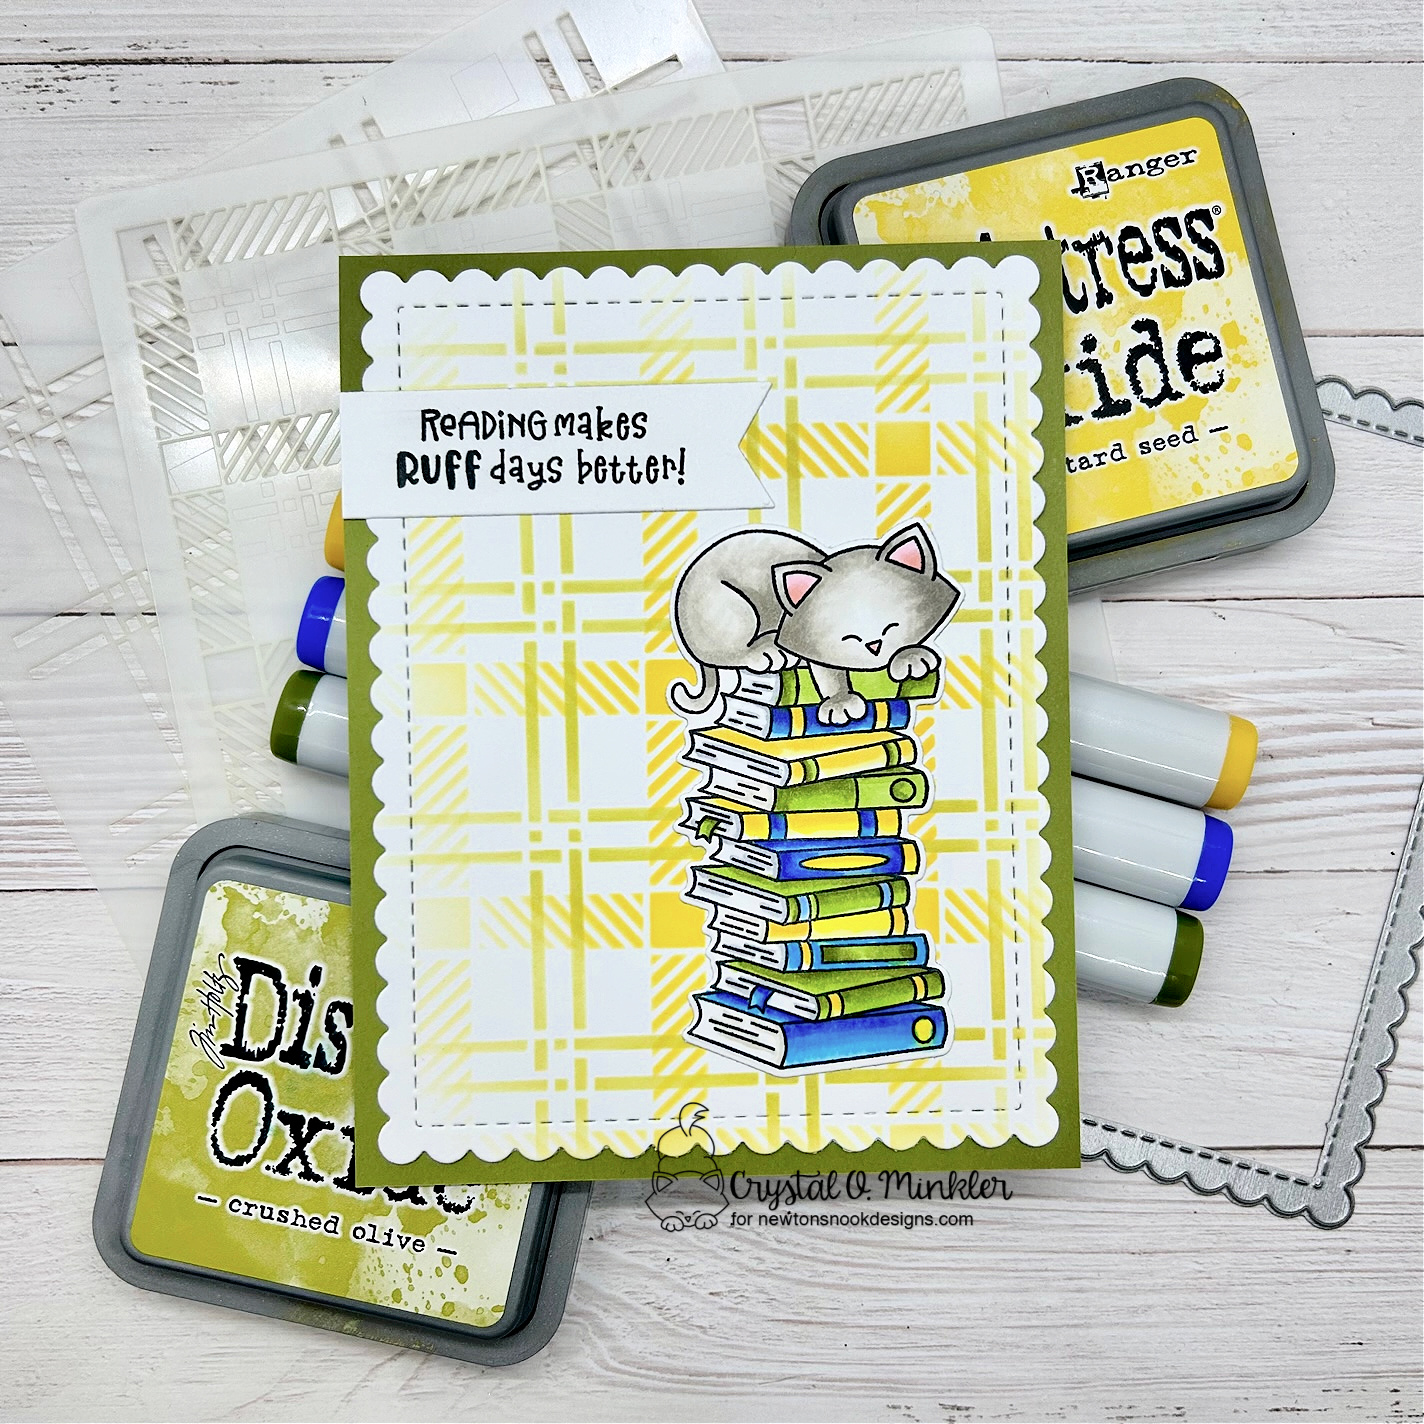
Last week was very hectic with the Spring into Christmas {BYSHC} Linky Party so I found that I wanted to make simple card for the new color challenge. I started with a soft background using the wonderful Plaid Stencil Set. I blended Mustard Seed and Crushed Olive Distress Oxide inks over the stencils.
I die cut the background using the largest die from the Frames & Flags Die Set. I adhered it to an Old Olive card front and then adhered my layers to a white A2 top fold card base. I set the card aside and stamped the adorable kitty and books from the All Booked Up Stamp Set using Memento Tuxedo Black ink. Here's a quick list of the Copic Markers I used to color up the sweet kitty and books:
I then die cut the colored image with the coordinating All Booked Up Die Set. I die cut a piece of white card stock using the flag die from the Frames & Flags Die Set. I stamped the sentiment on the die cut flag, trimmed it and adhered it to the card. I also adhered the kitty and the books directly to the card. No foam tape this time.
Now it's your turn to get your paws inky with your Newton's Nook Designs products and create a project using the color combo of Royal Blue, Olive Green, Sunshine Yellow, and White. Be sure to link up to the Inky Paws Challenge! Can't wait to see your projects!
Thanks so much for stopping by!
See ya next time.
Inky Hugs,
Crystal
{Please note that comment moderation is on. Your lovely comment will appear once approved.}


.jpg)