Showing posts with label Happy Birthday. Show all posts

Saturday, November 12, 2022

Ink Smooshed Butterfly Cards ~ Wings & Petals Ledger ~ Unity Stamp Co.

 Hello there crafty friend!
Today's the last day to order from the Brown Thursday Sale over at Unity Stamp Co. I'm sharing the two cards I made using the beautiful Wings & Petals Ledger background stamp from the Brown Thursday release!!


Both of these cards were so quick and easy... I inked smooshed a card front with Squeezed Lemonade, Evergreen Bough and Wilted Violet Distress Oxide inks. 


Once I was happy with the ink smooshed background and dried it completely with my heat tool, I stamped the beautiful Wings & Petals Ledger over top with Ranger Jet Black Archival ink.


I trimmed the background to 3-7/16 x 4-11/16" and adhered it to a piece of white card stock die cut with the largest die from the Pleated Lace Rectangles dies from Gina Marie Designs.


For this background I just ink smooshed Squeezed Lemonade and Evergreen Bough Distress Oxide inks. I really love these two colors together!


I trimmed this background to the same size I mentioned earlier. Once I had the backgrounds adhered to the die cut panels, I adhered them both to True Black card fronts. I love how the black background brings the stamped images into focus!


The 'happy birthday' sentiment is die cut using the beautiful Chic Script Salutations {die set}... which is currently on sale during Black Friday but it ends today!! I die cut both words four times and adhered two pairs together to give the sentiment a bit of dimension. I do think I'll die cut it one more time in black for my second card and adhere it on top of the white. It seems to get a bit lost in the background but I think if it's black it'll pop more. Head over to Unity and check out the amazing sale before it ends!!!


Thanks so much for stopping by!
See ya next time.

Inky hugs,
Crystal

{Please note that comment moderation is on. Your lovely comment will appear shortly.}

Sunday, February 23, 2020

Polka Dot Orchard ~ Fine and Dandy Cotton Candy ~ Happy Birthday Sugar!

Hello there crafty friend!
Today, I have a sweet card *pun intended* using the adorable Fine and Dandy Cotton Candy digi set!! I am loving this cotton candy image with this fabulous Happy Birthday Sugar sentiment... so fun!


I thought this cotton candy would look so sweet in rainbow so I grabbed my Rainbow Vibes paper pack from Unity Stamp Company and trimmed the striped paper down to 4-1/4 x 5-1/2". I adhered it to a white card base and set it aside. I resized and combined the Cotton Candy and Happy Birthday Sugar sentiment in a Word document and printed it off.


I colored the Cotton Candy and sentiment with the following copic markers:

Pinks ~ RV0000, RV00, RV52
Reds ~ R000, R14, R29
Oranges ~ YR15, YR21, YR68
Yellows ~ Y06, Y11, Y15
Greens ~ G000, G43, YG17
Blues ~ B0000, B00, B02
Purples ~ BV0000, BV11, V09
Mouth ~ C00, C1


I kept the design very simple. I just trimmed down the panel and mat it with black card stock. I then popped it up on the card base... done! I really like how this one turned out! I hope you do too!


Thanks so much for stopping by!
See ya next time.

Inky hugs,
Crystal


Saturday, July 13, 2019

Polka Dot Orchard ~ Petals for the Pittman's

Hello crafty friends!! 
Today I have a very special card to share with you.... it's created with a lovely image available in an exclusive floral digi stamp set only sold by Polka Dot Orchard!! This lovely set is part of a fundraiser to help the Pittman's during their difficult medical ordeal. 


Larissa Pittman is a crafty friend and DT sister with Polka Dot Orchard. 
You can read more about Larissa and her husband Gary here: Pittman’s Go Fund Me.

Polka Dot Orchard has collaborated with several different artists and companies to put not just this digital stamp set together.... but since there are so many images, there's two digital stamp sets available. These will only be available for a limited time, so stop by the Polka Dot Orchard Etsy shop today and purchase yours!  ALL PROCEEDS from these special sets will go directly to the Pittman's. There is also a crafty link up with sponsored prizes on the blog....you can find all the details by visiting  Polka Dot Orchard.

Before you head over to Polka Dot Orchard, let's take a quick look at my first card using the lovely Lily by Tierra Jackson... such a beautiful flower!!


I just love lilies!! Such gorgeous flowers!! So I was very excited to see one in this amazing floral digi set! I had so much fun coloring this image. I only used a few Copic markers for this one... RV19, RV91, YG11, G24, G94. I had fun adding the polka dots too... I think I went a little crazy with them, but how could you not?! I love it!


Here's a close up of the card I created. The sentiment is from the Floral Flourish Background 3 digi set. I love the font for this Happy Birthday sentiment and thought it would pair up nicely with the lovely lily!!

I was so touched when Jessica mentioned she was doing this fundraiser set for the Pittman's. Such a sweet way to help out a crafty friend! I'm even more touched by the pour out of love with donations by the crafty community... always warms my heart this fabulous community I'm a part of.

Be sure to stop by the Polka Dot Orchard blog for more information about this wonderful fundraiser. Thanks so much for stopping by my blog!
See ya next time.

Inky Hugs,
Crystal

Sunday, May 5, 2019

Unity Stamp Company ~ Happy Birthday to You

Hello crafty peeps!
 I made this sweet card to celebrate Unity Stamp Company's birthday!!


This sweet stamp is on sale right now!! ---> Happy Birthday to You

I had fun playing with a bunch of different layers of paper using a paper pad that I actually received a long time ago. It's hard to believe but this paper hoarder is enjoying using up her papers! LOL

I used the following Copic markers for this card ~ R01, R11, R21, R85, 
YR00, BG53, BG72, B00, YG91, N2

This was a pretty simple design with all of the layers adhered to the white card base. I did pop up the larger polka dot paper layer. A few enamel dots finished this cute card off!

Thanks so much for checking out my blog post!
See ya next time.

Inky Hugs,
Crystal

Friday, March 29, 2019

Unity Stamp Company ~ Soul Searching ~ Happy Birthday

Hello there! Today, I'm sharing a pretty happy birthday card that I created using Unity Stamp Company's Soul Searching stamp set from their Layers of Life membership.


I stamped the beautiful floral image on Canson XL watercolor paper using Ranger Archival jet black ink. I then heat set it with my heat tool and then pulled out my ZIG Clean Color Real Brush watercolor pens. So, you may notice that the consistency of the watercoloring is a little off... well, I started coloring and then walked away. I didn't get back to it until the next day. For some reason, I just wasn't able to color the remaining flowers in the same way. Does that ever happen to you?! I know this happens to me, so I tend to color an image in one sitting. Especially when it's something like this with all the same kind of flowers. If it was a mix of flowers, it would have been fine. I would have colored the 'roses' and saved the 'daisies' for next time. But that didn't work for this image. Oh well... I still love the gorgeous flowers!


I finished watercoloring the image and decided to die cut it out using the Pleated Lace Rectangle dies from Gina Marie Designs. I wanted to have some white space between the floral image and the sentiment... so I stamped the sentiment from the Abundant Blessings using VersaMark watermark ink and heat embossed a fine black embossing powder. I adhered the watercolored panel to a black card base. A very simple design... but still a lovely birthday card! I hope the recipient likes it!


Thank you friends for checking out my blog post!
See ya next time.

Inky Hugs!
Crystal

Friday, March 22, 2019

The Greeting Farm ~ Lovable Anya ~ HB2U

Hello there! Today, I'm sharing a card I made for my niece's birthday. The whole design and paper choices for this card are because of a challenge my friend, Bobbie Sue, shared and that was a challenge to use up those papers you have sitting around. Well, at first, I didn't like the idea! I am a paper hoarder! I love me some pretty papers! But after packing some of my papers for our move, I realized just how much paper I have and oh my goodness... it's time to let some go! So, I have been working this month, while I still have most of my craft space available, to use up papers in at least two different paper pads. It's really just a tiny bit in the whole scope of my paper hoard, but it's a start! So, I'm feeling pretty good about it!


With all that being said, the papers on my card base are from the Echo Park Everyday Eclectic paper pad. I also used the same cute papers to paper piece Lovable Anya from The Greeting Farm. Isn't she just too cute!?! She reminded me of my niece so I just had to ink her up! I had fun paper piecing all the cute papers to put her outfit together. For the focal image, I started by stamping Lovable Anya on a piece of white card stock and then masked her and stamped the HB2U sentiment from the HB2U Anya stamp set using Berry Sorbet ink from Papertrey Ink. I removed the mask and sadly discovered that the ink seeped through the mask... so plan B... I stamped Lovable Anya again on a scrap piece of white card stock and colored her (and the slice of cake) with the following Copic markers:
Skin ~ E000, E00, R20
Hair ~ E49, E57, E59
Cake ~ W00, W1, W2, R00, R05, R32
Cake Plate ~ G82, Colorless Blender


Once I had Lovable Anya colored and adhered all the paper pieces for her outfit, I fussy cut her out and adhered her to the background piece, along with the cake that I had also fussy cut. I wanted to frame the image so I die cut it twice. First, I had die cut the HB2U background piece before adhering Anya using the Pleated Lace Rectangle die by Gina Marie Designs. I then die cut another one from white card stock and die cut a rectangle out of the middle using a stitched rectangle die. Setting that piece aside for another future project. I adhered the framed piece onto the HB2U background piece using a liquid glue. I popped up the focal image onto the prepared card base. I was going to add an additional sentiment to the front of the card but decided against it since I didn't want to cover the focal image, so I left it as is. I love how this sweet card turned out! What do you think? Let me know below in the comments... I'd love to hear from you.

Thank you friends for checking out my blog post!
See ya next time.
Inky Hugs!
Crystal


Friday, March 15, 2019

Unity Stamp Company ~ Crafty Supplies {Border Backgrounds} ~ Crafty Birthday!

Hello there! I have a quick birthday card to share today using Unity Stamp Company's Crafty Supplies {border backgrounds} along with the cute sentiment from the Martha Girl stamp kit.


I used my Tim Holtz Stamp Platform for this card since I knew I was going to use different distress oxide inks to ink up the background. I started by inking up the stamp with Mustard Seed. I cleaned off the stamp and inked it up with Peacock Feathers. I cleaned it off again and inked it up with Worn Lipstick. While inking up each of these different colors, I tried to just ink up a little portion of the stamp so the colors didn't overlap too much. Once the background was inked up, I die cut it using My Favorite Things Blueprint #20 dies... I love the combination of the scalloped rectangle and the stitched rectangle dies in the set.


I dried my background with my heat tool since I knew I was going to heat emboss the sentiment with black embossing powder and I didn't want the embossing powder to stick to the background image. I did use the Ranger anti-static pouch, as well. Since I wanted this to be a birthday card for a crafty friend I added the Happy Birthday from the 3 Tiered Birthday stamp by masking the bottom portion of the stamp and inking it up with VersaMark watermark ink onto black card stock and then heat embossing a fine white embossing powder. I trimmed the sentiment and popped it up on the background. I adhered the background to a slightly larger mat of black card stock and then adhered those layers to the turquoise scalloped layer. I then adhered the entire thing onto a white card base. I love how easy this card was to make and I hope my crafty friends... yes, I made extras!... love it, too!


Thank you friends for checking out my blog post!
See ya next time.

Inky Hugs!
Crystal

Friday, March 8, 2019

Unity Stamp Company ~ Cuddlebug Owl ~ Sweet Birthday Card

Hello there! Today, I am sharing a sweet birthday card that I made for my niece. Isn't this adorable Cuddlebug Owl from Unity Stamp Company just the cutest you've ever seen!! I love it so much!
I have had this stamp on my desk for a long time just waiting for inspiration.


And finally inspiration came when I resolved to finish a paper pad I had laying around my desk. I thought this pretty pink star paper would pair nicely with the kraft paper in the paper pad and both of those would look very nice with a pink and purple owl. I trimmed the papers to fit on a top fold 4-1/4 x 5-1/2" white card base. I adhered the papers with mono multi purpose liquid glue 
and set the card aside.


I stamped the Cuddlebug Owl using Memento tuxedo black ink and started coloring using the following Copic markers ~ RV10, RV21, V0000, V04, V12, YR15, YR16, YR21, YR27. I die cut the owl with the Pleated Lace Rectangle die from Gina Marie Designs. I popped the die cut image up on the card using stampin' dimensionals. I then stamped the sentiment from the Hugs, Kisses & Birthday Wishes sentiment kit using VersaMark watermark ink and heat embossed a fine white embossing powder. I trimmed the sentiment into a banner and adhered it to the card with a combination of stampin' dimensionals and liquid glue. My final touch for this card was some Sprinkled Sugar Stickles that I applied to the little heart on the owl. Aww... love how this turned out!


Thank you friends for checking out my blog post!
See ya next time.

Inky Hugs!
Crystal

Saturday, March 2, 2019

~ Friends of Unity March Blog Hop ~

Hello there! It's time for another fabulous hop with Friends of Unity!! Our cue for this month's hop is Creativity... at first I thought I would make a card focusing on one of the cute crafty stamps that Unity carries, but I decided to go another direction for this hop. 


For last month's hop, I tried out some new watercolor markers and mentioned that I wanted to use them in different ways to see how well they work. Well, that's exactly what I did for this hop! So let's get to it!


So these are my cards using the Staedtler Marsgraphic Duo Double-ended watercolor markers -
two ways! I just had to ink up the gorgeous and surprisingly huge Blooming Peonies! I love these beautiful flowers!


For my first card, I used the watercolor markers directly on the Canson XL watercolor paper. I started with the darkest color near the bottom of the petals and then using a lighter color I tried to blend the colors out. This didn't work very well... and the paper ended up pilling! Not cool! Once I realized this was going to be an issue, I didn't try to blend the colors out as much. I went over the areas just twice with two colors and it seemed to be working okay. I continued with this method throughout my coloring and then decided that I would only do two colors for the leaves so they would blend easily and I wouldn't have the same issue. That actually worked out really well. So, I'm thinking blending two colors is okay as long as you don't go over the same area more than a couple times.


For my second card, I used the same method I used on my card last month. I scribbled the markers onto my acrylic block and then picked up the color using my watercolor pen and painted away. With this technique the colors painted beautifully and blended well. I did notice the color was much lighter and took more applications to achieve a darker color... But I didn't have any pilling of the paper. So... what have I learned? Well, first of all... the tips on these are really like a marker, not at all like the brush tip on the ZIGs. That is a huge difference in the direct to paper watercoloring in these two products. Secondly, they watercolor beautifully when applied with a watercolor pen and I do really love the assortment of colors in the pack of markers. So, if you are looking for watercolor markers that are reasonably priced, these are great when applied with a watercolor pen or brush.


I couldn't help but stamp this gorgeous bloom again inside the cards. I colored the inside with Prismacolor pencils. I blended the colors with the pencils and the colorless blender pencil. I tried to use similar colors to the front of the card... and I think I did pretty well. I love how it brings some of the pretty on the front of the card to the inside of the card!


One more look here with both cards... the direct-to-paper watercolor on the left and the watercolor pen watercolor on the right. The sentiment for these cards is found in one of my favorite sentiment kits called Abundant Blessings. I hope you found this post inspiring, informative, 
and, of course, creative!


Now, let's get to the hop!
A few of my friends are having giveaways so be sure to hop and comment on each stop for your chance to win a fabulous prize! 


Crystal <--- you're here

up next ---> Joyce


Thank you friends for checking out my blog post!
See ya next time.

Inky Hugs!
Crystal


Friday, February 22, 2019

Unity Stamp Company ~ Frankly Said ~ Watercolor Wash Birthday

Hello there! I'm dropping in with a super quick card... seriously, this is really quick! The most time-consuming part of this card was the dry time for the watercolor washed background.


I could have dried the background with my heat tool, but I decided to let it sit overnight so that I didn't re-heat the embossed sentiment from Unity's Frankly Said sentiment kit. So, to start I heat embossed the black sentiment onto the watercolor paper. Using painters tape, I taped down the watercolor panel to my board and wet the paper with a clean watercolor pen. I got the paper very wet... and funny note here... that's when the pizza delivery guy arrived with our dinner. LOL! So... after all that fun, I came back to my watercolor paper that was still a little wet and brushed more water on it. I scribbled my orange ZIG over my acrylic block and picked up the ink with my watercolor pen. I then brushed over the background. I went over it a couple of times to intensify the orange on the top, but I didn't want it too dark and I wanted to go with an ombre look... and the pizza was getting cold! LOL


The next day, I came back to my watercolored panel and I love how the background turned out. I die cut it with the Big and Little Chain Rectangle die by Gina Marie Designs. I die cut a piece of black card stock with the largest die in the set and then I adhered the black layer to a kraft card base. I popped up the watercolor panel using foam tape and that was it! I love the sassy sentiment on this card and I know the recipient will get a kick out of it!

Thank you friends for checking out my blog post!
See ya next time.

Inky Hugs!
Crystal

Saturday, December 29, 2018

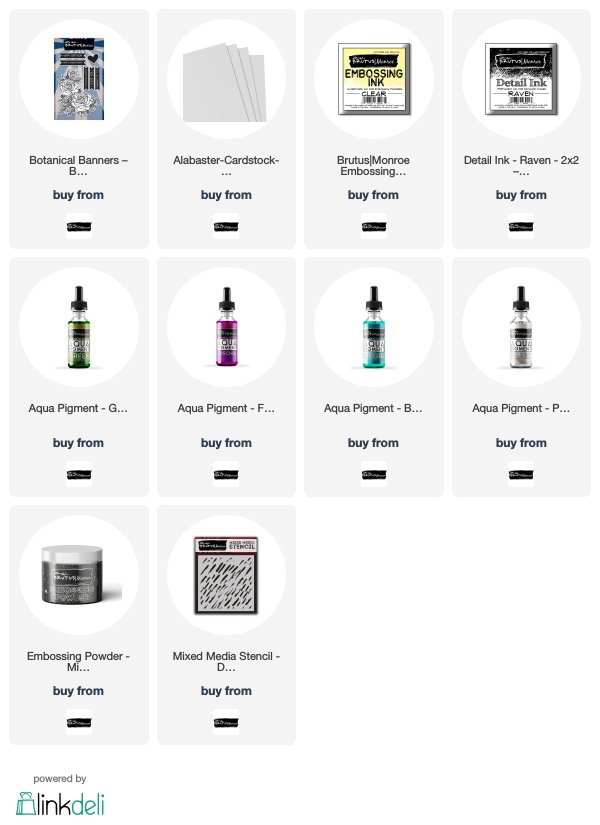
Brutus Monroe ~ Botanical Banners ~ Happy Birthday

Hello! I'm here with another guest spot featuring the gorgeous Botanical Banners stamp set... Oh My Goodness! These gorgeous flowers were a dream to watercolor! Let's get right to it, shall we?


I stamped the Botanical Banners floral set onto Canson XL watercolor paper (140lb) with Brutus Monroe Clear Embossing Ink and heat set a fine black embossing powder. This is my favorite technique for watercoloring because the raised edges of the heat embossed image keep the watercolors pretty well contained. I then watercolored the image by putting a couple drops of the Aqua Pigment on my acrylic blocks, one color per block so there wasn't any chance of mixing.


 I used my watercolor pen to pick up the colors, cleaning off my pen with paper towel between colors. I have to admit when I used the Pearl Aqua Pigment to blend with the Fuschia on the petals of the flowers... I was blown away! It was just so gorgeous and the shimmer! Love it!


All the shiny on the card made it a little difficult to get a picture. In this picture though, I think you can see the shimmer from the Pearl Aqua Pigment watercolors on the petals but also around the flower with the Blue Green Pigment watercolors.... I just couldn't resist using the Pearl again after seeing how beautiful it was on the petals.


Here's one last shot at the shimmery layers on the card. I just can't get enough of it!


Once my watercolored panel was dry, I die cut it with a stitched rectangle die and set it aside. I have just been itching to give this Milky Way embossing powder a try every since it arrived and I have to tell you it is so cool! I thought I'd give it a try on a colored piece of card stock but didn't want to do your typical black or maybe dark blue... so I grabbed this Lavender card stock from my stash. I laid the Down Pour stencil over the Lavender card stock and dabbed the Clear Embossing Ink all over the stencil making sure not to push too hard because the ink pad is really juicy, but I did make sure to get good coverage through the stencil. I removed the stencil, added the Milky Way embossing powder and then heat it up and Oh. My. Goodness. Wow! I love this stuff! It has such an awesome look to it! Love love love! Anywho, I trimmed my background piece and adhered it to a card base of Alabaster card stock. I then popped up the watercolor panel with some foam tape. My last touch for the card was the sentiment... I stamped the happy birthday banner from the Botanical Banners stamp set with Raven Detail Ink and then just fussy cut it by hand. I adhered it to the card and called this one Done!

I have had so much fun sharing my creations with you this month. I hope you've enjoyed them!

Thanks so much for stopping by!
See ya next time.

Inky Hugs,
~ Crystal


{Supplies}

Affiliate links are used:

Friday, October 5, 2018

Scrapping for Less ~ March 2018 FOTM ~ Let's Make Some Birthday Cards

Hello! Today, I am sharing a handful of cards I created using an older Flavor of the Month card kit from Scrapping for Less.
I found myself in need of some birthday cards and I remembered this sweet March 2018 Flavor of the Month card kit in my stash called It's All About Ice Cream. The perfect kit to replenish my birthday card stash!!


For all of the cards I created, I went with a pretty simple design... I started with a 5-1/4 x 4" piece of patterned paper from the collection. Some of those I mat on a piece of 5-3/8 x 4-1/8" piece of coordinating card stock... some I just left as is and adhered to a white card base.
This first card I watercolored and die cut with a wonky rectangle die. I stamped the sentiment from the Flavor of the Month Year 1 sentiment stamp set and then popped it up on the card with foam tape. I added a few sequins and that was it for card one.


For my second card, I added a strip of the pretty ribbon that I adhered to the back of the patterned paper. I then stamped the cute Flavor of the Month Logo stamp masking the center so I could stamp Happy Birthday from the FOTM Year 1 sentiment stamp instead. I just used a ruler and a Memento tuxedo black marker to add the masked lines back in and then stamped the sentiment. I colored the image using the following Copic markers ~ R14, R20, R29, B02, B21, BG000, BB01, BG45, E0000, E00, E23, E25, Y15. I fussy cut the focal image and then popped it up on the card. I added a few red sequins and this one was done.


For my third card I had to get creative because I didn't have a full 5-1/4 x 4" piece of patterned paper left over so I combined two papers and mat them on a green piece of card stock. This card was pretty simple... I utilized the fantastic cut-a-parts included in the patterned papers. I mat this particular one on red card stock and then popped it up on the card. I added a few of the Silver Glossy Dots and then decided I wanted to also use the cute Lawn Fawn Treat Yourself stamp set. 


I thought it would be fun to add a gift card for an ice cream shop (only had this gift card to show... sorry!) inside so I paper pieced the ice cream tub using the papers from this collection and adhered it on a strip of the same patterned paper that I had stamped the sentiment. I colored the little bit of ice cream using R20, E27, E51. I left the bottom portion of the card empty so I can write my birthday wishes to the recipient.


Now getting creative again, I cut the music note patterned paper in half and adhered it along with the green/white polka dot paper to the mat of orange card stock. I mat another cut-a-part paper onto red card stock and popped it up on the card with foam tape. I used my last five Silver Glossy Dots to finish off this card.


My last card came together pretty simply with the layers of patterned paper and the addition of the tag. I stamped the Ice Cream Marci directly on the tag along with the sentiment and then set the tag aside. I stamped Ice Cream Marci again on a scrap piece of white card stock and then paper pieced her shirt with the pink/white polka dot paper. I colored her in with the following Copic markers E0000, E00, E17, E23, E27, E47, E49, B91, B95, RV10, RV14, RV21. I then fussy cut her out and adhered her to the tag. I added some pink and white ribbon that I tied off with some twine... all from my stash. I then popped up the tag on the card and called this last card done!

There are some March 2018 Flavor of the Month card kits still in the shop. There's also some mini collections available in the shop. You can check out all of those kits... here.

Thanks so much for stopping by!

See ya next time.
~ Crystal


Wednesday, May 30, 2018

Scrapping for Less ~ You're Gonna Need These!!

Hello! Today, I'm sharing a super fun birthday card using Art Impressions Sunny Shades stamp set. Isn't this a funny set?! I just love these fun ladies in this image!


I stamped the image using VersaMark watermark ink onto watercolor paper and then heat embossed some ultra fine black embossing powder. Since the image has some smaller detailed spots, I wanted to be sure that the watercolors would stay where I put them - so that's why I heat embossed the image. I also did it for the cake... all those candles were so much easier to watercolor with the raised image.


Once I had my images ready, I pulled out my ZIG Clean Color Real Brush watercolor brush pens and had a blast coloring. I did pick out my papers beforehand so that I could pull the colors from the papers to use on the images. Sometimes, I do the reverse and then panic trying to find the right paper so I wanted to avoid that.


I thought this sentiment was hilarious and I really designed the whole card based on it! Too funny! Not sure who will get this fun card, but I sure had a ton of fun making it! This fabulous stamp set is available in the shop... here!

Thanks for stopping by!

See ya next time.
~ Crystal


Monday, February 12, 2018

Papertrey Ink Floral Challenge ~ Happy Birthday!

Hello! I'm super excited! I was able to make another card for the 11th Anniversary Floral Challenge over at Papertrey Ink! I am having so much fun with these challenges!


For this card I started with a piece of watercolor paper and I smooshed some Fossilized Amber Distress Oxide ink on my craft mat and spritzed it with a little water. I dabbed my paper in it. I did it just a couple of times to get the background. I then put my watercolor paper in my splatter box and splattered some gold silks. It's all shimmery and pretty! I set that aside to dry and inked up some pretty flowers using the Gran's Garden stamp set and dies. I adhered the flowers to my card and stamped my sentiment using the Ways to Say: Birthday mini stamp set. I die cut that out with a banner die and then die cut another banner in Plum Pudding card stock. I layered the banners and popped them up on the card. Another card for the PTI challenges AND another birthday card for the stash! Woohoo!

Here are the products I used for this card:
Stamps: Gran's Garden, Ways to Say: Birthday
Card Stock: White, Watercolor paper, Plum Pudding
Ink: Lilac Grace, Plum Pudding, Harvest Gold, Lemon Tart, Green Parakeet, New Leaf, Fossilized Amber Distress Oxide
Tools: Heat gun, Mini Misti
Miscellaneous: Gold silks (Fun Stampers Journey)

Thanks for stopping by!

See ya next time.
~ Crystal

Sunday, December 3, 2017

A Happy Masculine Birthday!

Hello! I know when it comes to those masculine birthday cards, it can be hard to figure out a design. I found myself in need of a handful of those very cards. Thank goodness I happened upon a great card in Unity Show & Tell that I was able to CASE and duplicate pretty quickly so I can mark that off my to-do list.


I just adore this moose from the Winter Wild SMAK kit. I was super excited to receive it as my gift for being the Growing in Unity girl a couple months ago. I stamped the trees with Peeled Paint Distress Oxide ink by first stamping them off on a scrap so that I would get a lighter image. I then stamped the the moose over the trees using Walnut Stain Distress Oxide ink. I also added a little bit of Vintage Photo and Antique Linen Distress Oxide inks to give the moose a bit more dimension. Once that was done, I ran them through my big shot with my Brushed Off Rectangle die from Papertrey Ink. Then the fun part... which patterned paper to use with it?!?! 


I finally decided on some fun plaid papers from a paper pad by The Paper Studio called Lewis Family Vacation. I am loving these papers!! I chose a few different ones and die cut them using a rectangle stitched die. The leftover scraps from the die cutting made for quick flags! I stamped the Happy Birthday sentiment from the For the Guys kit and cut it down to a flag, as well. And then I adhered the layers to a white card base after stapling the flags to the main panel using mono multipurpose glue. I made 4 of these pretty quick since I used the Tim Holtz Platform. I plan on making some more... I need just a few more and why not stock up?!

Thanks for stopping by!

See ya next time.
~ Crystal