Showing posts with label Unity. Show all posts

Wednesday, February 26, 2025

Best Day Ever Memory Dex Card ~ Best Day Anya ~ The Greeting Farm

 Hello there crafty friend!
Today I'm sharing another fun memory dex card featuring a sweet stamp set from The Greeting Farm!! 


I still had my memory dex dies on my desk so I thought, why not make another one? I've been wanting to ink up Best Day Anya for awhile and she's just too cute on this card.


I stamped the adorable Anya with Memento Tuxedo black ink and colored her up with Copic Markers. Unfortunately, I can't seem to find Best Day Anya on the website. But if you'd like to have her you can check out the Farmers Market and submit a request via email... maybe she'll be available for the next Farmers Market. Fingers crossed!

Here's a quick list of the Copic markers I used:
Skin: E000, E00, E21, E04, R00, R20
Hair: Y21, E43, E44
Ears: N0, N2, N4, N6, N8
Heart / Dress: R20, R14, R27
Bow: Y11, Y15
Boots: N0, N2, N4, N6


I die cut my layers for the memory dex card using an old retired die from my stash along with some fun papers called Mousin' Mix-Up {paper pad} from Unity. I also paper pieced the cute bow using the papers. I stamped the area around the bow onto the pattern paper and then I fussy cut it with scissors. I colored the edges of my fussy cutting with a Memento Tuxedo Black marker to make the cutting nice and neat and then I adhered it to the colored image.


I die cut a few circles to create a balloon using the Nesting Circles Die from Waffle Flower. I adhered a piece of black twine from Anya's hand behind her to the balloon. And then finished it off with a yellow bow. So fun to make. I hope I've inspired you to get inky!

Thanks so much for stopping by!
See ya next time.

Inky Hugs,
Crystal


{Please note that comment moderation is on. Your lovely comment will appear once approved.}

Friday, October 18, 2024

Falling for the Holidays 2024 {BYSHC} Linky Party ~ Beary Nice ~ Angie Blom Digital Designs

Hello there crafty friend!
I'm so excited to share my first card for the Falling for the Holidays 2024 {BYSHC} Linky Party hosted by the Build Your Stash Holiday Cardmakers Facebook group! I can't believe that it's time for our last Linky Party of 2024... where has the year gone?! So bonkers!


Today I'm sharing a sweet holiday card featuring the absolutely adorable Beary Nice Digital Stamp from our amazing Sponsor Angie Blom Digital Designs. This bear just released recently and I had to add him to my collection! I combined the cute bear with the fun sentiment from Blessing Poinsettia Digital Stamps in a Word Document. I resized them both and printed them off with a couple other digital stamps.

Here's a quick list of the Copic Markers I used to color up the bear and birds:
Bear: C00, C2
Nose: N0, N2, N4, N6
Scarf: N0 N2, N4
Birds: R20, R22, R43, R27
Bird Hat & Scarf: C00, C2, N0, N2, N4, N6 


I paired up the cute bear with the beautiful Hot Cocoa Warm Hearts 6x6 Paper Pad from our lovely Sponsor Not 2 Shabby. I used the pretty plaid pattern paper for my background layer measuring 4-1/4 x 5-1/2". It's adhered to a white A2 top fold card base using iCraft UltraBond Adhesive from our awesome Sponsor Therm O Web. 


I die cut the bear panel using the X Stitched Rectangle dies from our wonderful Sponsor Gina Marie Designs. I also die cut a couple scraps of the pattern paper using two washi dies from the Wonderful Washi {die set} from our fabulous Sponsor Unity Stamp Co. I popped up the bear panel using iCraft 3D Foam Tape Jumbo Roll (white) from Therm O Web. A quick and cute card to start off the Linky Party! Yay!


My card was inspired by the {BYSHC} Sketch 23! Have you visited the Build Your Stash Holiday Cardmakers Facebook group? We host a fun sketch challenge each month to inspire our holiday cardmaking all year long. I love using sketches for my cards... makes designing the cards so easy! I wouldn't be surprised if I use a couple more of our past sketches for the Linky Party.


I'm also a Sponsor for the Falling for the Holidays 2024 {BYSHC} Linky Party!! I have a wonderful prize set aside for one lucky winner. No photo for the prize as I'm leaving it as a fun surprise but it's retail value is $42 and all the goodies are from our fabulous Sponsors!! For a chance to win my fun prize make a Christmas card and link it up to the linky party blog post on the Build Your Stash Holiday Cardmakers blog. The winner will be announced on the {BYSHC} blog on Tuesday, October 29th.


Before you leave, be sure to stop by the Falling for the Holidays 2024 {BYSHC} Linky Party to check out all the wonderful Holiday inspiration that's been entered already!! I'm so excited to continue building my stash of holiday cards for 2024... I hope you'll join in the fun and play along!


Thanks so much for stopping by!
See ya next time.

Inky Hugs,
Crystal


{Please note that comment moderation is ON. Your comment will appear shortly.}

Sunday, September 29, 2024

Fall Book Lovers Card ~ Just One More Chapter ~ Unity Stamp Co.

Hello there crafty friend! 
I'm back with a sweet book lovers card for Unity's latest release. I love to read!! I even listen to books while I craft. It's gotten to where I almost need to have a book playing in the background for my mojo to get going! I was so excited to play with the new Just One More Chapter! Love it!


I stamped the book girl  and sentiment using Black Amalgam ink from Gina K. Designs and then I colored up the girl with my Copic markers. The girl was die cut with the new Maple Leaf Die. The edges of the leaf were distressed with a bit of Antique Linen Distress Ink.

Here's a quick list of the Copic markers I used:
Skin: E000, E00, E11
Hair: E70, E71, E74
Shirt: E40, E81
Pants: B91, B93, Colorless Blender
Books: C00, C2, YR21, YR15, YR16, YR27, YG61, YG63, E51, E55, E57, B91, B93
Ring: N2, N4
Nails: YR16
Ground: C00, C2


My pattern paper layers are from the beautiful Enrich the Soul {paper pack}... definitely my top five Fall paper packs! Love the colors in these papers! I die cut the leaf and sentiment papers using the largest die from the Deckle & Stitches Nesting Die Set.

You can check out my process video for this card here... Fall Book Lovers Card | Just One More Chapter | Unity Stamp Co.


The sentiment was die cut using a die from the Scalloped & Stitched Sentiment Nesting Dies. I adhered all of my layers together using Tombow Mono Adhesive liquid glue and then I popped up the Maple Leaf girl using Scrapbook Adhesive Crafty Foam Tape. Loving how this turned out! I hope you have an inkredible day! 

Thanks so much for stopping by!
See ya next time.

Inky hugs,
Crystal

{Please note that comment moderation is on. Your lovely comment will appear shortly.}

Saturday, September 28, 2024

Funny Happy Retirement ~ Flamingle into Retirement ~ Unity Stamp Co.

Hello there crafty friend! 
It's time for Unity's latest release!! I am so excited to share a funny retirement card with you all today! How fun is this awesome flamingo!? I love it! Flamingle into Retirement just released and I am loving the awesome sentiments included with this beautiful stamp!


I stamped the fun flamingo and sentiments using Black Amalgam ink from Gina K. Designs and then I colored up the flamingo with my Copic markers. I then die cut the flamingo using a die from the Scallops & Banners {nesting dies}

Here's a quick list of the Copic markers I used:
Flamingo: RV0000, RV10, RV11, RV14, BG10, BG02, BG13
Eyes: C00, C2, B00, B04, B29


My paper layers are from the beautiful Flutter Away {paper pack}. I am in love with the colors in these papers! And the feathers pair well with bird stamps! I just cut the feather & dot paper to 4 x 5-1/4" and cut my scrap of striped paper to 5-1/4" in length. Not sure what the width is since it was just a scrap. Those paper layers are adhered to a white A2 top fold card base.


The hilarious sentiment is popped up on the card with foam tape. Heehee! It's so fun! I stamped the Happy Retirement sentiment and then die cut it with the coordinating die called Happy Retirement {coordinating die}. I actually adhered this sentiment crooked and had to pull it up. What a mess!! It tore the paper underneath so I die cut a scrap of the same white card stock using the same die from the Scallops & Banners {nesting dies}. I trimmed it to just cover up the mess on the bottom of the banner. I then stamped and die cut the Happy Retirement sentiment again and this time I adhered it straight on the card. And bonus, it covered up the line on the banner to hide my fix! I added a little Card Bling from A Colorful Life Designs and called this one done!
Love how this turned out! I hope you have an inkredible day! 

Thanks so much for stopping by!
See ya next time.

Inky hugs,
Crystal

{Please note that comment moderation is on. Your lovely comment will appear shortly.}

Saturday, September 14, 2024

Quick Splatter Background ~ Sending Christmas Smiles ~ Unity Stamp Co.

Hello there crafty friend! 
I'm back with one more card for Unity's latest release. I can't get enough of all the sweet holiday stamps!! The Sending Christmas Smiles snowman is just too cute!! I love it!! This cute stamp is also available in photopolymer... {Clearly Unity} Sending Christmas Smiles. I love the options of either red rubber or clear photopolymer!!


I stamped the cute snowman and sentiment using Black Amalgam ink from Gina K. Designs and then I colored up the snowman with my Copic markers. I then fussy cut the snowman on the line, except for his arm. I left a bit of a white border so the arm wouldn't get lost in the dark background.

Here's a quick list of the Copic markers I used:
Snowman: C00, C1, C3
Nose: YR21, YR15, YR68
Hat: N2, N4, N6, B000, B00, B91, B23
Scarf: B000, B00, B91, B23


I thought I'd share the card that inspired my card for today. Do you ever CASE your own cards?! CASE stands for Copy And Share Everything. I thought it would be fun to CASE my snowman card from last year. I've been asked several times how I made this card last year so I thought it was a perfect excuse to do it again and record my progress.


This is such a simple card design! I love how quick it comes together! And it's perfect for the big stamps like the new Sending Christmas Smiles snowman and last year's Something About Christmas snowman. It would even work well with The List Guy. The only difference between the two cards, other than the card stock and the stamp, is that I didn't splatter the snowman on the Something About Christmas card.

You can check out my process video for this card here... Quick Splatter Background | Sending Christmas Smiles | Unity Stamp Co.


I adhered all of my layers together and called this one done! Love how this turned out! I hope you have an inkredible day! 

Thanks so much for stopping by!
See ya next time.

Inky hugs,
Crystal

{Please note that comment moderation is on. Your lovely comment will appear shortly.}

Thursday, September 12, 2024

Hilarious Vintage Holiday Card ~ Ho Ho No Pissy Kitty ~ Unity Stamp Co.

Hello there crafty friend! 
I'm back with another holiday card for Unity's new release. I just adore this hilarious new kitty stamp!!! LOL! The Ho Ho No Pissy Kitty stamp is just too fun and all the sentiment are freaking hilarious!! Love it!!


I stamped the fun kitty and sentiments using Black Amalgam ink from Gina K. Designs and then I die cut the kitty using a die from the Scallops & Squares {nesting dies}. I also die cut a mat from Kraft card stock using the slightly bigger square die from the same set. And then I Copic colored the fun kitty.

Here's a quick list of the Copic markers I used:
Kitty: N0, N2, N4
Eyes: YG21, YG03
Hat: R20, R14, R46, C00, C1, C3
Grounding: C00, C1


Inspiration for my card comes from last month's {BYSHC} Sketch Challenge 48! Even though this challenge is over, I still love this sketch and plan to use it often. As with all of my sketches, it's meant to inspire not require! So as I often do, I altered the design just a bit by adding another striped paper that I had torn.


I paired up the kitty with the beautiful Festive Christmas {paper pack}. I die cut the papers using the largest die from the Scallops & Rectangles {nesting dies}. Distressed all of my layers with Vintage Photo Distress Ink. I then tore the green striped paper and adhered it to the red. I adhered my layers together on an A2 top fold card base of Kraft card stock from Papertrey Ink.

You can check out my process video for this card here... Hilarious Vintage Holiday Card | Ho, Ho No Pissy Kitty | Unity Stamp Co.


I'm playing along with the awesome Color Hues Challenge #94: Rust & Green. I rusted up my red with some fun Vintage Photo Distress ink. Love this fun challenge!


I couldn't pick just one sentiment so I went with all three that I had stamped. I trimmed the sentiments and adhered them all to the card. To finish this one off, I added a few enamel dots from my stash. Love how this turned out! I hope you have an inkredible day! 

Thanks so much for stopping by!
See ya next time.

Inky hugs,
Crystal

{Please note that comment moderation is on. Your lovely comment will appear shortly.}

Thursday, August 22, 2024

Best Chick in Town ~ Witty Chick Whimsy ~ Unity Stamp Co.

Hello there crafty friend! 
I'm back with another fun chicken card for Unity's latest release. I can't get enough of all the awesome chicken stamps!! The Witty Chick Whimsy stamp is just so beautiful with the flowers and the glasses!! Love it!! This beautiful stamp is also available in photopolymer... {Clearly Unity} Witty Chick Whimsy. I love the options of either red rubber or clear photopolymer!!


I stamped the sweet chicken and sentiment using Black Amalgam ink from Gina K. Designs and then I colored up the chicken with my Copic markers. I then die cut the chicken using a die from the Scallops & Circles {nesting dies}.

Here's a quick list of the Copic markers I used:
Chicken: YR000, YR12, YR07, Y21, Y15, Y26, BG70, BG72, BG75
Flowers: Y21, Y15, Y26, YR000, YR07, YG91, YG03
Ground: C00, C1


Even though the {BYSHC} Sketch Challenge 48 is for Christmas cards, it doesn't mean it can't be used for other occasions! {Please just remember if you do use the sketch, you can't share it in the BYSHC Facebook group unless it's Christmas or winter themed.} But I'd love for you to share in my Tawny Owl Paperie Inky Inspiration group! As with all of my sketches, it's meant to inspire not require! So as I often do, I altered the design just a bit by adding another layer.


This sketch is fantastic for paper scraps but since this is a new paper pack that I just added to my stash, I cut random strips from all of the papers. I think I just did 1/4" and 1/2" strips and then made a fun pattern with them on a 4 x 5-1/4" piece of thin white card stock. I cut off the excess from the edges and die cut the papers using the stitched rectangle die from Scallops & Rectangles {nesting dies}. I then die cut the grid pattern paper using the largest die from the same die set. I think it's a wonderful contrast to the different patterns! I adhered my layers together on an A2 top fold card base of Kraft card stock from Papertrey Ink.


I placed the circle on the top layer and used a pencil to mark where I wanted to cut the edge. I used the Tim Holtz Tonic Guillotine Comfort Paper Trimmer to cut that edge. I trimmed up the sentiment and adhered both pieces to the card. To finish this one off, I added some Ranger Glossy Accents to the glasses for some fun shine. Love how this turned out! I hope you have an inkredible day! 

Thanks so much for stopping by!
See ya next time.

Inky hugs,
Crystal

{Please note that comment moderation is on. Your lovely comment will appear shortly.}

Saturday, August 17, 2024

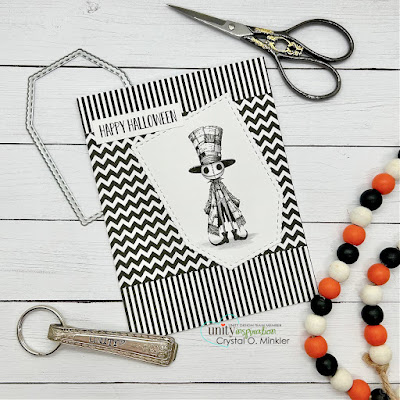
Happy Halloween Trio ~ Eerie Enchantment ~ Unity Stamp Co.

Hello there crafty friend! 
I'm back with a few fun Halloween cards! So excited to add three more Halloween cards to my stash! Woohoo! These three cards were SO super quick to make - it's bananas! All three cards feature stamps from the brand new Eerie Enchantment stamps from Unity! 


I stamped the scarecrow, witch and grim using Black Amalgam ink from Gina K. Designs and then I colored them up very simply with the following Copic markers: C00, C1, C3. I then die cut the witch using a die from the Scallops & Circles {nesting dies}. And I die cut the scarecrow and grim using a die from the Make A Tag {die set}.


Inspiration for my card today comes from the Tawny Owl Paperie Inky Inspiration Sketch 24. Such a versatile sketch! I love how quickly these cards came together! The sketch, as always, is meant to inspire not require. So let the sketch lead in your design, but don't feel limited by it. I hope you'll join us in the Tawny Owl Paperie Inky Inspiration Facebook group and play along with the sketch!


I wanted to keep the cards simple and easy to duplicate. So a black and white palette was perfect! I went looking through my pattern papers and was surprised to find the perfect papers in the Mousin' Mix Up {paper pack}. Yay! Luckily I had two paper packs so I could make the backgrounds all the same.


I think this last card just may be my favorite! I love the tag turned upside down. I stamped the sentiment three times and trimmed them up and then adhered them to the cards. So much fun and again SO super quick! I hope you have an inkredible day! 

Thanks so much for stopping by!
See ya next time.

Inky hugs,
Crystal

{Please note that comment moderation is on. Your lovely comment will appear shortly.}

Saturday, August 10, 2024

Happy Halloween ~ {Boo} to You ~ Unity Stamp Co.

Hello there crafty friend! 
I'm back with a fun Halloween card for Unity's latest release. Christmas is definitely my favorite season to make cards for, but Halloween is a close second! And I am loving the adorable {Boo} to You stamps from Unity! This adorable set of stamps is also available in photopolymer... {Clearly Unity} Boo to You. Are you loving that Unity is now offering some stamps in photopolymer?! I do!


Such adorable stamps! I, of course, love the kitty! I had to include it with the ghost. I stamped the kitty and ghost using Black Amalgam ink from Gina K. Designs and then I colored them up with my Copic markers. I then die cut them using a die from the Scallops & Circles {nesting dies}.

Here's a quick list of the Copic markers I used:
Ghost: C00, C1, C3
Hat: YG11, YG23, V000, V12, V15, V17, N2, N4, N6
Pumpkin: YR21, YR15, YR16
Cat: R00, R20, N0, N2, N4, N6
Ground: C00, C3


Inspiration for my card today comes from an older Tawny Owl Paperie Inky Inspiration Sketch... lucky number 13! Haha! This is a favorite and it works really well with scraps! I had a bunch of scraps in my Trick or Treat {paper pack} so this was the perfect sketch. Of course, I altered it, but the basic design was my starting point.


I didn't want to use a larger circle to mat the ghost circle so I just die cut a circle from True Black card stock from Papertrey Ink and offset it from the focal circle. I really like the dimension it gives to the card. I stamped the sentiment using Black Amalgam ink and trimmed it up. I mat it with black card stock.


I adhered the circles together and then I adhered the sentiment to the bottom portion making sure it was lined up on the card where I wanted it. I was then able to add foam tape to the back of both pieces and then I popped them up on the card. To finish it off, I added three black enamel dots. Such a fun card to make! I hope you have an ink-redible day! 

Thanks so much for stopping by!
See ya next time.

Inky hugs,
Crystal

{Please note that comment moderation is on. Your lovely comment will appear shortly.}

Wednesday, January 17, 2024

Membership Wednesday ~ January 2024 BOM Butterfly Breeze Meadow ~ Unity Stamp Co.

  Hello there crafty friend!
Today I'm sharing a quick sympathy card featuring the January 2024 Background of the Month membership from Unity called Butterfly Breeze Meadow. Yesterday was a rare day where I just didn't feel like coloring and a monochromatic card sounded perfect.


I stamped the beautiful A2 background stamp on Stampers Select White Card Stock from Papertrey Ink using Lost Shadow Distress Ink. I trimmed the panel down to 3-3/4 x 5".


I die cut a piece of Smokey Shadow Card Stock from Papertrey Ink using the largest die from the Postage Stamp {nesting dies}, also from Unity. I adhered the stamped background to the postage panel and then adhered the panel to a Stampers Select White Card Stock A2 card base.


I could of sworn that Unity has or had a 'with sympathy' die but I looked through my stash and didn't find one and then I checked the website and didn't find one. Maybe I imagined it. I don't know, but I still wanted to go with a sentiment that conveyed the feeling of a sympathy card so I went with the On My Mind {die}. I die cut the sentiment from Weathervane Card Stock from Papertrey Ink two times. And then I die cut it from Smokey Shadow Card Stock. I adhered the layers of the sentiment together using the awesome Bearly Art Precision Craft Glue. I love the fine tip on this glue!! And it hasn't clogged up on me one time! Love, love, love it!!


Here's a quick look at the Background of the Month membership this month! So gorgeous!


 Well, that's it for me today! I'll be back next week with a card probably using a stamp from the January 2024 Kit of the Month. Not totally sure, but that's what I'm leaning towards. Until then, have an ink-tastic day!


Thanks so much for stopping by!
See ya next time.

Inky Hugs,
Crystal


{Please note that comment moderation is on. Your lovely comment will appear once approved.}

Wednesday, October 11, 2023

Membership Wednesday ~ October 2023 BOM & KOM ~ Unity Stamp Co.

  Hello there crafty friend!
Today I'm sharing a pretty Fall card using the awesome October 2023 Background of the Month membership from Unity called Woodgrain Whisper along with the October 2023 Kit of the Month membership from Unity called Golden Glow. 


A fun ink smooshed background of Fossilized Amber, Carved Pumpkin, Peeled Paint and Vintage Photo Distress Oxide inks. I stamped the Woodgrain Whisper background stamp over the ink smooshed background using Ground Espresso Distress Oxide ink. 


I stamped the pretty flower from the Golden Glow Kit of the Month membership using Squeezed Lemonade and Fossilized Amber Distress Oxide inks and a bit of Vintage Photo Distress ink in the center. I also painted the center of the flower using the Vintage Photo Distress ink. The leaves were stamped with Peeled Paint Distress Oxide ink.


The lines in the center of the flower were lost when I painted it so I used a white gel pen to add some highlights. I may have gone a little overboard with them. I also did some dots. I fussy cut the flower and the leaves and adhered them together. The sentiment from the October 2023 KOM was heat embossed with white pigment ink, white embossing powder and a heat tool.


Here's a look at the whole Kit of the Month for October!! Another great kit fill with Fall images! Can you believe that you get this full sheet of rubber for only $44.99. That includes shipping! You also get a $6.95 discount on every order from Unity over $45. And you can purchase any past kits for only $34 plus shipping. Such a great value!


Here's a quick look at the Background of the Month membership this month! So fun! This membership is available for only $18.99. That includes shipping! Included with both of these memberships is a wonderful inspiration sheet with pictures and step-by-step instructions for two cards so you can easily recreate the cards yourself. And now when you sign up you have the ability to pause, skip or cancel your subscription within your Unity account.


 Well, that's it for me today! I'll be back next week with inspiration using the gorgeous October 2023 Whit Kit. Have an ink-tastic day!

Thanks so much for stopping by!
See ya next time.

Inky Hugs,
Crystal


{Please note that comment moderation is on. Your lovely comment will appear once approved.}

Wednesday, September 27, 2023

Membership Wednesday ~ September 2023 BOM Off the Grid ~ Unity Stamp Co.

  Hello there crafty friend!
Today I'm sharing a fun card using the cool September 2023 Background of the Month membership from Unity called Off the Grid. I had a fun idea for a background only using a portion of the stamp.


I stamped a piece of white card stock using Sugar Cube Pigment ink from Taylored Expressions. I applied Alabaster White Embossing powder from Brutus Monroe and melted it with my heat tool. 


Then came the fun part... I ink smooshed some Candy Apple and Wilted Violet Distress Oxide inks. I also blended some of the inks to fill in the background.


I die cut the background using the largest die from the Deckle & Stitches Nesting Dies, also from Unity. I dried the background completely, added some white acrylic paint splatters, and then adhered it to a white A2 top fold card base.


I stamped the beautiful Zinnia on a scrap of white card stock really only focusing on the one flower. I didn't want the whole cluster for my card so the grid background would show. I colored up the zinnia with just a few purple Copic markers: V0000, V000, V12, V17. I didn't want it very dark so it would pop on the background. I stamped the 'hello' sentiment from the September 2023 Kit of the Month called Harvest Hues. Love the distressed look of the sentiment. The flower is fussy cut and I colored up the edges using a Memento Tuxedo Black marker to make it all nice and neat. I also fussy cut the sentiment but I left the edges white. Both are popped up on the card with foam tape.


Here's a quick look at the Background of the Month membership this month! So fun! This membership is available for only $18.99. That includes shipping! Included with both of these memberships is a wonderful inspiration sheet with pictures and step-by-step instructions for two cards so you can easily recreate the cards yourself. And now when you sign up you have the ability to pause, skip or cancel your subscription within your Unity account.


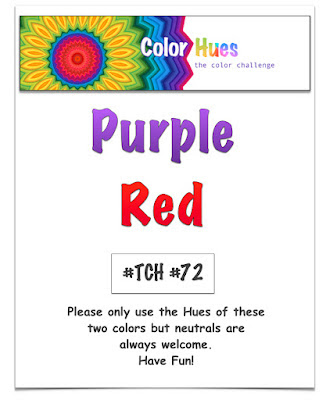
I'm playing along with the Color Hues Challenge #72: Purple & Red


 Well, that's it for me today! I'll be back in two weeks with inspiration for one of the fab October memberships. Just not sure at this point which one I want to play with first. {Be warned... they are ALL amazing!!} Until then, have an ink-tastic day!


Thanks so much for stopping by!
See ya next time.

Inky Hugs,
Crystal


{Please note that comment moderation is on. Your lovely comment will appear once approved.}