Showing posts with label Daisies. Show all posts

Wednesday, July 16, 2025

Membership Wednesday ~ July 2025 BOM Sunny Side Up ~ Unity Stamp Co.

Hello there crafty friend!
Happy Membership Wednesday! Today I'm sharing a fun card using the spotlight technique featuring the awesome Sunny Side Up background stamp from the July 2025 Background of the Month membership. 


Usually I color the spotlight when I do this technique, but this time I wanted to change things up and spotlight just the stamp in black and white. 


I die cut the one flower using a die from the Scallops & Circles {nesting dies} and then colored the background using a handful of Copic markers. I used B000, BV00, BV02, Y11, Y15.


I die cut the panel using the largest die from the Scallops & Rectangles {nesting dies} and adhered it to a white A2 top fold card base. I popped up the spotlight circle using foam tape and then I trimmed the sentiment from the July 2025 Kit of the Month and adhered it across the card.


Here's a quick look at this month's Background of the Month membership!

Well, that's it for me today! I hope you've been inspired to play with your membership stamps! Have an INKredible day!


Thanks so much for stopping by!

Inky Hugs,
Crystal

Monday, June 16, 2025

Inky Paws Challenge 241 ~ Sunny Days Theme Challenge {Week 3}

Hello there crafty friend!
 Sharing some more inspiration for week 3 of the Inky Paws Challenge #241 - Sunny Days Theme Challenge! You have until Friday, June 27th to get your entries in for the challenge and a chance to win a $20 store credit to Newton's Nook Designs!


The weather is definitely shifting into Summer... the heat is here!! I just had to play with the fun daisy dies for a fun sunny day card!


I die cut the daisies from white, yellow and green card stock using the fun dies from the Daisies Die Set. These daisies came together so quickly using these dies!


I wanted a fun sunny days background for my daisies so I grabbed the Summertime 6x6 Paper Pad and die cut all of the pieces using scraps from the Frames & Tags Die Set.


I had a hard time picking which sentiment to use for my card last week so I had a little victory and used the other sentiment from the Sunflower Days Stamp Set. I adore this font and the sentiment!


Now it's your turn to get your paws inky with your Newton's Nook Designs products and create a card using this month's fun theme. Be sure to link up to the Inky Paws Challenge! Can't wait to see your projects!


Thanks so much for stopping by!
See ya next time.

Inky Hugs,
Crystal


{Please note that comment moderation is on. Your lovely comment will appear once approved.}

Wednesday, June 4, 2025

Hello Sunshine ~ Petal Princesses ~ The Greeting Farm

 Hello there crafty friend!
Today I'm sharing a sweet card featuring the beautiful Daisy Anya from the Petal Princesses Big Kit from The Greeting Farm!


I had mentioned last month that when my kit arrived I couldn't help but ink up a few of the cute Petal Princesses and this one was my first to color up! Daisies are my favorite flowers so it was a must!
Unfortunately, the Petal Princesses Big kit isn't on the website currently but if you'd like to add these beauties to your collection, you can check out thFarmers Market and submit a request via email. Fingers crossed it'll be available for the next Farmers Market.  


I inked up Daisy Anya with Memento Tuxedo Black ink and colored her up with Copic markers. I fussy cut her leaving a white border. I also stamped the sentiment and trimmed it up.

Here's a quick list of the Copic markers I used:
Skin: E000, E00, E11, E04
Mouth: R20, R14
Hair: Y11, E43, E44
Daisy: C00, C2, C3, Y11, Y15, Y38, YG11, G14
Leaves: YG91, YG95, YG97
Dress: C00, C2, C3, Y11, Y15, Y38
Shoes: Y11, Y15, Y38


I paired up Daisy Anya with the Hello Daisy {paper pack} from Unity. These pretty papers and the colors worked so nicely with the colored Anya. It was almost like I had planned it... but I hadn't. The daisy papers measure 2-1/2 x 5" and 7/8 x 5". The golden yellow papers measure 2-3/4 x 5-1/4" and 1-1/8 x 5-1/4". The striped paper measures 2-3/4 x 3-3/4". And all of the papers are adhered to a white A2 top fold card base measuring 4-1/4 x 11" and scored at 5-1/2".


I popped up Daisy Anya and the sentiment with foam tape. And then I finished off the card with some yellow enamel dots. I hope I've inspired you to get inky!

Thanks so much for stopping by!
See ya next time.

Inky Hugs,
Crystal


{Please note that comment moderation is on. Your lovely comment will appear once approved.}

Monday, March 24, 2025

Inky Paws Challenge 238 ~ Showers & Flowers Theme Challenge {Week 4}

Hello there crafty friend!
 There's just a few more days to play along with the Inky Paws Challenge #238 - Showers & Flowers Theme Challenge! You have until this coming Friday, March 28th to get your entries in for the challenge and a chance to win a $20 store credit to Newton's Nook Designs!


This has been such a fun challenge! I hope you have a chance to play along with us if you haven't already! There's just a few days left to play!


I adore the sweet doxie from the Rainy Day Doxie Stamp Set so I just had to ink him up again. I stamped him with Memento Tuxedo Black ink and colored him up with Copic markers. I then die cut the image using the coordinating Rainy Day Doxie Die Set.

Here's a quick list of the Copic markers I used:
Doxie: E21, E13, E17, N2, N4, N6
Jacket: Y11, Y15, B0000, B00
Umbrella: V000, V01, V12, C00, C2, C3


I paired up the sweet pup with the Spring Blooms 6x6 Paper Pad. Daisies are my favorite flowers! So I thought it would be fun to use a couple daisy papers from the paper pad to create my card.


I die cut the background paper using the largest die from the Frames & Flags Die Set. I then die cut the daisy scene paper using a square die from the Frames Squared Die Set. I had originally chosen the yellow pattern paper with daisies for my strip across the card, but I think it was too much daisies. If that's even possible! LOL! So I changed it out with the gingham yellow papers which just happened to be a scrap in my paper pad. I added some dimension to the card by popping up the square focal image with the sentiment adhered to the bottom corner AND popping up the pup, all with foam tape.


Now it's your turn to get your paws inky with your Newton's Nook Designs products and create a project using the fun sketch. Be sure to link up to the Inky Paws Challenge! Can't wait to see your projects!


Thanks so much for stopping by!
See ya next time.

Inky Hugs,
Crystal


{Please note that comment moderation is on. Your lovely comment will appear once approved.}

Monday, March 10, 2025

Inky Paws Challenge 238 ~ Showers & Flowers Theme Challenge {Week 2}

 Hello there crafty friend!
 Have you played along with the Inky Paws Challenge 238 - Showers & Flowers Theme Challenge yet?! You have until Friday, March 28th to get your entries in for this fun challenge and a chance to win a $20 store credit to Newton's Nook Designs!


I am loving this fun theme challenge! I hope you have some time to play along with us.


I stamped the cute daisies from the Dainty Daisies Stamp Set on a scrap of white card stock and die cut it using the coordinating dies from the Dainty Daisies Die Set. I had fun coloring the daisies a pinky purple. 

Here's a quick list of the Copic markers I used:
Petals: RV10, RV11, V12, V15
Flower Centers: Y11, Y15
Leaves / Stems: YG11, YG23, YG17


I set the daisies aside and blended some Tumbled Glass Distress Ink over the Petite Clouds Stencil. I kept a light touch around the edges. And then I blended Mowed Lawn Distress Ink over the grass side of the Hills & Grass Stencil.


I die cut the panel using a stitched rectangle die from the Basic Frames Die Set. I adhered all of my layers to a white A2 top fold card base. I stamped the sentiment, trimmed it and popped it up on the card using foam tape. I finished off the card with a few translucent enamel dots from my stash.


Now it's your turn to get your paws inky with your Newton's Nook Designs products and create a project using the theme. Be sure to link up to the Inky Paws Challenge! Can't wait to see your projects!


Thanks so much for stopping by!
See ya next time.

Inky Hugs,
Crystal


{Please note that comment moderation is on. Your lovely comment will appear once approved.}

Monday, June 3, 2024

Inky Paws Challenge #224 ~ Color Challenge Reminder

 Hello there crafty friend!
 There's still time to play along with the Inky Paws Challenge #224 - Color Challenge! You have until this coming Friday, June 7th to get your entries in for the challenge and a chance to win a $20 store credit to Newton's Nook Designs!


Here's another look at the fun colors... Posy Pink, Sunny Yellow, Grass Green, and White.


I love the beautiful soft colors of this challenge! It got me thinking of Spring and then all of the rain we've been having here in Missouri. So naturally that had me thinking of the adorable Rainy Day Doxie Stamp Set. I just had to ink him up! I stamped the pup using Memento Tuxedo Black ink. I colored him up with my Copic markers and then I die cut him using the coordinating Rainy Day Doxie Die Set.


Here's a quick list of the Copic markers I used:

Pup: E11, E13, E17, E09
Umbrella: RV10, RV11, C00, C1, Y11, Y15
Rain Coat: YG11, YG05, Y11, Y15, RV10, RV11
Grass: YG11, YG05


I paired up the sweet pup with the Spring Blooms 6x6 Paper Pad. The colors in these papers are so perfect for this challenge! I die cut the daisy papers using the stitched scalloped die from the Framework Die Set. I die cut a scrap of white card stock using the tag die from the Frames & Tags Die Set and stamped the sentiment in the center. I adhered my paper layers to a white A2 top fold card base. I adhered the pup to the grass. I added foam tape to the back of the pup and the sentiment and then popped them up on the card. I made a little faux bow by tying a knot in yellow grosgrain ribbon. I adhered it to the card using a mini glue dot.


Now it's your turn to get your paws inky with your Newton's Nook Designs products and create a project with the color combo of Posy Pink, Sunny Yellow, Grass Green, and White. Be sure to link up to the Inky Paws Challenge! Can't wait to see your projects!


Thanks so much for stopping by!
See ya next time.

Inky Hugs,
Crystal


{Please note that comment moderation is on. Your lovely comment will appear once approved.}

Monday, May 27, 2024

Inky Paws Challenge #224 ~ Color Challenge

Hello there crafty friend!
It's time for a new Inky Paws Challenge... a beautiful Color Challenge
I sure hope that you'll join in the fun and play along with us with your Newton's Nook Designs products! You have until Friday, June 7th to get your entries in for the #224 Color Challenge and a chance to win a $20 store credit to Newton's Nook Designs!


Lovely Spring colors... Posy Pink, Sunny Yellow, Grass Green, and White!! 


My first thought when I saw these beautiful colors was the Pastel Basics 6x6 Paper Pad!! It has all the colors and it's so perfect. Plus, I already had some pieces die cut from my polka dot card last month that would be perfect for this card! 


I love mix matching all these beautiful papers to create cards! So easy and so pretty! I did have to die cut the green heart polka dot paper using the awesome frame die from the Frames & Tags Die Set. I trimmed a piece of the green heart polka dot paper slightly larger than the larger bottom window and then secured it to the back of the die using washi tape. A great way to utilize this awesome die without stockpiling a whole bunch of leftover pieces!


I stamped the beautiful daisies and the sentiment from the Dainty Daisies Stamp Set using Memento Tuxedo Black ink and colored up the daisies with a handful of Copic markers. I die cut the flowers using the coordinating Dainty Daisies Die Set. I trimmed up the sentiment and cut two very thin scraps of card stock. I adhered the scraps together and then adhered them on the back right edge of the sentiment allowing it to lay flat on the card when I adhered it.

Here's a quick list of the Copic markers I used:

Daisy Petals: C00, C1, C3
Daisy Centers: Y11, Y15, Y35, Y28
Stems / Leaves: YG11, YG23


Now it's your turn to get your paws inky with your Newton's Nook Designs products and create a project using the color combo of Posy Pink, Sunny Yellow, Grass Green, and White. Be sure to link up to the Inky Paws Challenge! Can't wait to see your projects!


Thanks so much for stopping by!
See ya next time.

Inky Hugs,
Crystal


{Please note that comment moderation is on. Your lovely comment will appear once approved.}

Monday, March 13, 2023

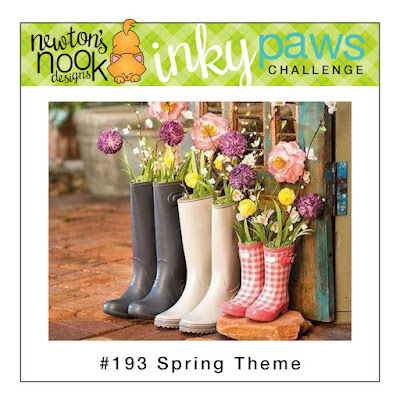
Inky Paws Challenge #193 ~ Spring Theme Challenge Reminder

  Hello there crafty friend!
There's still time to play along with the Inky Paws Challenge #193 - a Spring theme challenge! You have until this coming Friday, March 17th to get your entries in for the #193 Spring Theme Challenge and a chance to win a $20 store credit to Newton's Nook Designs!

Changing things up today with a flower stamp! Daisies are my favorite flower.


I just adore these sweet daisies from the Dainty Daisies stamp set from Newton's Nook Designs. I am also in love with the detail in the coordinating Dainty Daisies die set... oh my gosh! It even cuts out those itty bitty spots between the flowers. Love! Here's a quick list of the Copic markers I used to color up the daisies:

Pink Daisy ~ RV000, RV10, RV13
Purple Daisy ~ V01, V12, V15
White Daisies ~ C00, C1, C3
Daisy Centers ~ Y11, Y15, Y35
Leaves & Stems ~ YG11, YG13


I was so excited to see Spring colors in the Love & Chocolate Paper Pad. I hadn't played with these papers yet so I was happy to finally use a few for my card. I also used the wonderful Frames Squared Die Set to die cut all my pattern paper layers. The sentiment was also die cut using the largest circle die in the Frames Squared Die Set.


All my paper layers are adhered together and then adhered to a 5 x 10" card base scored at 5" for a 5" square card base. I adhered the two white daisies on the left to the sentiment circle and then I added foam tape to both pieces. I then popped them both up on the card.


Now it's your turn to get your paws inky with your Newton's Nook Designs products and create a project with a Spring theme. Be sure to link up to the Inky Paws Challenge! Can't wait to see your projects!


Thanks so much for stopping by!
See ya next time.

Inky Hugs,
Crystal


{Please note that comment moderation is on. Your lovely comment will appear once approved.}

Thursday, May 19, 2022

Simple Sympathy Card with Sepia Coloring on Kraft ~ Compassionate Daisies ~ Unity Stamp Co.

 Hello there crafty friend!
Today I'm sharing a card that us cardmakers don't necessarily like to make but sadly they are necessary. So I thought the beautiful new Compassionate Daisies stamp from Unity's new release would be perfect for a very simple and quick sepia colored sympathy card.


I kept the layers very simple with a 4-1/8 x 5-1/8" piece of Kraft card stock with the beautiful daisies and sentiment from the Compassionate Daisies stamped in an alcohol ink friendly ink.


For my sepia coloring I just used four Copic markers ~ E50, E53, E55, and E59.


I adhered the daisies panel to a 4-1/4 x 5-1/4" piece of True Black card stock from Papertrey Ink. I adhered the panel to a 4-1/4 x 11" Kraft card base; scored at 5-1/2". I left a bit of Kraft peeking out of the top and bottom of the base. 


Well that's it for me today! Do yourself a favor and go check out all the fab new releases at Unity for the second round of the Birthday Sale!! I'll be back tomorrow with my weekly Christmas card!


Thanks so much for stopping by!
See ya next time.

Inky Hugs,
Crystal


{Please note that comment moderation is ON. Your lovely comment will appear shortly.}

Sunday, August 30, 2020

Scrapping for Less ~ Summer Daisies Paper Pad ~ Post It Note Holder

Hello there crafty friend!
Today I'm sharing a fun swap that I made for fellow SFL design team member Stacy using the beautiful Summer Daisies paper pad that was recently released at Scrapping for Less. I combined the papers with some other products in my stash... let's have a look! 


I started with a cereal box... yup! You read that right. I cut all of my pieces for the post it note holder from the cereal box first. Here's a link to the tutorial I used... Easy Note Pad Holder Book.
I used the cereal box in place of the chipboard coasters mentioned in the tutorial.


I covered the cereal box pieces with pretty polka dot papers from Stampin' Up and then used the gorgeous Summer Daisies from SFL to decorate and embellish the other pieces. The beautiful ribbon is from Papertrey Ink... seriously a mash up of products from my stash! The daisy is one of my digital stamps available at Polka Dot Orchard... called Whoops a Daisy. I printed it out, colored it with a few copic markers and then fussy cut it. I couldn't find quite the right sentiment, so I just printed this one off from my computer on card stock and fussy cut it.


The side view... I only had a couple post it note pads in coordinating colors. 
This holder could hold a lot of post it notes!


The inside... isn't it cute?! I've had that mini pen from the Dollar Spot at Target for years... it works perfectly with this holder! 


To clean up the edges of my patterned papers I used a sanding block that I've had in my stash forever. I believe it's from Stampin' Up as well.


That's it! It was so fun to create something to send off to a crafty friend!
I definitely need to make more of these!

Check out all the new fabulous paper pads recently released at SFL here... New Paper Pads!!
This paper hoarder has to have them all! Lol..


Thanks so much for stopping by!
See ya next time.

Inky Hugs,
Crystal


Tuesday, April 30, 2019

Polka Dot Orchard ~ Spread Your Wings ~ Happy Mother's Day

Hi crafty friends!
I have my first Mother's Day card of the year to share with you today! I just love how this mixed media card turned out... but guess what? It's using digi stamps and copic markers! Yes! So... I guess it's more of a faux mixed media card LOL! Anyhow, I love it! 
The Spread Your Wings digi stamps by Polka Dot Orchard can be found... here!


When Jessica, the owner and artist of Polka Dot Orchard, shared a little sneak peek of this new digi set I fell in love! I love the designs of the stamps included and the possibilities are endless when combining them together in a word document. 

I started by adding the scribbled background stamp keeping it to one side of what would be my card front and then added the flowers stamp over top adjusting the size so a good amount of the scribble background showed through. I included some more digis on my page and then printed it off. I trimmed my cardstock down to four card fronts and then for this particular one, I ran it through my big shot with the MFT In & Out Diagonal Stitched Rectangle die.

I had so much fun coloring the flowers... I decided to go with warm oranges and yellows. I used the following Copic markers ~ Y000, Y06, Y15, Y17, Y28, Y38, E15, E97, YR14, YR21, YR24, YR27, G99, YG93, YG95.

I then colored my background alternating between the B000 and BV000 copic markers. I also added some V000 and some colorless blender to take away some color. To finish off the background I made a mask to cover up the flowers and then I added some Martha Stewart Metallic Champagne acrylic paint splatters, as well as some white splatters.


I wrapped some black metallic thread around the die cut panel and adhered the ends in the back with some tape. I adhered the panel on a black mat and then adhered the entire panel on a white card base. The sentiment... also included in the digi set of stamps... was also printed on my sheet of digis and I just trimmed it down and popped it up on the card. I added a skinny strip of black card stock underneath the sentiment to break up the white. My final touch was a few Nuvo glossy black drops.

I have plans to make a few Mother's Day cards this week to share. I hope 
you'll come back to check them out.

Thank you friends for checking out my blog post!
See ya next time.

Inky Hugs,
Crystal

Thursday, June 7, 2018

Inspired By Challenge ~ Happy Birthday!

 Inspired By challenge

Hello! I'm sharing a quick post today for my entry to the Inspired By Challenge...


I've had this beautiful daisy stamp from Unity Stamp Company's May Hope Sustain You sentiment kit on my desk for awhile. I've been itching to ink it up but just haven't had a chance... today was the perfect time! I pulled the greens and yellow from the Inspired By image to color the daisy stamp, using the following Copic markers ~ Y000, Y06, Y11, Y35, G14, G17, N0, N1, 0. I was also inspired by the 'shadow stripes' in the background and so this pretty striped paper in my stash from The Paper Studio's Pink Lemonade paper pack was a must!


Since I'm always in need of birthday cards, I decided to use the 'happy birthday' sentiment from the Abundant Blessings sentiment kit. I stamped it on kraft card stock with VersaMark watermark ink and heat embossed ultra fine white embossing powder. All that was left was adhering my layers. I popped up the main panel and the sentiment with foam tape. Voila!

That's it for me! Such a fun summery challenge... there's still lots of time to play along so head on over to the Inspire By challenge blog to check it out!

Thanks for stopping by!

See ya next time.
~ Crystal