Showing posts with label Thank you. Show all posts

Monday, December 16, 2024

Inky Paws Challenge #235 ~ Year End Cards Theme Challenge {Week 3}

Hello there crafty friend!
 Sharing some more inspiration for week 3, our final week of the Inky Paws Challenge #235 - Year End Cards Theme Challenge! You have until this coming Friday, December 20th to get your entries in for the challenge and a chance to win a $20 store credit to Newton's Nook Designs!


I usually find myself in need of a thank you card. And what's better than a coffee themed thank you card!?


I inked up the beautiful girl from Pumpkin Latte Stamp Set with Memento Tuxedo Black ink. I colored her up with my Copic markers and then I die cut her with the coordinating die from the Pumpkin Latte Die Set. I love these stamps! And was excited to see that I could use it for a holiday card.

Here's a quick list of the Copic markers I used:
Skin: E000, E00, E11
Hair: Y21, Y02, E23, Y26, E25
Blue Jacket: BG10, BG70, BG72
Buttons / Belt / Sleeve: R20, R14, R56
Scarf: BG10, BG72, R20, R14, R56
Boots: E51, E55, E57
Cup: C00, C1, R20, R14, YG11, G24, G46


I created a simple background by blending white pigment ink over the Evergreens Stencil onto Kraft card stock. I die cut the background using a die from the Frames & Flags Die Set. I also die cut the red scalloped mat using a die from the same set. And the white card stock layer is die cut using a die from the Basic Frames Die Set.


Before adhering all of my layers, I die cut the Thanks a Latte Dies from the white layer and the red layer. A fun trick I like to use to stretch out my card stock supply sometimes. I finished off the card with a few enamel dots from my stash.


Now it's your turn to get your paws inky with your Newton's Nook Designs products and create a card using this month's fun theme. Be sure to link up to the Inky Paws Challenge! Can't wait to see your projects!


Thanks so much for stopping by!
See ya next time.

Inky Hugs,
Crystal


{Please note that comment moderation is on. Your lovely comment will appear once approved.}

Tuesday, June 4, 2024

Tawny Owl Paperie Inky Inspiration Sketch 22 ~ Layla with Lettered ~ The Greeting Farm

 Hello there crafty friend!
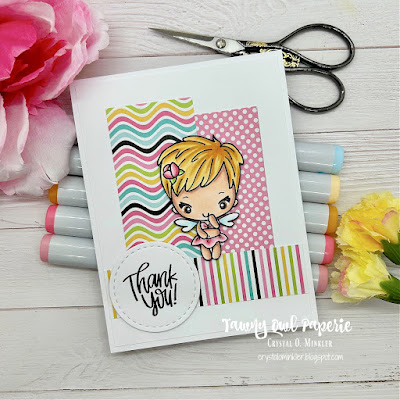
 Today I'm sharing a sweet thank you card for the Tawny Owl Paperie Inky Inspiration Sketch Challenge 22. I recently hurt my back and finally gave in and went to the chiropractor. Boy, am I ever glad that I did! My back is finally feeling better. Not 100% just yet, but improving every day. I wanted to make a thank you card for my sweet chiropractor. She has the cutest little girl so I colored the adorable Layla stamp from The Greeting Farm to look a bit like her.


 I'm still working to finish off the leftover papers I found in my stash in April. I am anxious to get these papers done so I can move on to another leftover pack. This time I was able to use 3 leftover pieces of pattern paper. I just adhered the pieces to my 4 x 5-1/4" panel of Stampers Select White Card Stock from Papertrey Ink. And then adhered the panel to a white A2 top fold card base. 


I stamped the sweet Layla fairy using Memento Tuxedo Black ink onto two separate scraps of white card stock. I colored up the cute fairy with my Copic markers. I also stamped the sentiment from the Lettered stamp set from The Greeting Farm. I die cut the sentiment using the smallest circle die from the Scallops & Circles {nesting dies} from Unity. Fussy cut the fairy on the line and then colored the edges of my cutting using a Memento Tuxedo Black marker making the cutting look all nice and neat.

Here's a quick list of the Copic markers I used: 
Skin: E000, E00, E11, E04
Hair: Y21, YR23, YR14
Eyes: E57, white gel pen
Wings: B0000, B000, B00
Flower: RV0000, RV10, RV11, RV14, YG11, YG23
Top / Skirt: RV0000, RV10, RV11, RV14


Here's a look at the fun sketch for Tawny Owl Paperie Inky Inspiration Sketch Challenge 22 in the Tawny Owl Paperie Inky Inspiration Facebook group. The sketch, as always, is meant to inspire not require. So let the sketch lead in your design, but don't feel limited by it. I didn't add measurements for the pattern paper scraps as I'm sure we all have different sized scraps in our stash. I ended up covering the bottom of the wavy striped and polka dot papers with the bottom strip of striped pattern paper. I felt it was more balanced on the card.


I added foam tape to the back of the sentiment and the fairy and popped them both up on the card. I'm really enjoying this sketch! I hope you all have fun with it, too. Have an ink-tastic week!

Thanks so much for stopping by!
See ya next time.

Inky Hugs,
Crystal


{Please note that comment moderation is on. Your lovely comment will appear once approved.}

Monday, May 27, 2024

Inky Paws Challenge #224 ~ Color Challenge

Hello there crafty friend!
It's time for a new Inky Paws Challenge... a beautiful Color Challenge
I sure hope that you'll join in the fun and play along with us with your Newton's Nook Designs products! You have until Friday, June 7th to get your entries in for the #224 Color Challenge and a chance to win a $20 store credit to Newton's Nook Designs!


Lovely Spring colors... Posy Pink, Sunny Yellow, Grass Green, and White!! 


My first thought when I saw these beautiful colors was the Pastel Basics 6x6 Paper Pad!! It has all the colors and it's so perfect. Plus, I already had some pieces die cut from my polka dot card last month that would be perfect for this card! 


I love mix matching all these beautiful papers to create cards! So easy and so pretty! I did have to die cut the green heart polka dot paper using the awesome frame die from the Frames & Tags Die Set. I trimmed a piece of the green heart polka dot paper slightly larger than the larger bottom window and then secured it to the back of the die using washi tape. A great way to utilize this awesome die without stockpiling a whole bunch of leftover pieces!


I stamped the beautiful daisies and the sentiment from the Dainty Daisies Stamp Set using Memento Tuxedo Black ink and colored up the daisies with a handful of Copic markers. I die cut the flowers using the coordinating Dainty Daisies Die Set. I trimmed up the sentiment and cut two very thin scraps of card stock. I adhered the scraps together and then adhered them on the back right edge of the sentiment allowing it to lay flat on the card when I adhered it.

Here's a quick list of the Copic markers I used:

Daisy Petals: C00, C1, C3
Daisy Centers: Y11, Y15, Y35, Y28
Stems / Leaves: YG11, YG23


Now it's your turn to get your paws inky with your Newton's Nook Designs products and create a project using the color combo of Posy Pink, Sunny Yellow, Grass Green, and White. Be sure to link up to the Inky Paws Challenge! Can't wait to see your projects!


Thanks so much for stopping by!
See ya next time.

Inky Hugs,
Crystal


{Please note that comment moderation is on. Your lovely comment will appear once approved.}

Monday, March 13, 2023

Inky Paws Challenge #193 ~ Spring Theme Challenge Reminder

  Hello there crafty friend!
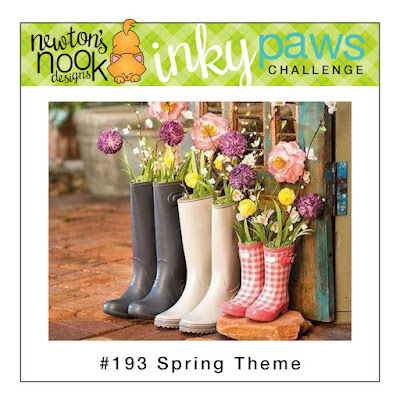
There's still time to play along with the Inky Paws Challenge #193 - a Spring theme challenge! You have until this coming Friday, March 17th to get your entries in for the #193 Spring Theme Challenge and a chance to win a $20 store credit to Newton's Nook Designs!

Changing things up today with a flower stamp! Daisies are my favorite flower.


I just adore these sweet daisies from the Dainty Daisies stamp set from Newton's Nook Designs. I am also in love with the detail in the coordinating Dainty Daisies die set... oh my gosh! It even cuts out those itty bitty spots between the flowers. Love! Here's a quick list of the Copic markers I used to color up the daisies:

Pink Daisy ~ RV000, RV10, RV13
Purple Daisy ~ V01, V12, V15
White Daisies ~ C00, C1, C3
Daisy Centers ~ Y11, Y15, Y35
Leaves & Stems ~ YG11, YG13


I was so excited to see Spring colors in the Love & Chocolate Paper Pad. I hadn't played with these papers yet so I was happy to finally use a few for my card. I also used the wonderful Frames Squared Die Set to die cut all my pattern paper layers. The sentiment was also die cut using the largest circle die in the Frames Squared Die Set.


All my paper layers are adhered together and then adhered to a 5 x 10" card base scored at 5" for a 5" square card base. I adhered the two white daisies on the left to the sentiment circle and then I added foam tape to both pieces. I then popped them both up on the card.


Now it's your turn to get your paws inky with your Newton's Nook Designs products and create a project with a Spring theme. Be sure to link up to the Inky Paws Challenge! Can't wait to see your projects!


Thanks so much for stopping by!
See ya next time.

Inky Hugs,
Crystal


{Please note that comment moderation is on. Your lovely comment will appear once approved.}

Saturday, December 1, 2018

~ Friends of Unity December Blog Hop ~

Hello! It's the first of December AND it's the first Saturday of December... you know what that means!! It's time for another Friends of Unity blog hop... but this month's hop marks one whole year of Friends of Unity sharing our love of Unity Stamp Company with you! Wow! A whole year!! I can't believe it! Time sure does fly on by! Thank you all so much for commenting and supporting our little hop! We truly appreciate it! 

To show my appreciation for your support, I'm having a giveaway! Oh boy... do I have something up my sleeve... but you have to read down to the bottom of my post! No skipping either... lol... check out my card below and I've tried to keep the chatter to a minimum. :) So let's get to it!

 I know a lot of us cardmakers are still working on our Christmas projects. Some of us just started on them... Yikes! Some of the more disciplined of us, are done with our Christmas projects... Yay! So I thought it would be a great time to share a Thank You card with a wintry theme. Our cue for this month's hop is ~ Thank You! 


A lot of the focus this time of the year tends to be about giving and getting... I wish there was more thanking! We're all so thankful during Thanksgiving... it's the thing to do, right?! But it seems to go away when Christmas is coming near. I try to be thankful all year long... but it's easy to get caught in the tide of the seasons. This year, though, I thought it would be nice to make thank you cards for the friends and family that send us cards and gifts during the Christmas season. 


I wanted to keep my card simple for two reasons... I wanted it easy to duplicate so I had enough on hand to send out and I wanted it relatively flat so it wouldn't need the extra non-machinable postage to mail it. I did end up putting those wood elements on... I couldn't help myself! They work so well with the snowflakes in the stamp so this card will be hand delivered... BUT... I could easily change this up with some die cut snowflakes or punched out snowflakes... whatever works!


Now, to the details for my card... I stamped the Burst of Flakes {Border Backgrounds} using VersaMark watermark ink onto two 5-1/2 x 4-1/4" pieces of Kraft card stock. I then heat embossed some ultra fine white embossing powder on both pieces. I also stamped the sentiment from the Like a Snowflake sentiment kit on one of the pieces with VersaMark watermark ink and heat embossed the same white embossing powder. I trimmed the one piece without the sentiment down to 5-1/4 x 4" and adhered it to a Kraft card base. I then die cut the other piece with the sentiment using a stitched rectangle die that measures 4-7/8 x 3-5/8" and popped it up on the card.


I colored one side of the snowflake wood element using a white prismacolor pencil. It gives the wood a subtle white color that I think compliments the kraft and white on the card.


Here's one more look at the card as a whole. I just love how simple but beautiful this card turned out!
I hope I've inspired you to pull out some of your Christmas or Holiday stamps to make some thank you cards.

So... did you read through the post or did you just skip down here to check out my crazy giveaway?!
Are you ready?! 
Well, I was thinking ~ how do we celebrate one whole year of hopping with Unity Stamp Company's fabulous stamps?!?! The obvious answer is we give away Unity Stamps! But I really want to celebrate... so I'm giving away 2 prizes! 

The first prize is a Brand New Winter Beauty SMAK kit <--- click there to check out this kit! It's gorgeous!! And perfect for a Winter giveaway!

The second prize is a bundle of Brand New stamps... December Girl, Jolly Ol' Santa, and Stay Cozy!! You can click on each of those to check them out! Oh... I love these fabulous stamps! 

What do you think?! Crazy awesome prizes, right?! Now, all you have to do to enter is to check out our hop and comment on each of the blogs. I'll use Random.org to choose two lucky winners and share them with you next month for our January hop!! Thank you all again for your support and Happy Hopping!


~ Blog Hop List ~

Crystal <--- you're here

up next ---> Eileen


Thank you friends for checking out my blog post! 
See ya next time.

Inky Hugs!
~ Crystal


Monday, November 19, 2018

Polka Dot Orchard ~ Winter Bear

Hello! I'm excited to share a brand new digi stamp set from Polka Dot Orchard called Winter Bear


I combined three separate images for my card... I resized the tree and the bear images and placed them inside the mug image. I just love the versatility of these digi stamps! I colored the image with the following Copic markers:
Bear ~ W00, W1, W2, R000, R20
Tree ~ G24, G29, G46, E55, E57, E59
Mug ~ R14, R27, R37, E43, E44, E47


I colored before finding my papers for this card, so it took a bit of time to find the right papers but you can't go wrong with Christmas reds and greens. The papers I decided to use are retired Stampin' Up called Trim the Tree. I trimmed them to fit on a stitched rectangle die measuring 5-1/8 x 3-7/8. I trimmed the card stock with the image and used a corner rounder to punch the two bottom corners. I trimmed the sentiment down and adhered that to the card. I then wrapped the piece with a red and white twine from Papertrey Ink. I tied off a little bow and trimmed the ends of the twine. I popped up the panel on a white card base. How sweet is that?! I just love it!


Thank you friends for checking out my blog post!
See ya next time.

Inky Hugs!
~ Crystal


Tuesday, February 13, 2018

Papertrey Ink Retirement Challenge ~ Thank you!

Hello! I am on a roll... woohoo!! Here's my entry for the Papertrey Ink Retirement Challenge. The stamp set I used for this is the Paper Clippings: Thank You set. I hate to admit it, but this is the first time I inked up this set. Wow, is it big!


As you can see it takes up almost the entire A2 card that I made. It's a really cute set. I inked up the sentiment using VersaMark and Royal Velvet ink and then I heat embossed it with a clear embossing powder. For some reason the embossing didn't heat up smooth... it's kind of bumpy. I don't know why. If you know why it did this, please let me know in the comments. I hope I don't have defective embossing powder. Anywho, I stamped a few flowers and the little birds using Plum Pudding, Blueberry Sky, Winter Wisteria, Lilac Grace, and Lavender Moon inks. I die cut the piece using a large rectangular stitched die. I adhered it to a piece of Blueberry Sky patterned paper and then popped up the whole panel using dimensionals onto a white card base. I added a few drops of Sweet Lilac gloss Nuvo drops. A pretty quick thank you card and another one for the Papertrey Ink challenges! Yay!!

Here are the products I used for this card:
Stamps: Paper Clippings: Thank You
Card Stock: White, Blueberry Sky patterned paper
Ink: Royal Velvet, Winter Wisteria, Lavender Moon, Lilac Grace, Blueberry Sky, Plum Pudding
Tools: Stitched Rectangle Stacklets (Taylored Expressions)
Miscellaneous: Nuvo Crystal Drops gloss Sweet Lilac


Thanks for stopping by!

See ya next time.
~ Crystal

Wednesday, December 6, 2017

November Flavor of the Month ~ Thank You

Hello! I have a super quick Thank You card I designed using the November Flavor of the Month card kit. This card came together so fast!


I chose two pieces of scrap paper from Collection One that I had leftover. I die cut a scallop edge on one of the papers and then layered the papers onto a white card base. I die cut the 'Thank You' from the Xcut die in the Banana Split kit and popped on some sequins. This would be such a super easy card to duplicate!


Thanks for stopping by!

See ya next time.
~ Crystal


Thursday, May 25, 2017

Papertrey May Blog Hop Challenge

I'm so excited! It's time for another Papertrey Blog Hop challenge!! Here's the inspiration for this month's hop... 


Beautiful colors, am I right?! I absolutely love the blues in the leaves... gorgeous!


I recently received my latest Papertrey Ink order and was able to ink up this stunning set, Gran's Garden! I have to admit it took me a few tries lining up the flowers just right, but I finally got the hang of it. I evened used the assembly suggestion on the packaging of the stamp set as my inspiration for the layout of the flowers. Overall, I had some inking fun and really love the way it turned out! I tried to duplicate the blues in the inspiration but I guess in my mind it had some green to it, so I chose Ocean Tides with a touch of Dark Indigo to the edges. I have to admit... I absolutely love this combination!! I loved it so much that I added some more to the layout by using the flower center... I think it looks like tiny flowers! I also used another new set to me for the sentiment, Keep It Simple: Thank You II. Love the fonts in this set!! I actually messed up when I stamped the sentiment... I didn't mask enough of the area so some residue ink was left behind but luckily I had just ordered the Tombow Mono Sand Eraser and it came right off, like magic!! Love it! I die cut the sentiment using Stitched Circles. When I put the card together, I decided to offset the sentiment so some of the Melon Berry color could peek through! I adhered the whole panel to a white card base and BAM!


Here are the products I used for this card:
Card Stock: White, Melon Berry (PTI)
Miscellaneous: Tombow Mono Sand Eraser (Blitsy)


 If you have a minute, please leave a comment. I'd love to hear what you thought of my creation.
Thanks for stopping by!

See ya next time.
~ Crystal


Sunday, January 8, 2017

Savvy 7 ~ January Blog Hop ~ Snowflakes

I'm super excited to be a part of this amazingly creative group of paper crafting artists for a monthly blog hop. What a great way to start off this new year?!? We are... 

 the Savvy 7

 Don't you just love that!!


Our first theme is Snowflakes... now, I know some of you are cringing, maybe even wailing, "No more Christmas cards!!" Well, this isn't a Christmas card. It's a wintry, snowflake Thank You card. It could be used for thanking your loved ones for a sweet Christmas gift, or for a lovely visit over the holidays. 

Now for the details... I started by heat embossing these beautiful snowflakes from Unity's Magical {Bliss and Wonder} kit using Versamark ink and Clear embossing powder on a piece of white card stock. Then I grabbed a few distress inks and started blending. I added the lacy background stamp, also from the Magical kit, and a sentiment from Stampin' Up!'s One Big Meaning set using Early Espresso ink. It needed something else... so, I grabbed some antique brass brads. I layered this on a piece of Early Espresso card stock and popped the whole panel up using stampin' dimensionals on a white card base.


Now when I had finished up the card, I just happened to look over on my desk and see this bookmark already cut out in white card stock and thought... hmmmm... wouldn't this be a fun idea for a bookmark!! I absolutely love it!! I did the same heat embossing and blending with distress inks. The only difference was the sentiment... I used the letters from Stampin' Up!'s Labeler Alphabet to spell out Winter in white craft ink and heat embossed it with clear embossing powder and then I stamped over those letters with the little block in the set using Early Espresso ink.


Here's another view of the bookmark... you can see the lovely satin ribbon tied off with some white twine. Isn't it beautiful!? I love it!


Here is a picture of my first two projects for our first Savvy 7 Blog Hop! I really hope that you liked them!

Here are the products I used for this card:
Stamps: Magical {Bliss and Wonder} (Unity), One Big Meaning, Labeler Alphabet (SU!)
Card Stock: White (PTI), Early Espresso,(SU!)
Inks: Early Espresso, White Craft, Versamark (SU!)
Tools: heat tool (SU!), Basic Bookmark 3 die (PTI)
Miscellaneous: Hero Arts Ultra Fine Clear EP (SSS), antique brads (retired SU!)

Thanks for stopping by!

See ya next time.
~ Crystal