
It's time for another Savvy 7 & Friends Blog Hop! The theme for this month is April Showers Bring May Flowers! Another theme with so many possibilities! I can't wait to see what the other hoppers created!

I had so many ideas for this hop, but decided to focus on a mixed media piece that I made for my friend's birthday. I really hope that she likes it.

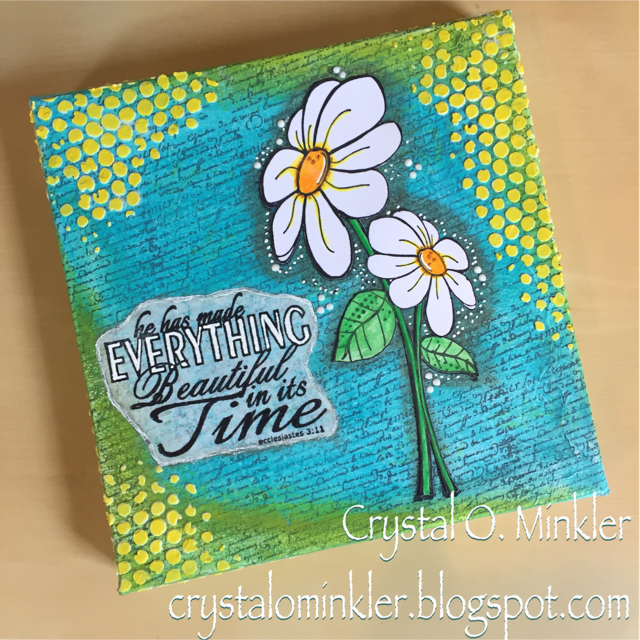
I wanted to share some of the steps that I went through creating this canvas. First, I applied a thin layer of clear gesso to the blank canvas and set it aside to dry. I then stamped a script background all over a piece of tissue paper (not pictured) using Archival jet black ink. Once the gesso was dried, I applied some matte mod podge to the canvas and adhered the script tissue paper all around the canvas (even over the edges). Once the canvas was dried, I used a baby wipe to apply some Bimini Blue acrylic paint to the canvas. Along the two edges I applied some Bright Yellow acrylic paint also using the baby wipe. The yellow added to the blue gave a bit of a greenish tinge that I really liked. Once the paint was dry, I grabbed a stencil and added some texture paste around the three corners and also on the edges of the canvas.

Using the Bright Yellow acrylic paint again, I painted the texture paste using a tiny paint brush. I then stamped the daisy onto the canvas using Archival jet black ink. I wasn't looking for a perfectly stamped image... I just needed a guide for adding shading around the image. I applied a tiny bit of Pewter Grey acrylic paint around the stamped image and then smudged it using another baby wipe. I set the canvas aside and stamped the daisy on a piece of white cardstock. I wanted the daisy to be white so all it needed was a few touches of yellows, orange, and a bit of brown. I also painted the stems and leaves using a couple different green paints. I applied some matte mod podge to the canvas and adhered the daisies in two pieces - kind of like a puzzle. I then stamped the sentiment on a piece of tissue paper using Archival jet black ink and adhered that to the canvas using matte mod podge. I wanted the sentiment to pop a bit so I added some grey paint for shading but then it looked a bit too dark so I ended up adding some white paint and I think that helped it to pop a bit more.

I used the Uni-ball Signo white gel pen to fill in the word 'Everything'. My last finishing touches were some gloss white nuvo crystal drops around the daisies. The stamped image had black dots and I wanted to make them pop so adding the drops not only made them pop, but it also gave them some dimension on the canvas.
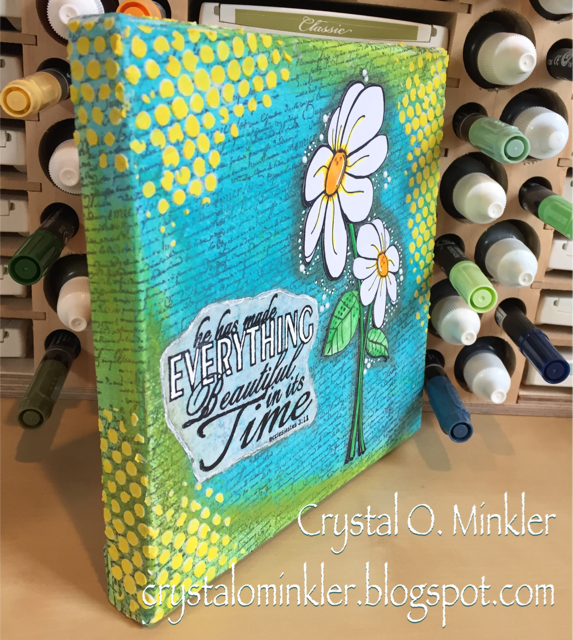
Here's a side view showing the color and texture that was applied around the edges as well.

Here's a close up view of the daisies with the glossy drops.
If you've made it this far in my post, THANK YOU!! I know there's a lot of pictures and info here. I had such a great time making this canvas for a very dear friend of mine. I truly hope she liked it.
Here are the products I used for this card:
Stamps: Everything Joyful & Beautiful, Spring Inspired (Unity)
Materials: LWR Crafts Stretched Canvas 6x6, Apple Barrel Acrylic Paint set, Matte Mod Podge (Amazon), Ranger Texture Paste (SSS)
Card Stock: white (PTI)
Inks: Ranger Archival Jet Black (SSS)
Tools: Palette Knife set (SSS)
Miscellaneous: Uni-Ball Signo White gel pen (Amazon), Gloss White Nuvo Crystal Drops (SSS), white tissue paper
Thanks for stopping by!
See ya next time.
~ Crystal
Be sure to check out the rest of the fabulous creations on the hop!


