Showing posts with label tulip. Show all posts

Saturday, May 3, 2025

~ Friends of Unity May 2025 Blog Hop ~

Hello there crafty friend!
It's time for our Friends of Unity Blog Hop!! This month's cue just might be one of my favorites! 


This month's cue is Bloom Where You Are Planted! For me... that means flowers! I absolutely LOVE the assortment of flower stamps available at Unity! It wasn't easy, but I narrowed it down to two for this hop.


First up is the gorgeous Tulip Symphony. I adore this stamp! I wanted to do some watercoloring and this stamp was the first one that came to mind. I used my ZIG Clean Color Real Brush markers. I used Light Pink, Light Carmine, and Pink for the petals. And Yellow Green, May Green and Green for the stems and leaves. For the blue in the background I used a bit of Light Blue.


Once the panel was completely dry, I die cut it using a die from the Scallops & Rectangles {nesting dies}. I also die cut another piece of watercolor paper using the largest die from the Postage Stamp {nesting dies}. These gorgeous tulips could be a forever postage stamp. I love it!


I used Canson XL 140lb watercolor paper for my watercoloring layers. I adhered the postage layer to an A2 top fold card base of Kraft card stock from Papertrey Ink. I decided to make this a birthday card for my beautiful niece whose birthday was just a few days ago. I hope she liked it.


My next card features the beautiful blooms from the Snarky Mama stamps. I really wish Unity would make this stamp bigger. Don't you think it would look fab as a big slimline stamp?! I think so. I may just ask Ang if we can make that happen. :)


I stamped the flowers and the sentiment on Stampers Select White card stock from Papertrey Ink. And then I die cut it using a die from the BIG Scallops & Rectangles {nesting dies}. I wanted to keep the card CAS so I looked through my embossing folders for a fun background and came across the Tim Holtz Brick 3D Embossing Folder. I finished off the card with some Raindrop Embellishments from the 2024 Advent Calendar.


Here's a quick list of the Copic markers I used:
Big Flowers: Y11, R20
Big Flower Centers: Y11, YR15, R14
Little Flowers: R20, R32
Leaves / Stems: YG11, G02, G07
Background: BG10, Colorless Blender

Now before we get to the hopping, I chose a lucky winner from the comments on last month's hop to win a fun prize and the lucky winner is...


... Denise Bryant!! Congratulations, Denise!!
Please email me at crystalominkler@gmail.com to claim your prize. 
Please claim the prize before June 4th, 2025. 

Well, that's it for me this time! Please hop along and enjoy some more inspiration from the Friends of Unity! I can't wait to see how our friends were inspired by this month's cue. I will be doing another fun giveaway this month!! Be sure to hop along and comment for a chance to win. {When you comment please leave your name just in case it posts as anonymous.} I'll announce the winner next month! 


Let's get to the hopping...

Crystal <--- you're here

up next ---> Amber


Thanks so very much for supporting our little hop!
We appreciate you so much!!

See ya next time.

Inky Hugs,
Crystal


{Please note that comment moderation is ON. Your comment will appear shortly.}


Monday, April 21, 2025

Inky Paws Challenge #239 ~ Color Challenge {Week 3}

Hello there crafty friend! Happy Easter!
 Sharing some more inspiration for the Inky Paws Challenge #239 - Color Challenge! You have until Friday, May 2nd to get your entries in for the challenge and a chance to win a $20 store credit to Newton's Nook Designs!


Such a gorgeous color combo for any occasion but this time I had to make an Easter card. Our colors for the challenge are Dusty Violet, Spring Green, Sunshine Yellow, and Cocoa Brown!! 


I stamped the cute images from the Easter Postage Sampler Stamp Set using Memento Tuxedo Black ink. Colored them up with my Copic markers and then I die cut them using the coordinating die from the Easter Postage Sampler Die Set.

Here's a quick list of the Copic markers I used:
Bunny: E21, E23, E25, C00, C2
Eggs: YG11, YG03, YG63, V000, V12, V15, Y11, Y15
Tulip: V000, V12, V15, YG11, YG03, YG63


I used some scraps leftover from a previous card that I had die cut using the Postage Stamp Layout Dies. I blended lightly with Vintage Photo Distress Ink over the little rectangle pieces. And then I cut three slightly larger rectangles and adhered the little postage pieces together. This gave them a little more stability. I adhered the cute images to the postage pieces and set them aside.


I blended a fun background on the front of a white A2 top fold card base using the Bunny Tails Stencil Set. I blended the bunny outlines with Villainous Potion keeping it light. And then I blended the little bunny tails with Wilted Violet Distress Ink. I die cut the beautiful sentiment from the Happy Easter Die three times from Kraft card stock. I adhered them all together to give the sentiment some dimension. I die cut the shadow layers from white card stock. I played around with the placement of all of the pieces for way too long... LOL... until I settled on the above. I really love how this turned out!


Now it's your turn to get your paws inky with your Newton's Nook Designs products and create a project using the color combo of Dusty Violet, Spring Green, Sunshine Yellow, and Cocoa Brown. Be sure to link up to the Inky Paws Challenge! Can't wait to see your projects!


Thanks so much for stopping by!
See ya next time.

Inky Hugs,
Crystal


{Please note that comment moderation is on. Your lovely comment will appear once approved.}

Friday, January 31, 2025

Sending Joy Card ~ Tulip Symphony ~ Unity Stamp Co.

Hello there crafty friend! 
Today I'm sharing a pretty card using the gorgeous Tulip Symphony stamps from Unity's latest release. I absolutely love the detail in these tulips!


I stamped the pretty tulips using Black Amalgam ink and Copic colored them.

Here's a quick list of the Copic markers I used:
Tulips: R000, R81, R43
Stems / Leaves: G12, G24, G17


I die cut the tulips and a pink mat using dies from the Deckle & Stitches Nesting Die Set.


I stamped the sentiment, trimmed it up and then popped it up with foam tape. I adhered the panel to a black A2 top fold card base. I love how this one turned out!

Thanks so much for stopping by!
See ya next time.

Inky hugs,
Crystal

{Please note that comment moderation is on. Your lovely comment will appear shortly.}

Monday, June 27, 2022

Membership Monday ~ Good Things Tulips ~ June 2022 UU All Good Things ~ Unity Stamp Co.

Hello there crafty friend!
I'm back for one more Membership Monday post for the month of June and this time I'm sharing a cute mini slimline featuring the gorgeous tulip stamp in the June 2022 Uniquely Unity All Good Things stamp kit from Unity Stamp Co. I have been impatiently waiting to ink up this gorgeous stamp... I love it so much! The detailed lines in the leaves and tulips are amazing and then the lines in the background add depth and dimension to the flowers. So gorgeous!
 

I stamped the beautiful tulips on Stampers Select White card stock from Papertrey Ink with Gina K. Design Black Amalgam ink. I die cut the image with a Scalloped Stitched Mini Slimline die from Gina Marie Designs.


I colored up the beautiful image with the following Copic markers:

Tulips ~ V91, V20, V22, V25
Leaves ~ YG11, YG05, YG17
Background ~ B0000, B00


I was super excited to get to attend a wonderful Unity Lovers gathering in Missouri on Friday... so many wonderfully talented ladies!! Lots of chatting, eating and even some inky time! It was a blast! We also had a fun gift exchange and I kept the wrapping paper and ribbon from my gift... well, I couldn't help but use some of the pretty mesh ribbon on my card today! I wrapped it around my 6 x 3" mini slimline card front of Winter Wisteria card stock from Papertrey Ink. I adhered it to the back of my card front with Ranger Multi Medium Matte. It was pretty bulky so I set a few heavy books on top of my card to give the adhesive some time to cure. I also used the Multi Medium Matte to secure the card front to the mini slimline card base measuring 6 x 6", scored at 3". I set those heavy books right back on top of it for a bit to let the adhesive cure and then I took it out to get some photos. I'll leave it under the pile of books over night to ensure that it's good and stuck!


I stamped the sentiment with the same Black Amalgam ink and trimmed it up. It's a pretty big sentiment and I didn't want to cover up too much of the tulips so I cut the one side at an angle. I just love how this card turned out!


I just love this gorgeous stamp! So awesome! You can check out the Uniquely Unity membership over at Unity Stamp Co. Next Monday is Fourth of July so I'm not sure if I'll be able to share a card just yet... but I'll try to! I have no idea what membership it'll be either... a surprise for the both of us! :)


Thanks so much for stopping by!
See ya next time.

Inky Hugs,
Crystal


{Please note that comment moderation is ON. Your lovely comment will appear shortly.}

Friday, March 25, 2022

Distress Oxide Ink Blending ~ Layering Tulip Stencil ~ Unity Stamp Co.

Hello there crafty friend!
There's a fun new release over at Unity! I'm sharing a pretty slimline card with lots of fun Distress Oxide Ink Blending over two stencils from Unity Stamp Co. I thought it would be fun to use the Mountain Scapes Stencil in a different way. I used it for some interest in my background rather than an actual mountain scene.
 

I like the dimension the background gives to those top tulips. I used Squeezed Lemonade, Spiced Marmalade, and Abandoned Coral Distress Oxide inks over the Mountain Scapes Stencil for my background. I splattered some water over the ink blended background and dabbed it dry with paper towel.


I ink blended over the Layering Tulip Stencil with Ripe Persimmon, Barn Door, and Mowed Lawn Distress Oxide inks. I also splattered some white acrylic paint over the panel and dried it with a heat tool.


I die cut a piece of white card stock with the Pleated Lace Slimline die from Gina Marie Designs. I trimmed the tulip panel and adhered it to the die cut layer. And then I adhered it to the slimline card base measuring 7 x 8-1/2"; scored at 3-1/2". 


I stamped the sentiment from the 3 Tiered Birthday itty bitty stamp kit from Unity with Sugar Cube Pigment ink from Taylored Expressions on True Black card stock from Papertrey Ink. And then I added Alabaster white embossing powder from Brutus Monroe and melted it with a Mini Wagner heat tool. You can check out my process video here... Distress Oxide Ink Blending | Layering Tulip Stencil | Unity Stamp Co.


Be sure to stop by Unity to see all the amazing new releases! Lots of fun goodies on sale too!


Thanks so much for stopping by!
See ya next time.

Inky Hugs,
Crystal


{Please note that comment moderation is ON. Your comment will appear shortly.}

Thursday, April 8, 2021

Monochromatic Slimline Cards ~ Layering Tulips Stamp & Stencil ~ Unity Stamp Co.

 Hello there crafty friend!

I'm back with a fabulous set of Monochromatic Slimline cards using the gorgeous new Layering Tulips stamp & stencil bundle from Unity Stamp Co. Oh my gorgeousness... you have got to check out this amazing bundle!! The Slimline Layering Tulips is a huge and beautiful stamp all on it's own, but when you combine it with the fabulous Layering Tulip stencil... it's a game changer!! Seriously amazing!


Check out this fun set of Monochromatic Slimline birthday cards that I made using the Slimline Layering Tulips stamp and the Layering Tulip stencil!! They turned out better than I even imagined!!


First I chose four main colors of card stock and the coordinating inks, along with four more slightly darker card stocks and inks to compliment the cards. For this first card, I used Lemon Tart card stock and ink along with the Summer Sunrise card stock and ink. I stamped the Slimline Layering Tulips stamp with the Lemon Tart ink on the Lemon Tart card stock.


I then blended Lemon Tart ink over the petals and leaves portion of the stencil to 'color' the tulips. Such a super easy and fast way to color this huge stamp! Don't pass up this stamp and stencil bundle if you don't like to color... the stencil seriously makes it easy to color without actually coloring!


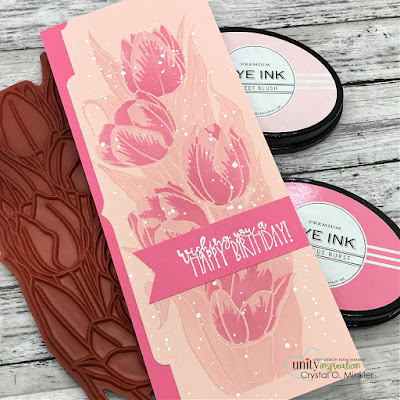
For my second card I used Sweet Blush and Hibiscus Burst card stocks and inks.
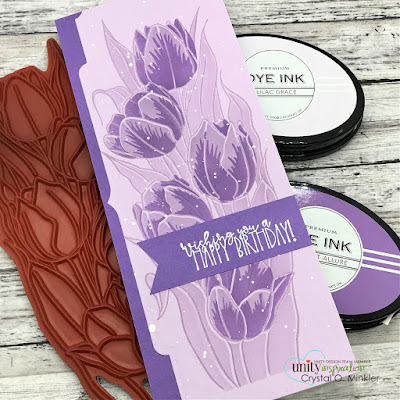
I used the darker inks over the third portion of the stencil to give the tulips some shading and contrast.


I die cut each of the panels with the Essentials Slim Cuts die from PinkFresh Studio.


For my third card I used Aqua Mist and Hawaiian Shores card stocks and inks.
I stamped the sentiments with Wow Clear Embossing ink and then melted Alabaster White embossing powder with a Mini Wagner heat tool. I trimmed the sentiments and used a hexagon punch to cut the flags on the left side.


I splattered the panels with a bit of white acrylic paint that I spritzed with water to thin it out.


For my last card I used Lilac Grace and Amethyst Allure card stocks and inks.
I adhered all the layers together with Tombow Mono Multi Liquid glue.


And then I adhered the 3-1/2 x 8-1/2" slimline panels to slimline white card bases measuring 7 x 8-1/2", scored at 3-1/2". I have a video sharing my process in making these cards. You can check it out here... Monochromatic Slimline Cards | Layering Tulips.


A beautiful set of Monochromatic Slimline birthday cards!! I just love how these turned out!
Be sure to stop by Unity Stamp Co. and check out their fabulous new releases and the current sale!!


Thanks so much for stopping by!
See ya next time.

Inky Hugs,
Crystal


{Please note that comment moderation is ON. Your comment will appear shortly.}

Monday, May 11, 2020

Unity Stamp Company ~ May 2020 Kit of the Month ~ Such an Amazing Mom

Hello there crafty friend!
Today we are celebrating!!! If you haven't already heard, I've started my very own YouTube channel to share some of my coloring, cardmaking, techniques... basically all kinds of crafty good stuff!! I am also celebrating being Oh So Close to having 1K followers on my Instagram! I would love if you would help me reach and even exceed that goal... eeeep! I'm so excited!! So... first of all, I have a card to share with you and there's a little video to go along with it.


A rather simple card with just one layer on a black mat and some pretty coloring... I do love how these tulips turned out! There's just something about the two-toned flowers. So beautiful!


I added a couple of strips of black card stock to give the sentiment a little focus on the card. And I finished it off with a few black nuvo drops. Now, you can check out the video for some of the coloring down below. 


To enter my giveaway go ahead and follow my blog, follow me on Instagram, and subscribe to my YouTube channel.... and then comment on any of those letting me know that you followed and subscribed!! It's that easy!! And all my links are at the top of my blog... under my blog heading! You have until May 17th 11:59pm EST!!

Here's a look at the giveaway...


But I just found some more goodies to add to it... so it'll have even more crafty goodness!!
Winner will be announced here and on Instagram May 19th!


Thanks so much for stopping by!
See ya next time.

Inky Hugs,
Crystal


Monday, July 15, 2019

Growing In Unity ~ Day 1 of My 5 Favorite Things

Hello there crafty friends!
I'm super excited about this week... it's my turn to be the Growing in Unity gal and I am over the moon excited!! I am a Unity addict through and through and being able to share my love of Unity for a whole 5 days... it's just an amazing opportunity!! 

I have been so excited, in fact, that I had so many ideas and then all of sudden my mind went blank on what to share. And then I got to thinking... I could share some of my favorite things about Unity, as well as my favorite products, techniques, or crafty tips... channeling the wonderful Oprah Winfrey, you may say! Lol... so I'm going to share My 5 Favorite Things!

One of my first favorite things about Unity is the gorgeous floral stamps!! There are hundreds of absolutely stunning stamps with all kinds of flowers... literally, if you do a search on the website, over 300 stamp kits come up! Something for everyone!!


One of my absolute favorite flowers is the lovely daisy and this beautiful daisy from Graciellie Design's Be Unstoppable kit is perfect! I thought it would be fun to color it blue but let the color fade out at the tips of the petals... love how it turned out. Sadly, I didn't write down the copic markers I used for this but if I had to take a guess I would say it was B0000 and B24, along with YG11 and YG23 for the leaves. For the center of the flower, I think I used Y11, Y35, and E55.


I die cut the daisy using a Pleated Lace Circle die and popped it up on my already prepared card base of Pacific Point card stock with a beautiful layer of brown patterned paper by Bo Bunny called Penelope Collection that I had adhered a wide Pacific Point ribbon from my stash (can't remember the name of it). To finish off the card I die cut the sentiment with a banner die and mat it on a die cut piece of Pacific Point card stock. I think it turned out pretty.


Now, another favorite thing of mine is to use an easy sketch when making my cards. You'll notice that my two cards today aren't identical, but they use a similar sketch or design with the patterned paper on the card base and the main image die cut with some ribbon accent. 
A great design for a quick and beautiful card!


For this card, I colored the gorgeous tulip from the same Be Unstoppable kit with BG000, BG11, BG23, YG11, G24, and G28. I then die cut it with the Pleated Lace Rectangle die and adhered it directly to a stitched rectangle die cut piece of Stampin' Up Wood Textures patterned paper. I wrapped some White Sheer Organza ribbon around the panel tying just a knot... like a faux bow... and adhered the panel to an Aqua Mist card base. And this time I just popped up the sentiment on the main panel. 

Two lovely cards using one basic design that look very different from each other. 
Love how they turned out! I hope you like them too!

Be sure to leave a comment for a chance to win one of two fabulous grab bags of 25 stamps from Unity Stamp Company!!! Love me some deeply etched red rubber stamps! Oh yeah!!

Come back tomorrow for Day 2 of My 5 Favorite Things!

Thanks so much for stopping by!
See ya next time.

Inky Hugs
~ Crystal