Showing posts with label copic background. Show all posts

Monday, February 10, 2020

Polka Dot Orchard ~ Ocean Cuties {Winter Narwhal} ~ Warm Any Heart

Hello there crafty friend!
I am loving all of the sweet new releases at Polka Dot Orchard! Have you seen them? 20 new digi sets and they're all on sale!! Woot woot! I love a great sale!


I just couldn't wait to color this adorable narwhal from the Ocean Cuties {Winter Narwhal} digi set. How sweet is he just sitting on the ice drinking a cup of coffee. Too cute! I combined the narwhal image with the sentiment in a Word document (along with some other new releases that I'll be sharing soon!) and print off the sheet. I trimmed it down to an A2 card front size measuring 5-1/2 x 4-1/4".


I then colored the image and background with the following copic markers:

Narwhal ~ BV0000, BV20, BV23, C00, C1, C3
Eyes ~ BV000, BV11, BV17
Scarf/Ear Muffs ~ RV10, RV13, RV14, B00, BG01
Cup ~ RV10, RV13, RV14, B00, BG01, E21, E23, E27, N0, N1
Background ~ BG000, BG01, BV0000, V0000, C00, C1, C3


I kept the card simple since the image and the sentiment were already together on the card front. I trimmed it down to 5-1/4 x 4" and mat it on a 5-3/8 x 4-1/8" piece of Tempting Turquoise card stock and then mat it again on an A2 card front of Raspberry Fizz card stock. I adhered the entire panel to a white card base and called this card done! A cute card to send to a friend to let her know I'm thinking about her. If you're loving this sweet digi stamp be sure to head over to the Polka Dot Orchard website and check out the fabulous sale on all the wonderful new releases at Polka Dot Orchard!

Thanks so much for stopping by!
See ya next time.

Inky Hugs,
Crystal


Friday, January 17, 2020

Scrapping for Less ~ Winter Fairy House ~ Fairy Warm Winter

Hello there crafty friends!
Today I'm sharing a sweet little copic colored scene created using the cute Winter Fairy House stamp set from Scrapping for Less!! I am loving this adorable fairy cottage... it looks so cozy!


I knew that I wanted to create a little snowy scene with the cottage from the Winter Fairy House stamp set and the trees from the Winter Fairies stamp set. They work perfectly together!! I stamped the cottage on a card front of white card stock measuring 4-1/4 x 5-1/2". I then stamped the cottage and trees on another piece of white card stock and colored them with the following copic markers:

Fairy Cottage ~ BV00, BV02, BV08, BV11, R00, R81, R83, Y000, Y11, N0, N1, N2, N4
Trees ~ YG0000, YG11, YG61
Snow ~ C00, C1, C3
Sky ~ B0000, B000, B00, B01


Once all the trees and the cottage were colored, I fussy cut them and cleaned up the edges with a Memento tuxedo black marker. I even cut apart a pair of trees giving me more options in creating my scene. I then set the images aside and grabbed the card front that I had previously stamped the cottage on. I wanted to create a snowy scene but still have a lot of white left on the card... since I was going to basically paper piece the cottage I was able to color over the image on the card front but still have an idea of placement for all of the images. 


I started by drawing a light line of blue with the lightest blue copic marker across the card front to divide the sky and the snow. I then colored the sky by just flicking my markers upwards working from lightest to darkest blue until I was happy with the blend. I then added just a little bit of shadow with a light gray copic marker for all of my snow. I placed the trees in the areas that I planned to adhere them and colored the shadows for those, as well. 


I adhered all of the elements for my scene using a liquid glue and then adhered the entire panel to a dark purple card base... I think this turned out really cute! To finish off the card, I stamped the sentiment on a scrap of white card stock and mat it on black card stock. I adhered it to the card and decided this one was done. I just love how cozy this little scene feels!

Thanks so much for stopping by!
See ya next time.

Inky Hugs,
Crystal


Friday, July 26, 2019

Scrapping for Less ~ July 2019 Flavor of the Month Card Kit ~ Summer Camp


 July! What is another summer activity you enjoy? 
Lots of folks love summer camping and kids love going to camp. I spent 3 summers of my career life as a summer camp director at a girl's week long resident camp...it was hard work but yet super satisfying. I loved seeing the girls (most of them were city girls) being exposed to nature, hiking, and the outdoors. We have a great kit for you this month. All about camping and the outdoors! So grab your computer, a beverage, maybe go out on your back porch (so you are outdoors) and hop along and view the most wonderful inspiration from our Design Team and guest designers! You can purchase your kit from our subscription page...links for 1x purchases are in the paragraph to the left of the slider on that page. Make sure to enter the rafflecopter for a chance to win a past kit. Hope you enjoy this month! Happy Camping! ~ Teresa, SFL Co-Owner


If you are just starting hopping, we're so glad to have you join us! 
The hop starts on the Scrapping for Less blog or you can start hopping right here.

Here's a quick look at the July 2019 Summer Camp card kit...


Isn't that just an amazing card kit!!! 
I just adore the cute stamps this month and the papers are awesome!! 


Collection One: Under the Stars
So one of the sketches this month is a fun long card and I thought this would be a fun way to build a night time scene. I used some of the beautiful Under the Stars paper for the top of the scene and then added layers of Timber Green card stock that I had die cut with different hillside border dies. 


I then stamped the sweet camper from the Happy Camper set by Sunny Studios and colored it in with copic markers. I also stamped the sentiment and fussy cut it into a banner... popping up the fussy cut camper, as well as, the sentiment on the card.


To finish off the card, I adhered a few of the Camping Icon stickers by Darice that are 
included in the kit. So fun!

Supplies used (not found in the kit):
Copics ~ N0, N2, N3, N5, Y000, BG10, BG23, R17
Lawn Fawn Stitched Hillside Border die
Lawn Fawn Forest Border die
3M Scotch 1/2-inch Double-Sided Foam Tape


Collection Two: Camping Plaid
First, I just have to say that the plaid in this kit is absolutely amazing! It's all beautiful Fall colors and I love it! It would be great for masculine cards too! 
Now, onto the card... I veered a little off of the sketch with this one. I wanted to build a scene using the Tree embossing folder that's included in the collection and I thought it would be fun to have it in the background. I blended a little Mowed Lawn and Gathered Twigs distress inks over the embossed tree to give it some color and dimension. I trimmed it down and adhered it to a mat of Hot Fudge card stock. I then adhered all of the layers to this beautiful plaid patterned paper layer that's adhered to a white card base. Such pretty colors! 

I set the card aside and got to work on my scene with the squirrels. I masked the sky with purple tape and blended Mowed Lawn distress ink over the white card stock. I then removed the purple tape mask and covered the green portion of card stock. I blended some Tumbled Glass distress ink over a cloud stencil very lightly and then blended some more ink around the edges and above the masked portion of card stock. I stamped the squirrels and colored them in. I then fussy cut them and adhered them to my scene that I mat with the Timber Green card stock. I stamped the sentiment, trimmed it down and mat it on the Timber Green card stock and then popped it up on the card. 
To finish off the card, I adhered a few sequins in the leaves of the tree and adhered the wooden binocular icon by Kaisercraft.

Supplies used (not found in the kit):
Copics ~ E23, E25, E30, E33, E34, E35, E37, N0, N1, N4, Y06, YR15, YR16, YR68
Distress Inks ~ Tumbled Glass, Mowed Lawn, Gathered Twigs
My Favorite Things Mini Cloud Edges


Collection Three: Camping No.1
My next card just may be my most favorite!! The sweet little bears in this collection are just too cute! I trimmed all of my layers of patterned papers and adhered them to a white card base. I used a fishtail die for the sentiment and the s'mores patterned paper and then mat them on kraft and Hot Fudge card stock and popped them up on the card. For my focal image I used Copic markers to color my scene on the metal rimmed kraft tag included in the collection. I stamped the bear and fire on white card stock, colored them up, and then fussy cut them out. I adhered them to the tag and then added a little green twine. I then popped up the circle tag on the card.


To finish off this card I added a few of the tiny sequins included in the collection.
Oh my goodness... I just love how this turned out!

Supplies used (not found in the kit):
Copics ~ W0, W1, W2, W4, R000, E55, E57 (bear); N0, N1, N2, N4 (rock); E55, E57, E59, Y13, YR15, YR68 (campfire); E55, E57, G24, G29, Y06, Y13, Y17, YR15 (background on tag)
My Favorite Things Stitched Fishtail Flag STAX


Collection Four: Summer Camping
And my last card for today... a close second fave! LOL! This was a bit of an experiment for me... I tried something different with the hair and also created a scene using copic markers. I'm very happy with how it turned out! I actually made this card before the bear card and copic colored background on this one gave me the courage to try another on that kraft tag. So glad I tried! I love learning new techniques with my copic markers!! 

So for the card I cut a few of the patterned papers and adhered them directly to a white card base. I also die cut the 'Explore' (exclusive to the Banana Split subscription!!) out a few times from Kraft card stock and once from the Tangy Orange card stock. I adhered the Tangy Orange layer a little offset from the kraft to give it a little dimension.


 I had stamped the sweet little girl first and colored her up with copics leaving her shirt blank so I could paper piece the fun diagonal striped paper. I realized it had been a while since I paper pieced anything... such a fun technique! I need to do it more often! Now for my scene, I kept it pretty simple with some dirt and grass. If I was to do this again, I would probably extend the dirt across the panel with the grass in the background, but I'm still happy with how it turned out. I die cut the panel with a stitched rectangle die and then mat it on a piece of Hot Fudge card stock that I also die cut using a slightly larger stitched rectangle die. I adhered a few green paper leaves so they would peek out from under my focal image and then I popped up the focal image. I stamped the "Let's" sentiment with VersaMark watermark ink and then heat embossed a fine white embossing powder. I trimmed the sentiment and then mat it with a scrap of Hot Fudge card stock. It's hard to see in the pictures but to finish off this card, I added a tiny orange rhinestone to the little campfires in the background patterned paper. Just a fun little touch that gives the fire some shine! Oh, and I almost forgot I used the fun Sakura Glaze pen in the Banana Split subscription to add the dots on the hair bands in her hair and also on the eyelets in her shoes.

Supplies used (not found in the kit):
Copics ~ E000, E00, E21 (skin); E34, E35, Y21 (hair); E31, E33, YG11, G21, BG10, BG53, Y15, Y35 (clothes/accessories); E31, E33, YG17, YG23, B0000, C0, C1 (background scene)
Taylored Expressions Stitched Rectangle Stacklets
VersaMark Watermark ink
Brutus Monroe Alabaster Ultra Fine embossing powder


I sure hope you've enjoyed my cards today!

Your next stop on the hop is... Desiree


Be sure to head back over to the Scrapping for Less blog to enter the Rafflecopter once you've finished hopping!


Thank you friends for checking out my blog post!
See ya next time.

Inky Hugs,
Crystal

Sunday, May 26, 2019

Unity Stamp Company ~ Mer-Mazing ~ Guide Your Heart

Hey there crafty friends!
Sooo... I couldn't help but make another card using the gorgeous Mer-Mazing stamp set from Unity Stamp Company! Can you blame me?! Look at how gorgeous she is!!


This time I went with a monochromatic feel but with a twist because I didn't just use one purple for my card, I changed up the purples depending on what part of the image I was coloring.

Here's a list of the Copic markers I used:
Mermaid ~ V000, V04, V12
Skin ~ E000, E51
Sky ~ V0000
Water ~ BV20, BV23
Rock ~ V93, V95

I die cut the image with he Reverse Confetti Stitched Squares die and then set it aside. I die cut white card stock using the Stampin' Up Striped Scallop die and adhered a portion of it to the bottom right corner of a 5" square card base of Plum Pudding card stock. I adhered the square panel to the card base using a liquid glue and then punched out the sentiment. I layered it on a punched out piece of Plum Pudding card stock using the same punch... but I offset it to help it pop off the background.


To finish off the card, I added a few drops of the Fairy Wings Nuvo Dream Drops... love the shimmer in these drops!! Love how this turned out!! I hope you do too!

Thanks for checking out my blog post!
See ya next time.

Inky Hugs,
Crystal

Friday, December 28, 2018

Scrapping for Less ~ December 2018 Blog Hop ~ Animals in the Arctic


December’s kit is all about Arctic Animals…Now if you are anything like me, you hate the cold weather, snow, and anything that would mean being cold. However, snow and these cute little critters in this kit are all about fun! So grab your warm beverage, sit back, and hop along with us to see these adorable critters and all the inspiration our designers have to share. Check out the Flavor of the Month page to place your order if you haven’t subscribed. Also, don’t forget to check the A La Carte items (items that are leftover - full packs and such - from putting the kits together, and other items that we have on the website that may coordinate with this kit). Make sure you also put your name in for that Rafflecopter prize!


Hey there! I am loving the theme of this month's kit... Animals in the Arctic! The critters in the stamp sets are all so cute! Let's not waste anymore time and get straight to the cards!


For my first card I used Sketch #2 with Collection One.
I did a mix of layers using the Winter Skies patterned paper by Scrapping for Less along with some Sno Cone card stock. I adhered all of the layers on a white card base. I added a few sequins to the main image and on the card base.


Here's a close up of the watercolored bear. In real life the watercolors coordinate a whole lot better with the colors in the background. You can also see the touches of purple organza ribbon on either side of the bear.


For my second card I used Sketch #4 with Collection Two.
I say I used sketch #4 for this one but it's a loose interpretation... what I mean is, I went rogue! LOL! I kinda sorta used some of the elements of the sketch, but it really had a mind of it's own. ;)  Now you may notice that this card looks kind of similar to my sneak peak card... and that's because I made them at the same time. I just loved this color palette that I pulled from these Alexandra Renke papers included in Collection One so I had to use it for this card too. I trimmed my layers of patterned paper and adhered them to a kraft card stock base. I stamped the adorable penguin with memento tuxedo black ink and colored him in with the following Copic markers:
Penguin ~ C0, C2, C4, C8, R20, YR15, YR27, YR68
Hat/Scarf ~ BG10, BG11, N0, N1, Colorless Blender
Mug ~ B0000, B000, B39, B99, N1


I added some sparkle to the hat and marshmallows using stickles from my stash. I then die cut the image using a wonky square die. I popped it up on the card base and adhered a few die cut snowflakes using the snowflake die from Collection Three. The sentiment was simply stamped, trimmed, and then popped up, as well.


For my third card I used Sketch #1 with Collection Three.
I adhered my layer of grey snowflake patterned paper to a piece of Grape Jelly card stock. I stamped a few snowflakes on the white card base using Wilted Violet and Hickory Smoke Distress Oxide inks. I adhered my grey/purple panel to the card base and then stamped the 'Snow Much Fun' sentiment using Wilted Violet Distress Oxide ink.


I trimmed a small piece of white card stock for my focal scene and stamped the mountains and chunk of ice using Memento Tuxedo black ink. I then stamped the owl and penguin on a scrap piece of white card stock and got to coloring using the following Copic markers:
Mountains ~BV20, BV23, N1
Sky ~ B60
Water/Ice ~ B000, B02, BG0000
Penguin ~ N0, N1, N5, YR15, YR68, V17
Owl ~ C1, YR15, YR68, B02, BG0000
I fussy cut the penguin and owl and adhered them to the scene. I added a few banners cut from the Frosty patterned paper by Pink and Main in the collection. And my last touch was a few sequins here and there.


For my last card I used Sketch #3 with Collection Four.
Now for this card, I flipped the sketch because I wanted to use the Winter Tree Stencil from the Banana Split subscription in my focal panel. I blended Worn Lipstick, Tattered Rose, and Shaded Lilac Distress Oxide inks over the stencil and then set it aside to dry while I stamped and colored the owl and moose. The owl is part of the stamp set included in Collection Four, but the moose is from the Arctic Sentiments set by Scrapping for Less that is in the Banana Split subscription. I colored the images using the following Copic markers:
Owl ~ BV04, BV20, BV31, YR27, YR68
Moose ~ E00, E01, E02, R01, RV95, W5


I fussy cut the images and adhered them to the focal panel that I had mat on Bubblegum card stock. I adhered a few banners on the back of the focal panel and then popped up the panel on the card base. I adhered some snowflakes and sequins all over the card and then realized I didn't have a sentiment yet... so I stamped out the 'Snow Much Fun' sentiment again, trimmed it, and adhered it to the card.
Such a fun kit to play with!! I had a blast creating these cards. I sure hope you've enjoyed them as much as I have.

Here's a look at the Double Dip Subscription.


Here's a look at the Banana Split Subscription.


Next up on the hop is Luci!

After checking out the hop, make sure to join the Rafflecopter back on the SFL blog to have a chance to win an awesome prize!!


Thank you friends for checking out my blog post!
See ya next time.

Inky Hugs!
Crystal

Tuesday, December 18, 2018

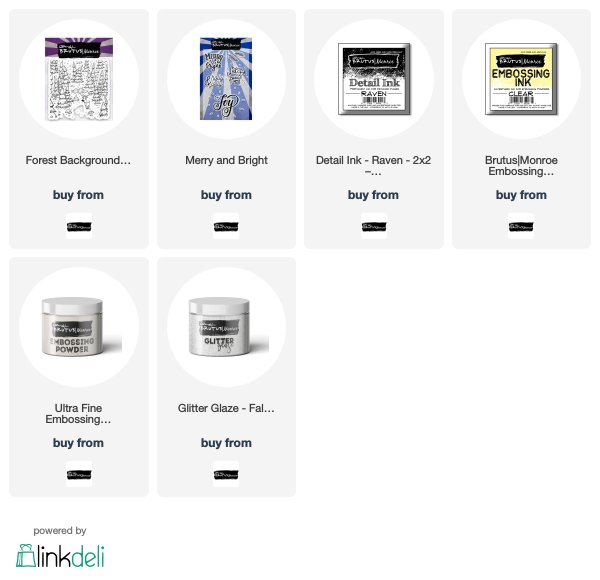
Brutus Monroe ~ Forest Background ~ Let it Snow

Hello! I am beyond excited to be guest designing for Brutus Monroe during the month of December! Woohoo! I hope to share some fun creations with you this month using some fabulous products!! Let's get started! 


Today, I have a card I created using the adorable Forest Background stamp. I stamped the background using Raven Detail Ink and then colored in the images with the following Copic markers ~ E21, E23, E25, E34, E35, N0, N2, N5, E55, E57, E59, W5, G24, G29, G46, YG17. I knew that I wasn't going to use the entire background so I didn't color the whole thing. In fact, I just realized I missed a tiny bit of tree there in the bottom right corner. Ooops! Haha... well, sometimes that happens. I also added some 'snow' to the background using a snow marker and then heat set it to make it puffy. I then die cut the circle piece I wanted for my focal image and then die cut the stitched rectangle piece. I didn't want to exclude that sweet little bunny so I fussy cut him out and adhered him by the deer adding a bit of snow around him, as well. I then set those pieces aside to work on my back layer.


I just had to try out the Fallen Snow Glitter Glaze and I wanted to see what it would look like on a dark card stock so I chose a piece of dark blue card stock from my stash along with a snowy stencil. I was pleasantly surprised at the texture of the glaze... it was so easy to work over the stencil with the spatula filling in all the snowy bits. I love it! I love the effect of the glittery 'snow' on the dark background, too! The perfect base layer for the design I had in mind.

Once the glaze dried, I trimmed the snowy background and mat it on a piece of grey card stock. I mat the rest of my layers using the same grey card stock and then adhered all of my layers onto a white card base, popping up the focal image in the circle using foam tape. When I adhered that last focal piece I was careful to line up the images with the rectangle background.... it's a great way to give dimension to a card when using just a background stamp.


To finish off the design and tie the whole theme of the card together I chose the 'Let it Snow' sentiment from the Merry and Bright set. I didn't want to cover the background I had colored so I chose to stamp the sentiment on vellum card stock. I stamped it using Brutus Monroe Embossing Ink and then I heat embossed Ultra Fine Alabaster Embossing Powder... OMG! I absolutely love this embossing powder! You can see in the picture above how well it melted... so beautiful! I die cut the sentiment with a circle die and then I adhered it just on the right side where it overlaps the scene in the circle. I didn't want to use foam tape behind the other side since it would be visible through the vellum and it would cover the background so I just left it to kind of float there. 


Here's another look at the finished card. I love how it turned out! I hope I've inspired you to pull out those background stamps and have fun with some layers!

Thanks so much for stopping by!
See ya next time.

Inky Hugs!
~ Crystal


{Supplies}

Affiliate links are used:


Friday, August 10, 2018

Scrapping for Less ~ Pink & Main ~ A Giveaway!!

Hello! Today I'm sharing my design team post featuring the exclusive to Scrapping for Less -Wild & Free stamp set!! This set was exclusively designed for Scrapping for Less by Pink & Main for the August 2017 Flavor of the Month card kit. I created four cards using the sweet animals included in this cute set. I'm also having a giveaway, but more about that after we check out these cards! Let's get to it!


{Copic markers used ~ E11, E17, R27, N0, N3, N7, BG11, BG15, BG49}
You'll notice that the cards all use the same sketch. I love doing that for sets that include more than one image. With some fun papers and these cute images you can put cards together pretty quickly using a simple sketch like this one. I got this sketch from the CASE This Sketch challenge blog, but my cards and post were done too late to enter... that's ok though, because the sketch was what I needed to start my design!


{Copic markers used ~ Y06, Y26, Y35, YR15, YR68, R00, R14, R20, E31, B00, YG03}
For all of the cards I used up some of the older card stock that I still had in my stash for my card bases. I also used the Our Family Mini Kit from Scrapping for Less... you can check that little kit out here. The kit includes 6 sheets of the Our Family patterned paper from Echo Park, along with three coordinating embellishments. Included in my kit was some paper flowers and sequins so I decided to add those to my cards.


{Copic markers used ~ Y06, Y26, Y35, B95, B97, B99, BG13, BG49}
The remaining layers on each of the cards is the Our Family papers. I like the mix of patterns and solid papers included in the pack, it makes for easy layering and matting for the main images. Scrapping for Less has more mini kits available... you can check those out here. There's also a full pad of the Our Family 6x6 papers available.


For my last card, I thought I'd share how I colored the backgrounds of my little images using Copic Markers B00, B000, 0, YG03, YG17. I started by coloring the grass portion with YG17. I then went over the outer parts of the area with YG03 leaving a slight shadow for the animals . For the clouds I started by outlining a cloud with B000.


I then colored the rest of the sky with B00 being sure not to overlap the B000 lines all of the way. I wanted there to be some variation in the outline of the cloud. To finish off the sky, I went around the inside of the cloud with the 0 colorless blender to blend those two shades of blue and soften the lines.


{Copic markers used ~ Y18, Y35, YR15, YR68, R20}
I then colored in the platypus and mat the image. I popped up all of the images on the card and then adhered a paper flower with a sequin center. That's all my cards for this time!


Now for the Giveaway!! I have this brand new exclusive stamp set to giveaway!! AND I'm going to throw in some other goodies from my stash as a surprise (all brand new items). All you have to do to enter is to comment on my blog. AND for a bonus entry, I'm also sharing this giveaway on my Instagram. You can head over there, like my post and follow me and you'll have another chance to win!! AND for another bonus entry, follow the Scrapping for Less Instagram. You have until 8/17/2018 midnight EST to enter. Unfortunately, open to US residents only. I will announce the winner on my Instagram on 8/18/2018!! 


Thanks for stopping by!

See ya next time.
~ Crystal