Showing posts with label snow. Show all posts

Saturday, December 7, 2024

~ Friends of Unity December 2024 Blog Hop ~

Hello there crafty friend!
It's time for our Friends of Unity Blog Hop!! This month's cue is super fun! I hope you'll hop along with us and enjoy some wonderful inspiration from our friends! But today is not just a regular monthly blog hop... it's our 7th Anniversary of hopping!! How amazing is that?! 7 years has gone by in a flash!! The FOU has shared so many wonderful cards and projects over the last 7 years and we've added and sadly, said goodbye to some of our friends. I'm so very grateful to my friends that help make this hop amazing each month and I'm also very grateful to the friends that come and hop along with us each month. All your love and comments each month means so much to us. Thank you all so much! We appreciate each of you!


This month's cue is Winter Wonderland! 


For me winter wonderland means snowflakes. I love snowflake stamps! And one of my first snowflake stamps from Unity was the Magical {bliss and wonder} Layers of Life stamps. Still a favorite of mine!


I ink smooshed the Kraft card stock using Stormy Sky, Chipped Sapphire and Picket Fence Distress Inks. I dried the background completely with a Wagner Precision Heat Tool. And then I prepped the card stock for heat embossing with the TE Anti-Static Powder Tool. I stamped the snowflakes and sentiment using Picket Fence Distress Ink and then I sprinkled the wet ink with Alabaster White Embossing Powder. I melted the powder with the heat tool.  


I die cut the background and a piece of Kraft card stock using dies from the BIG Scallops & Rectangles {nesting dies}. I adhered all my layers onto a white A2 top fold card base that I turned on the side for a landscape card. I finished off the card with some confetti from the White Glossy Card Bling from A Colorful Life Designs.


I love the magic and wonder of snow! It's so beautiful and I love to watch it when it just starts snowing. I tried to bring that magic and wonder through my second card. Not sure if I succeeded, but I definitely like how it turned out. To start I traced the inner circle of the Moon {layering stencil} on a piece of {Easy Peel} Masking Paper from Unity with a pencil. I cut out the circle mask, pulled off the backing and placed it on my white card front.


 Commence the inky fun... heehee... I ink smooshed the panel with Stormy Sky, Pine Needles, and Chipped Sapphire Distress Inks. I then blended some Tumbled Glass and Stormy Sky Distress Inks over the white areas of the panel. I distressed the edges of the panel with Black Soot Distress Ink and I ink smooshed just a little Picket Fence Distress Ink too to finish it off. It was a whole bunch of inky fun!


I dried the background completely with a heat tool. And then I added some white acrylic paint spatters. I removed the mask from the 'moon' and blended very lightly over the crater shadows stencil from the Moon {layering stencil} with my black blending brush. I didn't add any ink to the brush though and I kept it very light. In fact, I cleaned off my brush by wiping it off on a microfiber cloth to make sure it wasn't saturated with ink. I used the moon stencil to add just a tiny bit of yellow around the edges of the moon. Again, not adding any ink to my yellow brush. 


Once I was happy with the moon, I stamped the beautiful trees and the sentiment from the Search for those Moments stamps. This is another lovely Layers of Life stamp. I love it! I stamped both of these with VersaFine Onyx Black Ink. Love how this turned out!

Now before we get to the hopping, I chose a lucky winner from the comments on last month's hop to win a fun prize and the lucky winner is...


... Laurie Black!! Congratulations, Laurie!!
Please email me at crystalominkler@gmail.com to claim your prize. 
Please claim the prize before January 1st, 2025. 

Well, that's it for me this time! Please hop along and enjoy some more inspiration from the Friends of Unity! I can't wait to see how our friends were inspired by this month's cue. I will be doing another fun giveaway this month!! Be sure to hop along and comment for a chance to win. {When you comment please leave your name just in case it posts as anonymous.} I'll announce the winner next month! 


Let's get to the hopping...

Crystal <--- you're here

up next ---> Amber


Thanks so very much for supporting our little hop!
We appreciate you so much!!

See ya next time.

Inky Hugs,
Crystal


{Please note that comment moderation is ON. Your comment will appear shortly.}


Thursday, October 24, 2024

Falling for the Holidays 2024 {BYSHC} Linky Party ~ Snow Angel Newton ~ Newton's Nook Designs

 Hello there crafty friend!
It's day 7 of the Falling for the Holidays 2024 {BYSHC} Linky Party!! I'm super excited to share another sweet card that I've made to add to my holiday stash this week! I just added the adorable Snow Angel Newton Stamp Set from our fabulous Sponsor Newton's Nook Designs to my collection and I just HAD to ink him up! Isn't he just the cutest?!


I die cut white card stock using the large zig zag frame die from the Frames & Tags Die Set. I heat embossed the snowflakes using my favorite combination of products... I stamped the sentiment using the Sugar Cube White Pigment ink from Sponsor Taylored Expressions, and added Alabaster White Embossing powder from Brutus Monroe. I then melted the embossing powder using my Wagner Precision Heat Tool. And then I blended a bit of Tumbled Glass Distress Oxide ink over the area making sure to cover the snowflakes. This helped the snowflakes to pop on the background.


I stamped the adorable Snow Angel Newton Stamp Set in my mini misti using the fabulous Pressure Pal from our awesome Sponsor Twiddler's Nook. I colored up the kitty with some Copic markers and then I die cut him using a die from the Snow Angel Newton Die Set. I really wanted to add a wobble spring but I couldn't find my small ones and the big ones were just too big. If I ever find them, I'm definitely copying this card and adding the wobble spring!

Here's a quick list of the Copic markers I used:
Kitty: R00, R20, YR21, YR15, YR27
Hat / Scarf: C00, C2, V000, V12, Colorless Blender
Snow: B0000, B00, Colorless Blender


I die cut the sentiment twice from white card stock using the Merry Christmas Die Set. I used my blue TE Blender Brush to ink up one of the sentiments just a little bit leaving some white. I adhered the sentiments together usinthe Bearly Art Precision Craft Glue. And then I adhered all of my layers to a white A2 card base using the iCraft UltraBond Adhesive from Sponsor Therm O Web.


The Falling for the Holidays 2024 {BYSHC} Linky Party is coming to an end!! Tomorrow is the last day to enter the linky party! I have thoroughly enjoyed the inspiration being shared! I hope you'll join in the fun! Have an ink-tastic day!


Thanks so much for stopping by!
See ya next time.

Inky Hugs,
Crystal


{Please note that comment moderation is ON. Your comment will appear shortly.}

Friday, March 10, 2023

{BYSHC} Sketch Challenge 31 ~ Owl Bundle Up ~ Unity Stamp Co.

 Hello there crafty friend!
I'm sharing another Christmas card for the {BYSHC} Sketch Challenge 31 for the Build Your Stash Holiday Cardmakers Facebook group. I just adore the sweet owls illustrated by Lisa Arana for Unity Stamp Co. The adorably sweet owl from the Owl Bundle Up stamps was just perfect for my card today.


I paired him up with the Snowy Winter Greetings {paper pack} also from Unity. The snowflakes in the pattern paper compliment the snowflakes on the sweet owl's sweater.


The owl was stamped on Stampers Select White card stock from Papertrey Ink {my go-to white card stock!} using Black Amalgam ink from Gina K Designs. I used the following Copic markers to color up my image:

Owl ~ E21, E23, E25, C00, C1, C3, YR21, YR15, YR27
Sweater ~ B000, B91, B95
Ground ~ C00, C1, C3


My main panel was die cut with a stitched circle die from the Scallops & Circles {nesting dies}. I popped it up on my card with foam tape. The sentiment is trimmed up and just adhered to the card. And I finished up the card with a few enamel dots from my stash... I'm really just trying to use these up!! I have SO many. It's ridiculous.


Here's a look at {BYSHC} Sketch 31 for the month of March!
I hope you'll join us and play along with the sketch! If you're interested in seeing a bit more inspiration for this sketch, check out the amazing inspiration from the design team over on the {BYSH} Cardmakers blog!


Thanks so much for stopping by!
See ya next time.

Inky hugs,
Crystal


{Please note that comment moderation is ON. Your lovely comment will appear shortly.}

Tuesday, December 18, 2018

Brutus Monroe ~ Forest Background ~ Let it Snow

Hello! I am beyond excited to be guest designing for Brutus Monroe during the month of December! Woohoo! I hope to share some fun creations with you this month using some fabulous products!! Let's get started! 


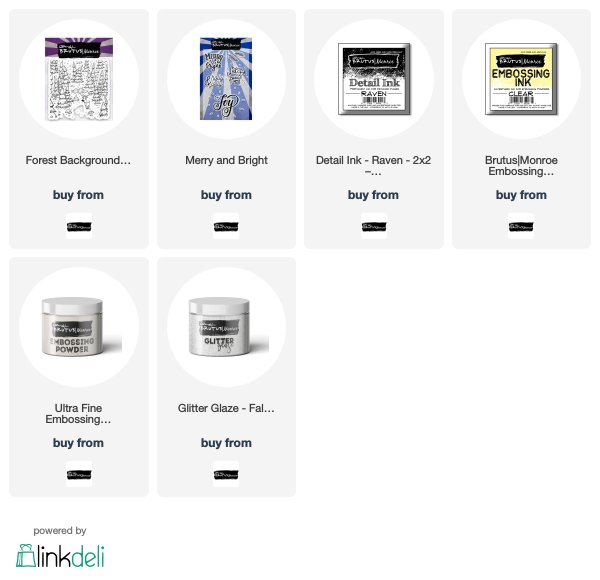
Today, I have a card I created using the adorable Forest Background stamp. I stamped the background using Raven Detail Ink and then colored in the images with the following Copic markers ~ E21, E23, E25, E34, E35, N0, N2, N5, E55, E57, E59, W5, G24, G29, G46, YG17. I knew that I wasn't going to use the entire background so I didn't color the whole thing. In fact, I just realized I missed a tiny bit of tree there in the bottom right corner. Ooops! Haha... well, sometimes that happens. I also added some 'snow' to the background using a snow marker and then heat set it to make it puffy. I then die cut the circle piece I wanted for my focal image and then die cut the stitched rectangle piece. I didn't want to exclude that sweet little bunny so I fussy cut him out and adhered him by the deer adding a bit of snow around him, as well. I then set those pieces aside to work on my back layer.


I just had to try out the Fallen Snow Glitter Glaze and I wanted to see what it would look like on a dark card stock so I chose a piece of dark blue card stock from my stash along with a snowy stencil. I was pleasantly surprised at the texture of the glaze... it was so easy to work over the stencil with the spatula filling in all the snowy bits. I love it! I love the effect of the glittery 'snow' on the dark background, too! The perfect base layer for the design I had in mind.

Once the glaze dried, I trimmed the snowy background and mat it on a piece of grey card stock. I mat the rest of my layers using the same grey card stock and then adhered all of my layers onto a white card base, popping up the focal image in the circle using foam tape. When I adhered that last focal piece I was careful to line up the images with the rectangle background.... it's a great way to give dimension to a card when using just a background stamp.


To finish off the design and tie the whole theme of the card together I chose the 'Let it Snow' sentiment from the Merry and Bright set. I didn't want to cover the background I had colored so I chose to stamp the sentiment on vellum card stock. I stamped it using Brutus Monroe Embossing Ink and then I heat embossed Ultra Fine Alabaster Embossing Powder... OMG! I absolutely love this embossing powder! You can see in the picture above how well it melted... so beautiful! I die cut the sentiment with a circle die and then I adhered it just on the right side where it overlaps the scene in the circle. I didn't want to use foam tape behind the other side since it would be visible through the vellum and it would cover the background so I just left it to kind of float there. 


Here's another look at the finished card. I love how it turned out! I hope I've inspired you to pull out those background stamps and have fun with some layers!

Thanks so much for stopping by!
See ya next time.

Inky Hugs!
~ Crystal


{Supplies}

Affiliate links are used: