Showing posts with label #echoparkpaper. Show all posts

Thursday, January 25, 2024

Fun Fold with a Fix ~ Ribbons & Ruffles ~ Unity Stamp Co.

Hello there crafty friend! 
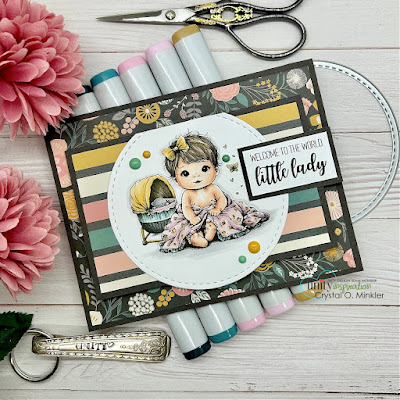
Today I'm sharing a cute fun fold card featuring the adorable new Ribbons & Ruffles stamp from Unity Stamp Co. This stamp is just too cute!! I couldn't wait to play with her and had a spontaneous idea for a fun fold card so I didn't record my whole process, but just the assembling of the card with the fun fold element and, of course, the fix I needed to do to make it work.


Isn't this sweetie just darling!? So precious and sweet! I could use all the adjectives for this one! LOL! Anywho, as I mentioned above this is a fun fold card but you can't actually see how it works in the photos. So I hope you'll check out my video. But the floral layer is actually just a card front. The fold is in the center... so fun! *wink wink*

You can check out my short video showing the fun fold element of this card and how I had to fix it right here... Fun Fold Card with a Fix | Ribbons & Ruffles | Unity Stamp Co.


I stamped the Ribbons & Ruffles sweetie with Black Amalgam ink on Stampers Select White card stock from Papertrey Ink and colored her up with my Copic markers to coordinate with the pretty papers I had pulled for this card. So happy when I remember to find my papers before actually coloring my image! I die cut the baby girl using the largest stitched circle die from the Scallops & Circles {nesting dies}.

Here's a quick list of the Copic Markers I used:

Skin: E000, E00, E11 
Hair: E70, E87, E74
Blankie: RV91, RV93, Y26
Ribbon: Y23, Y26
Bassinet: Y23, Y26, BG70, BG72, BG75, RV91, RV93
Teddy Bear: N0, N1, N3, N5
Butterfly: Y23, BG72


 I paired up Ribbons & Ruffles with the Hello Darling paper pad from The Paper Studio {Hobby Lobby}. My card stock layers are Smokey Shadow from Papertrey Ink. And the enamel dots that just happened to coordinate with the papers is the Celebrate Autumn Enamel Dots from Echo Park Paper Co. Have an ink-tastic day!

Thanks so much for stopping by!
See ya next time.

Inky hugs,
Crystal

{Please note that comment moderation is on. Your lovely comment will appear shortly.}

Friday, August 25, 2023

{BYSHC} Sketch Challenge 36 ~ Christmas Magic ~ Echo Park Paper Co.

 Hello there crafty friend!
I'm sharing one last Christmas card for the {BYSHC} Sketch Challenge 36 for the Build Your Stash Holiday Cardmakers Facebook group. This month's sketch is really great for the paper packs that have cut-aparts in them. I made four pretty quick cards using the Echo Park Paper 6x6 Paper Pad called Christmas Magic.


I cut down two pattern papers to 4-1/4 x 5-1/2" - for my first two cards that's the plaid and the green pattern papers. I cut them both again at the two inch mark and adhered them to two white A2 top fold card bases.


I then cut a couple little strips of pattern paper to adhere across the card base and trimmed off the excess. I adhered the cut apart directly on the card for the first card with the gifts. For the reindeer card I added foam tape to the back of this cut apart and popped it up on the card.


Just like the first two cards, I used two pattern papers for my last two cards. I cut them down to 4-1/4 x 5-1/2" and then cut off 2" from both. I then adhered them to card bases.


And this time I adhered Santa directly to the card and the house cut-apart was popped up using a bunch of foam tape.


Four really quick cards!! I'll definitely be using this sketch again with the cut-aparts in my paper packs. Loving it!


Here's a look at {BYSHC} Sketch 36 for the month of August!
There's still a few days to play along with the sketch! The challenge ends on August 31st. I hope you'll join in the fun and start building your stash of holiday cards. If you're interested in seeing a bit more inspiration for this sketch, check out the amazing inspiration from the design team over on the {BYSH} Cardmakers blog!


Thanks so much for stopping by!
See ya next time.

Inky hugs,
Crystal


{Please note that comment moderation is ON. Your lovely comment will appear shortly.}

Friday, June 23, 2023

{BYSHC} Sketch Challenge 34 ~ Lovely Legs Hugging Elves ~ Colorado Craft Company

  Hello there crafty friend!
I'm sharing another Christmas card for the {BYSHC} Sketch Challenge 34 for the Build Your Stash Holiday Cardmakers Facebook group. This time I played with a fun digi stamp from Colorado Craft Company called Lovely Legs Hugging Elves. Did you know that Colorado Craft Company started selling digi stamps?! I was super excited to get couple of their digi stamps during one of their Buy One Get One sales... such a fab sale!


I paired up this sweet Lovely Legs Hugging Elves digi stamp with the Santa Claus Lane 6x6 paper pad from Echo Park Paper Co. These fun plaid papers have stitches on some of the plaid which reminds me of the stitched ribbons I used to hoard from Stampin' Up. I thought it was a fun plaid paper and the perfect colors for my focal panel.


The digi stamp was inserted into a Microsoft Word Document where I adjusted the size of the image. I kept it kind of big because I wanted it to be a large focal panel. I love how the line of the snow works so well with the line of the focal panel in the sketch. This digi stamp is so perfect for this sketch! Here's a quick list of the Copic markers I used to color up the digi stamp:

Skin ~ E000, E00, E11, E04
Dress / Red Shoes ~ C00, C1, C3, R20, R17, R27
Pants ~ Y06, Y15
Jacket ~ YG11, G24, G46, Y15
Belts ~ N0, N2, N4, N6, Y06, Y28
Black Shoes ~ N0, N2, N4, N6
Snow ~ C00, C1, C3
Sky ~ B000


I die cut a piece of white card stock with a die from the Double Roped Rectangle dies from Gina Marie Designs. I trimmed the copic colored digi stamp to fit inside of the die cut rectangle. I covered the back of the die cut with lots of foam tape and popped it up on the card. The sentiment is a sticker from the Christmas Clippings Stickers from Tim Holtz and Idea-ology. I trimmed the ends with my scissors and just stuck it on the card. I love these sentiment stickers! They have been so handy!


Here's another look at the {BYSHC} Sketch 34 for this month's challenge. Did you know that Colorado Craft Company is sponsoring this month's challenge? The winner of this month's challenge will receive a fun prize package of Colorado Craft Company goodies!! I sure hope you'll join us and play along... there's still a whole week left to enter the challenge!


Thanks so much for stopping by!
See ya next time.

Inky hugs,
Crystal


{Please note that comment moderation is on. Your lovely comment will appear once approved.}

Wednesday, February 1, 2023

{BYSHC} Sketch Challenge 30 ~ Destination Christmas ~ Newton's Nook Designs

 Hello there crafty friend!
It's time for a new sketch challenge over in the Build Your Stash Holiday Cardmakers! Today I'm sharing a sweet Christmas card using the adorable Destination Christmas stamp set from Newton's Nook Designs!! I also paired it up with super cute papers from Echo Park Paper Co. called Gnome for Christmas. The car stamp worked so well with the papers... it was a must to pair them up!


This month's sketch has a few layers that don't require mats if you use coordinating papers from the same paper pack that also contrast a bit. I used the car papers for my background... it's the busiest paper with repetitive images. And then I used the snowflakes to contrast the brown snowflakes in the car paper. And it also compliments the red in my focal image. And then the darker green paper contrasts both papers and brings your eye to the white focal piece. I know some have shared with me that they struggle with pairing up papers so I hope that this helps a bit in how I chose my papers for layering.


Here's a quick list of the Copic markers I used for the cute car stamp:

Tree ~ YG11, G24, G46, E51, E55, E57
Car ~ R20, R14, R37, E51, E55, E57, E59
Tires / Bumpers ~ N0, N1, N4, N6
Window ~ N0, N1


I die cut the cute car and sentiment with the scalloped stitched circle die from the Circle Frames die set, also from Newton's Nook Design. I added foam tape to the back of the circle and popped it up on the card. I think this one turned out pretty cute! What do you think?


Here's a look at {BYSHC} Sketch 30 for the month of February!
I hope you'll join us and play along with the sketch! If you're interested in seeing a bit more inspiration for this sketch, check out the amazing inspiration from the design team over on the {BYSH} Cardmakers blog!


Thanks so much for stopping by!
See ya next time.

Inky hugs,
Crystal


{Please note that comment moderation is ON. Your lovely comment will appear shortly.}

Friday, January 27, 2023

{BYSHC} Sketch Challenge 29 ~ Gnome Christmas and a Bonus Card ~ The Greeting Farm

Hello there crafty friend!
I'm back with not one, but TWO Christmas cards to finish off the {BYSHC} Sketch Challenge 29 for the Build Your Stash Holiday Cardmakers!! Last month I got the super cute Gnome for Christmas paper pad from Echo Park Paper Co. and I thought it would be just too cute paired up with the adorable Gnome Christmas stamp set from The Greeting Farm.


What do you think? It almost looks like a snow globe the way I cut the sentiment. Complete accident, but I think I might try it again for a future card! I used two cute papers from the Gnome for Christmas paper pad... a cute green gingham and, of course, the gnome paper. I adhered those to an Old Olive piece of card stock from Stampin' Up measuring 4 x 5-1/4". I then adhered the paper layers to a card front of Pure Poppy card stock from Papertrey Ink measuring 4-1/4 x 5-1/2". And then I adhered the layers to a white A2 top fold card base. I actually created both cards at the same time since I was in the zone and set them aside.


I stamped the adorable gnomes and the holly with berries on a scrap of white card stock using Memento Tuxedo Black ink. This is my favorite ink to use on clear stamps because it cleans off very nicely. I then colored up the gnomes with the following Copic markers:

Skin ~ E000, E00, E11, E04
Hair / Beard ~ C00, C2
Holly & Berries ~ YG11, YG91, YG95, YG97, R20, R14, R37
Candy Cane ~ C00, C2, R20, R14, R37
Girl Gnome's Clothes ~ R20, R14, R37, YG11, YG91, YG95, YG97
Guy Gnome's Clothes ~ YG11, YG91, YG95, YG97
Shoes ~ N0, N1, N4, N6


I fussy cut the gnomes and cleaned up the edges of the images by coloring them with a Memento Tuxedo marker. I die cut a white piece of card stock using the stitched scalloped circle die from the Scallops & Circles {nesting dies} from Unity Stamp Co. And then I adhered the gnomes to the circle. I stamped the sentiment, trimmed the top and bottom, and then cut fishtails on both sides. As I mentioned above, it was a complete accident that it looks kind of like a snow globe but I love it! I cut a scrap of Pure Poppy card stock to be thinner than the white card stock and cute fishtails on it too. I adhered the sentiment and red layer together and then adhered the gnome circle to the bottom of the sentiment. I then added a bunch of foam tape and popped up the whole thing on my card. I used the thinner foam tape from Scrapbook Adhesives so my card won't be too bulky. 


If you've played with this sketch, you know that it's easy to make two cards when you cut two different pattern papers for the triangles. So, I have a bonus card to share using a cut apart from the Gnome for Christmas paper pad.


I popped up the cut apart using the same thin foam tape I used on my first card. I finished off the card by adding a few green enamel dots from my stash. 


This card may need a non-machinable postage stamp to mail but it was screaming for those enamel dots... had to happen! :)


Here's a look at {BYSHC} Sketch 29 for the months of December-January!
There's just a few more days to join us and play along with the sketch for a chance to win a prize! If you're interested in seeing a bit more inspiration for this sketch, check out the amazing inspiration from the design team over on the {BYSH} Cardmakers blog!


Thanks so much for stopping by!
See ya next time.

Inky hugs,
Crystal


{Please note that comment moderation is ON. Your lovely comment will appear shortly.}

Saturday, October 1, 2022

{BYSHC} Sketch Challenge 27 ~ Nut Cracker Holiday ~ Unity Stamp Co.

 Hello there crafty friend!
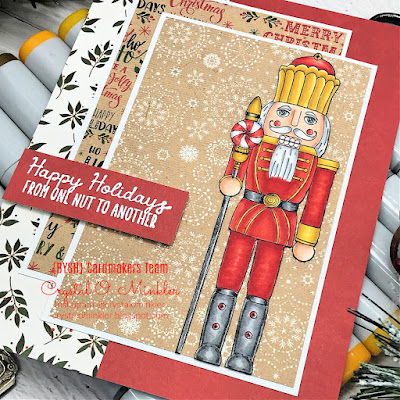
It's time for a new sketch challenge over at Build Your Stash Holiday Cardmakers and I have a cute Christmas card to share using a punny stamp from Unity Stamp Co. called Nut Cracker Holiday. This detailed nutcracker stamp was so fun to color up all festive and I just love that punny sentiment!


I paired the Nut Cracker Holiday stamp up with the beautiful My Favorite Christmas 6x6 paper pad from Echo Park Paper Co. I couldn't find a paper in my stash with just the right colors but I think this one coordinates nicely. Yes, that means I colored before looking for my pattern paper... it happens sometimes! 


You'll see the sketch down below in my blog post but I've altered it just a bit to work with my nutcracker. He's a little taller than the focal piece in the sketch calls for so I made my panels 2-3/4 x 4-1/4" and they are both mat with white card stock measuring 2-7/8 x 4-3/8". It takes up a bit more room on the card front but I think it still works nicely with this sketch design.


Here's a list of the Copic markers I used for the Nutcracker:

Skin / Eyes ~ E000, E00, E11, E04, B000, B00, B02
Hair / Facial Hair ~ C00, C2, C3
Clothes / Scepter ~ Y15, Y35, Y28, R20, R14, R27, N0, N1, N3, N5


Here's a look at {BYSHC} Sketch 27 for the month of October!
I hope you'll join us and play along with the sketch! If you're interested in seeing a bit more inspiration for this sketch, check out the amazing inspiration from the design team over on the  {BYSH} Cardmakers blog! I'll be back next week with my weekly Christmas card using this fun new sketch!


Thanks so much for stopping by!
See ya next time.

Inky hugs,
Crystal


{Please note that comment moderation is ON. Your lovely comment will appear shortly.}

Wednesday, September 14, 2022

Thanksgiving Place Cards ~ Fall, That's All ~ Unity Stamp Co.

 Hello there crafty friend!
Today I'm sharing adorable Thanksgiving place cards using the new Fall, That's All stamps from Unity Stamp Co. Love this sweet set of stamps!! I had created these to share as part of my Fall is in the Air Collab with my sweet friend Teresa, but sadly she's unavailable currently with a health issue so we've postponed our collab. I would really love if you would lift her up in prayer or send good vibes her way. I bet she'd appreciate it! Well, let's get to these cute cards...


Aren't they just the cutest?! These stamps are perfect for some cute 3 x 3" place cards! How fun are these and so easy to make! A fun addition to your Thanksgiving table this year!


I paired up these cute stamps with the Celebrate Autumn 6 x 6" paper pad from Echo Park Paper Co. I die cut the circles from Orange Zest and Dark Chocolate card stock (both from Papertrey Ink) using a die from the Stitched Circle Stacklets dies from Taylored Expressions... it measures approx. 2-1/8".


So these are just top fold 3 x 3" notecards of Kraft card stock measuring 6 x 3"; scored at 3". I trimmed up the pattern papers using my Tim Holtz Tonic Deckle Torn Edge Trimmer so they're about 2-7/8" square. Ha! I just realized I forgot to color the name tag for my second pumpkin card! Ooops! I got rushed finishing up my video and missed that! Oh, well... let's just imagine it has that bit of shading.


The pattern papers are adhered to the 3 x 3" place cards. I went with this size so that I could also write little notes inside. So fun!


I had so much fun coloring up these stamped images! I just love coloring Fall images... something about the rich beautiful colors of Fall!


I adhered the bottom portion of the circles to the top of the note cards. I thought about popping up the fussy cut images but decided to just leave all the layers flat. Here's a quick list of the Copic Markers I used to color up the images:

Pumpkin Pie ~ E30, E31, E33, YR21, YR15, YR24, C00, C2
Acorn ~ E21, E23, E25, E29
Pumpkin ~ E21, E23, E25, E29, YR21, YR15, YR68, YR27


I just love this pumpkin pie stamp! It's definitely my fave... and I think it could be used for other pies! I have a video sharing my coloring of the three images and then I assemble just one of the cards so it's not a super long video. I hope you'll check it out!! Here's the link... Thanksgiving Place Cards | Fall, That's All | Unity Stamp Co.


Here's another look at the set of Thanksgiving Place Cards. Today is the last day for the Tag Sale over at Unity Stamp Co. Be sure to stop by and check out all the amazing new releases and the sale, of course!!


Thanks so much for visiting my blog and YouTube channel!
See ya next time.

Inky Hugs,
Crystal


{Please note that comment moderation is on. Your lovely comment will appear shortly.} 
Friday, August 19, 2022

{BYSHC} Sketch Challenge 25 ~ Gifting Girl ~ Angie Blom Digital Designs

 Hello there crafty friend!
I'm back with my weekly Christmas card for the {BYSHC} Sketch Challenge 25 and this week I finally colored up the gorgeous Gifting Girl digi stamp from Angie Blom Digital Designs. I had this beauty printed for the Christmas in July {BYSHC} Linky Party but I never did get to color her up... until now! Yay!


I paired up this lovely girl with the Deck the Halls 6x6" paper pad from Echo Park Paper Co. I actually picked these out before I started coloring so I could pull the colors from the papers. 


I cut all my layers and adhered them to my card front of green pattern paper that measures 4-1/4 x 5-1/2". The tree pattern paper and the red pattern paper are bigger than what the sketch calls for but they were scraps in my paper pad and I liked how they looked.


Here's a quick list of the Copic Markers I used to color up Gifting Girl:

Skin ~ E000, E00, E11, E04
Hair ~ YR0000, YR31, YR02, YR24, YR27, E25
Hat ~ C00, C2, BG11, BG23, BG32
Coat ~ BG11, BG23, BG32, Y11, Y15, Y28
Dress / Gloves ~ R20, R14, R27
Boots ~ E21, E25, E29
Presents ~ BG11, BG23, BG32, R20, R14, R27, G12, G14, G46, C00, C2, C3, YR0000, YR31, YR02


I fussy cut Gifting Girl and the sentiment leaving a skinny white border around both. I adhered the sentiment directly to the card and popped up Gifting Girl with foam tape. I finished off the card with a few enamel dots from my stash.


Here's a look at this month's Sketch 25 for the Build Your Stash Holiday Cardmakers Facebook group. I'm still hoping to make a fun card with this sketch... fingers crossed I have time this weekend to make it. Anywho, be sure to stop by the {BYSHC} blog to see a whole bunch more adorable inspiration from the {BYSHC} Design Team.


Thanks so much for stopping by!
See ya next time.

Inky Hugs,
Crystal


{Please note that comment moderation is on. Your lovely comment will appear shortly.}

Friday, July 1, 2022

{BYSHC} Sketch Challenge 24 ~ Sweet Christmas Wishes ~ Unity Stamp Co.

 Hello there crafty friend!
It's time for a new Sketch Challenge over at Build Your Stash Holiday Cardmakers and I have a sweet Christmas card to share using an adorable stamp from Unity Stamp Co. called Sweet Christmas Wishes. I was super excited to attend a Unity Lovers gathering last Friday and I took a few images to color up while I was there. I thought the adorable penguin in this Itty Bitty stamp set would be perfect for this month's sketch... and he took no time to color up!!


I paired up this cute stamp with the A Perfect Winter paper pad from Echo Park Paper Co. These papers are one of my absolute favorites!! I love the mix of colors and the designs so much! I used a few different ones for my background that I think compliments the focal image.


I stamped the cute Sweet Christmas Wishes penguin and sentiment with Gina K. Design Black Amalgam ink and colored up the penguin with the following Copic Markers:

Penguin ~ C00, C2, YR15, YR68
Hat ~ C00, C2, R20, R14, R27
Candy Cane ~ C00, C2, R20, R14, R27
Snowflakes ~ B000, B02


I trimmed up my pattern papers for my background exactly as the sketch calls for... the wood grain paper is 1-3/4 x 5-1/2" and the snowflakes are 4-1/4 x 5-1/2". I adhered the wood grain paper onto the snowflake paper. Now if you'd prefer not to cover up any of your paper and waste it really... you can cut your second paper (the one that would be on the right side) at 2-1/2 x 5-1/2". Just make sure that your cuts are straight and adhere them both to your card base. I did make my candy cane striped paper a bit bigger than the sketch calls for since my focal image was also larger. My focal image was die cut with a 2-7/8" stitched square die. My candy cane striped paper measures 2 x 4-1/4". And then my last adjustment was my sentiment which was bigger so I didn't want to cover up a lot of the pattern paper. I just trimmed it down and moved it closer to the middle.


Here's a look at the fun {BYSHC} Sketch 24 for the month of July!
I hope you'll join us and play along with the sketch! If you're interested in seeing a bit more inspiration for this sketch, check out the amazing inspiration from the design team over on the  {BYSH} Cardmakers blog! I'll be back next week with my weekly Christmas card using this fun new sketch!


Thanks so much for stopping by!
See ya next time.

Inky hugs,
Crystal


{Please note that comment moderation is ON. Your lovely comment will appear shortly.}

Friday, April 8, 2022

{BYSHC} Sketch Challenge 21 ~ Owl-ways Merry ~ Penny Black

 Hello there crafty friend!
Today I'm sharing my weekly Christmas card using Sketch 21 from the Build Your Stash Holiday Cardmakers! I made a sweet owl mini slimline card using the Owl-ways Merry stamp set from Penny Black.


I've had this cutie sitting on the side of my desk just waiting for it's turn to get inked up. Isn't it just the cutest?! I paired up the sweet owls with the A Perfect Winter paper pad from Echo Park Paper Co.


I altered the sketch a bit to fit a mini slimline card. My card base measures 6-1/2 x 7"; scored at 3-1/2". My bottom layer with the dark blue paper measures 6 x 3". The flower paper measures 5-7/8 x 2-7/8". Now for the plaid paper, I didn't want to waste any of it... Love It!!... so I cut to small pieces that tuck just under the focal piece. They measure approximately 3/4 x 2".


I stamped the sweet owls with Gina K. Black Amalgam ink and colored them up with the following Copic Markers:

Owls ~ W00, W1, W3, W5, C00, C2, Y06, YR15, YR27
Hats / Scarves ~ C00, C2, R20, R14, R37
Branch ~ BG01, T0, T4, T6
Leaves ~ BG0000, BG000, BG10, BG01
Berries ~ R20, R14, R37
Outline ~ C00, C1


The focal piece measures 3-3/4 x 2-1/2". To cut around the leaves I used my guillotine cutter but only cut close to the leaf and then I fussy cut the rest of the way around the two leaves. I adhered the plaid papers just under the focal piece and then adhered the whole thing to the card.

Here's a look at the fun {BYSHC} Sketch 21 for the month of April!
I hope you'll join us and play along with the sketch! If you're interested in seeing a bit more inspiration for this sketch, check out the gorgeous inspiration from the design team over on the  {BYSH} Cardmakers blog! I'll be back next Friday with my regular weekly Christmas card using this fun sketch!


Thanks so much for stopping by!
See ya next time.

Inky hugs,
Crystal


{Please note that comment moderation is ON. Your lovely comment will appear shortly.}