Showing posts with label #halloweencard. Show all posts

Monday, July 29, 2024

Inky Paws Challenge #228 ~ Sketch Challenge Reminder

 Hello there crafty friend!
 There's still time to play along with the Inky Paws Challenge 228 - Sketch Challenge! You have until this coming Friday, August 2nd to get your entries in for this fun challenge and a chance to win a $20 store credit to Newton's Nook Designs!


Such a fun sketch! I couldn't wait to make a Halloween card using my favorite Halloween stamp!


I stamped the adorable Newton's Perfect Pumpkin using Memento Tuxedo Black ink and colored it up with my Copic markers. I fussy cut this cutie and colored up the edges with a Memento Tuxedo Black marker making the fussy cutting nice and neat! I heat embossed the sweet sentiment using Sugar Cube White Pigment ink from Taylored Expressions along with Alabaster White Embossing Powder from Brutus Monroe. This is my favorite combo for a pretty white heat embossed sentiment. I melted the powder with a Wagner Precision Heat Tool and then trimmed the sentiment.

Here's a quick list of the Copic markers I used:
Kitty: R00, R20, N0, N2, N4
Hat: N2, N4, N6, N8, YG11, YG23
Pumpkin: E53, E55, E57, YR21, YR15, YR68, YR14


I die cut a hexagon from True Black card stock from Papertrey Ink using a die from the awesome Hexagon Frames Die Set. I adhered the sentiment across the bottom of the hexagon and adhered the kitty just on top... I think the pumpkin lays over the sentiment strip just a tiny bit. I added foam tape to the back of the hexagon and sentiment and set it aside.


I die cut the background paper using the stitched scalloped die from the Frames & Flags Die Set and I adhered it to a black A2 top fold card base. I cut the rest of my fun pattern papers from the Halloween Meows 6x6 Paper Pad. The orange striped papers measures 1-1/2 x 4-5/8". The cute kitty pumpkin paper measures 1-3/4 x 4-1/8". And the orange pumpkin paper measures 4-1/4 x 1-1/2". I adhered my paper layers to the card and then popped up the focal kitty! So happy to add a cute Halloween card to my stash!


Now it's your turn to get your paws inky with your Newton's Nook Designs products and create a project using the sketch. Be sure to link up to the Inky Paws Challenge! Can't wait to see your projects!


Thanks so much for stopping by!
See ya next time.

Inky Hugs,
Crystal


{Please note that comment moderation is on. Your lovely comment will appear once approved.}

Monday, October 9, 2023

Inky Paws Challenge #208 ~ Halloween Theme Challenge Reminder

 Hello there crafty friend!
 There's still time to play along with the Inky Paws Challenge #208 - Halloween Theme Challenge!! You have until this coming Friday, October 13th to get your entries in for this fun challenge and a chance to win a $20 store credit to Newton's Nook Designs!


Loving all the pumpkins in the badge for this challenge... I just had to feature some fun jack-o-lanterns for my card this week!


I pulled out a couple of fun pattern papers from the Halloween Meows 6x6 Paper Pad. I cut the background paper to cover the front of my card base. It measures 4-1/4 x 5-1/2". I cut the orange jack-o-lantern paper to 2-1/4 x 3". The black mat is just a tad bigger at 2-3/8 x 3-1/8". The two green papers are scraps I had leftover. They're approximately 1/2" x 3". I cut fishtails on the ends and adhered them together.


The adorable kitty and pumpkin from the Newton's Perfect Pumpkin Stamp Set was stamped with Memento Tuxedo Black ink. I colored it up with my Copic markers {listed below}. I then fussy cut the kitty on the black line and colored the edge with a Memento Tuxedo Black marker. This helps the image look nice around the edges. I adhered the kitty to a piece of vellum that I had die cut this a stitched oval from the Oval Frames Die Set

Copic Markers I used to color up the kitty and pumpkin:
Kitty: C00, C1, C3, R00, R20
Hat: YG21, YG11, YG13, C00, C1, C3, C5
Pumpkin: YR21, YR15, YR68, YR27, E51, E55, E57


To add a little fun touch to the card, I die cut two bats using one of the bat dies from the Witchy Newton Die Set. I chose a cute sentiment from the Spiderweb Oval Stamp Set and colored 'trick' with YG21, YG11 and YG13. I trimmed it up and mat it on a piece of black card stock and then I adhered it to the card. I did add a couple scraps under the left side of the sentiment so it would lay flat on the card. 


Inspiration for my card came from the TOP Inky Inspiration Sketch 15. This has been such a fun sketch. It works great with a small image and a great mix of papers for a background.


Now it's your turn to get your paws inky with your Newton's Nook Designs products and create a project using the stripes theme. Be sure to link up to the Inky Paws Challenge! Can't wait to see your projects!


Thanks so much for stopping by!
See ya next time.

Inky Hugs,
Crystal


{Please note that comment moderation is on. Your lovely comment will appear once approved.}

Monday, October 2, 2023

Inky Paws Challenge #208 ~ Halloween Theme Challenge

Hello there crafty friend!
It's time for a new Inky Paws Challenge... a super fun Halloween Theme Challenge! 
I sure hope that you'll join in the fun and play along with us using your Newton's Nook Designs products! You have until Friday, October 13th... ohhh... SPOOKY... to get your entries in for the #208 Halloween Theme Challenge and a chance to win a $20 store credit to Newton's Nook Designs!


I am a huge Halloween fan so I'm really loving this challenge! I can't wait to see all the inspiration for this challenge.


I started this card with a fun background I created using the Flying Bats Stencil. I blended Villainous Potion Distress Oxide inks over the stencil covering a whole card front of white card stock measuring 4-1/4 x 5-1/2". I then blended Black Soot Distress Oxide ink around the outer edges leaving some purple in the middle. I removed the stencil and distressed the edges of the card front with some more black ink.


I trimmed up the background to 4 x 5-1/4" and adhered it to a card front of True Black card stock from Papertrey Ink. I also die cut a piece of True Black card stock using the stitched and scalloped frame from the Framework Die Set. And then I die cut a little hill from black card stock using the stitched hill die from the Land Border Die Set. I adhered them together and trimmed off the extra hill on the side. Next, I just adhered the frame to the center of the card.


I stamped the cute witch holding a broom from the Brooms & Boos Stamp Set using Memento Tuxedo Black ink. I also stamped the moon. I colored them up with some Copic Markers. Here's a quick list of the Copic Markers I used:

Skin: E000, E00, E11
Hair: YR31, E43, E44
Hat: N0, N1, N3, N5, N7, YG11, YG23
Dress: YG11, YG23, V000, V12, V15, V17
Shoes: V000, V12, V15, N0, N1, N3, N5
Broom: E51, E55, E57, E59
Moon: Y06, Y15, Y38

I die cut the colored witch and moon using the coordinating Brooms & Boos Dies Set. I die cut two more moons from scraps of white card stock and adhered them all together before I adhered them to the card. This gives some dimension to the moon. I also die cut an extra witch and cut off her feet and the bottom portion of the broom. I adhered it to the colored witch and then adhered her to the card. This added layer helps the witch to lay flat on the card. I stamped the sentiment with Sugar Cube Pigment Ink from Taylored Expressions onto True Black card stock that I had applied anti-static powder to using the TE Anti-Static Powder Tool, also from Taylored Expressions. I added some Alabaster White Embossing Powder from Brutus Monroe and then melted the powder using a Wagner Precision Heat Tool. I trimmed it up, cut a fishtail end and popped it up on the card using Crafty Foam Tape from Scrapbook Adhesive.


I've been having some fun finishing up my cards inside the card. For this one I just die cut a piece of white card stock using the large stitched and scalloped rectangle die from the Framework Die Set. I stamped the fun Halloween sentiment and then adhered the panel inside the card. Easy peasy!


Now it's your turn to get your paws inky with your Newton's Nook Designs products and create a project with a Halloween theme. Be sure to link up to the Inky Paws Challenge! Can't wait to see your projects!


Thanks so much for stopping by!
See ya next time.

Inky Hugs,
Crystal


{Please note that comment moderation is on. Your lovely comment will appear once approved.}

Monday, September 25, 2023

Inky Paws Challenge #207 ~ Sketch Challenge Reminder

 Hello there crafty friend!
 There's still time to play along with the Inky Paws Challenge #207!! You have until this coming Friday, September 29th to get your entries in for this fun sketch challenge and a chance to win a $20 store credit to Newton's Nook Designs!


Today I'm sharing a cute Halloween card using the sketch for the current challenge. 
I am just smitten with this sketch!


I started by cutting four pattern papers from the Halloween Meows 6x6 Paper Pad. Each of these measured 6 x 1-1/4". I adhered them across a 3-1/2 x 5" piece of True Black card stock from Papertrey Ink. I mat the panel with a 3-5/8 x 5-1/8" piece of Lemon Lime Twist card stock from Stampin' Up that I adhered to a True Black card front measuring 4-1/4 x 5-1/2". 


The fun sentiment is from the Witchy Newton Stamp Set that I die cut using a die from the Oval Frame Die Set. I also die cut a black mat using the next largest oval die from the same die set.


All of my layers on the front of the card are directly adhered to a white A2 top fold card base.


Now... I've been having fun continuing the design of my cards inside the card. So I stamped the first sentiment - "Best Witches" - inside and I also stamped Newton from the Witchy Newton Stamp Set. I had planned on not coloring Witchy Newton but it just looked too plain. So I stamped him again on a scrap of white card stock. I colored him up with the Copic markers I've listed below and then I die cut him using the Witchy Newton Die Set and adhered him inside the card. I thought the sentiment needed a little something so I added the ampersand {&} from the Spring Blooms Oval Stamp Set. I just masked the rest of the sentiment and inked up the ampersand and then removed the mask and stamped in the card. Easy peasy. And then I finished my sentiment with the Happy Halloween sentiment from the Spiderweb Oval Stamp Set.

Here's a quick list of the Copic Markers I used for this stamp:

Kitty ~ Y11, YR21, R00, R20
Hat ~ N0, N1, N3, N5, N7, V000, V12, V15, V17
Boot ~ V000, V12, V15, V17, YG21, YG11, YG03, N0, N1, N3, N5, N7


Now it's your turn to get your paws inky with your Newton's Nook Designs products and create a project using the sketch. Be sure to link up to the Inky Paws Challenge! Can't wait to see your projects!


Thanks so much for stopping by!
See ya next time.

Inky Hugs,
Crystal


{Please note that comment moderation is on. Your lovely comment will appear once approved.}

Saturday, September 16, 2023

Hocus Pocus ~ Halftone Circle Stencil ~ A Colorful Life Designs

 Hello there crafty friend!
Today I'm so excited to share another cute Halloween card as a guest designer for A Colorful Life Designs. Have you checked out the selection of stencils over at A Colorful Life Designs yet? All so AMAZING! There is literally something for every occasion!! Before we get to my card, please use code Crystal10 for 10% OFF your order over at A Colorful Life Designs and tell them Crystal sent you over!


Today I'm sharing a very simple Halloween card featuring the Halftone Circle Stencil from A Colorful Life Designs. It makes the perfect background! I can imagine so many different fun images with this stencil. I used a palette knife from my stash and applied Unicorn Horn Glitter Glaze from Brutus Monroe all over the stencil onto a card front of True Black card stock from Papertrey Ink.


The adorable witch is from the Hocus Pocus stamp set from The Greeting Farm. I don't see it currently on their website. But I did find Hallo Witch - she's a fun digital stamp and she's also on a broom. Here's a quick list of the Copic markers I used to color up this cute witch:

Skin: E000, E00, E11, E04
Eyes: YG11, YG23, C00, C1
Mouth: E04, E000
Hair: YR14, YR18, E09, E29
Dress / Boots / Hat: YG11, YG23, YR21, YR15, YR16, N0, N1, N3, N5, N7
Broom: E51, E55, E57, E59, YR21, YR15, YR16
Gecko / Leaves: YG21, YG11, YG23, YG63


I adhered the stenciled background to a white A2 top fold card base measuring 4-1/4 x 11"; scored at 5-1/2". I added foam tape to the back of the fussy cut witch and popped her up on the card. I heat embossed the sentiment using Sugar Cube Pigment ink, Alabaster White embossing powder and my heat tool. I trimmed the sentiment and popped it up on the card also using foam tape.

You can check out my process video here... Hocus Pocus | Halftone Circle Stencil | A Colorful Life Designs.


 Be sure to head over to A Colorful Life Designs and check out their amazing selection of stencils. And don't forget to use code Crystal10 for 10% OFF your order! Have a wonderful weekend friends!

Thanks so much for stopping by!
See ya next time.

Inky hugs,
Crystal


{Please note that comment moderation is on. Your lovely comment will appear once approved.}

Friday, September 8, 2023

Here for the Boos ~ Ghost Squad Stencil ~ A Colorful Life Designs

 Hello there crafty friend!
Today I'm so excited to share a cute Halloween card as a guest designer for A Colorful Life Designs. The amazing selection of stencils over at A Colorful Life Designs are well, AMAZING! A whole slew to pick from and there's something for every occasion!! Before we get to my card, please use code Crystal10 for 10% OFF your order over at A Colorful Life Designs and tell them Crystal sent you over!


Today my card features the coolest ghosts in town! I used the Ghost Squad Stencil. Aren't they just the cutest?! And those glasses! I can't get enough of them.

I ink smooshed a fun background for the ghosts using Villainous Potion and Kitsch Flamingo Distress Oxide inks. I then blended the same oxide inks over the Ghost Squad Stencil. I masked the ghosts as I went across the stencil just so the blends wouldn't get messed up. I really just wanted the pink in the middle and it was easier to mask and just blend each one separately.


I also added a bit of glittery goodness to the ghosts and splattered some Liquid Pixie Dust while the stencil was still over the ghosts. I had a couple splatters bleed through but that's okay. The glitter is so fun! I love it!


I die cut the ghosts and the ink smooshed panel using two dies from the Big and Little Chain Rectangle Die Set from Gina Marie Designs. Added a bunch of foam tape to the back of the ghosts and popped them up on the ink smooshed panel. I adhered the whole panel onto a white A2 top fold card base. The cute sentiment is from the Brooms & Boos Stamp Set from Newton's Nook Designs. Isn't it just perfect with these fun ghosts?! 


I couldn't help but add a ghost inside the card... so fun!


 Be sure to head over to A Colorful Life Designs and check out their amazing selection of stencils. And don't forget to use code Crystal10 for 10% OFF your order! Hope you have a wonderful weekend!

Thanks so much for stopping by!
See ya next time.

Inky hugs,
Crystal


{Please note that comment moderation is on. Your lovely comment will appear once approved.}

Monday, August 28, 2023

Inky Paws Challenge #205 ~ Use Stripes Challenge Reminder

 Hello there crafty friend!
 There's still time to play along with the Inky Paws Challenge #205 - Use Stripes Challenge!! You have until this coming Friday, September 1st to get your entries in for this fun challenge and a chance to win a $20 store credit to Newton's Nook Designs!


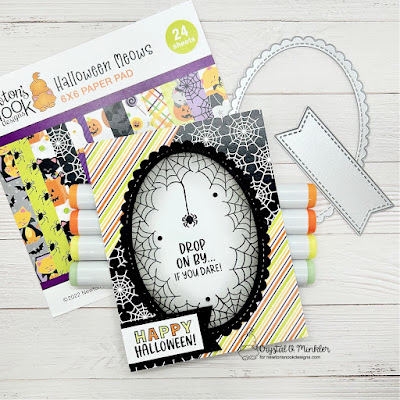
I am seriously loving this challenge!! I love to use stripe papers in my cards so I was excited to find some pretty striped papers in the Halloween Meows 6x6 Paper Pad.


I've also been wanting to play with the fun Spiderweb Oval Stamp Set. This stamp set was a must have for my Halloween collection! 


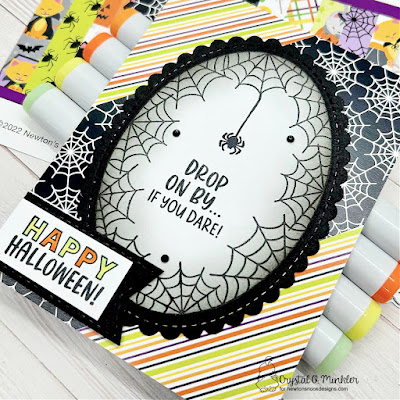
I stamped it with Memento Tuxedo Black ink and mat it with a black scalloped and stitched oval I die cut from True Black card stock from Papertrey Ink using a large die from the Oval Frames Die Set


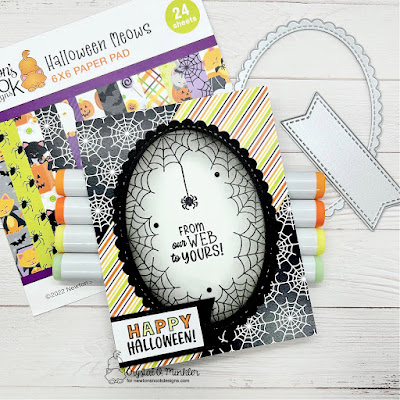
As I mentioned above, I used the wonderful Halloween Meows 6x6 Paper Pad. I cut my papers to 4-1/4 x 5-1/2" and then I cut the triangles off of the top and bottom. Which gave me enough paper pieces to make two cards!


My second card shows how I used the other pieces of pattern papers. This card is actually the one that inspired my design.


I wanted to use stripe papers for the strips in the TOP Inky Inspiration Sketch 14. This has been such a fun sketch. August has been such a busy month. I wish I had more time to play with this one but the challenge ends today. 


The fun sentiment, also from the Spiderweb Oval Stamp Set, was stamped with Memento Tuxedo Black ink and I colored up the Happy letters with the following Copic markers: YG21, YG11, YR15, YR16. I finished off both cards by adding a few black rhinestones from the Rainbow Rhinestones from Gina Marie Designs.


Now it's your turn to get your paws inky with your Newton's Nook Designs products and create a project using the stripes theme. Be sure to link up to the Inky Paws Challenge! Can't wait to see your projects!


Thanks so much for stopping by!
See ya next time.

Inky Hugs,
Crystal


{Please note that comment moderation is on. Your lovely comment will appear once approved.}

Saturday, August 19, 2023

Torn Pattern Paper ~ Eternal Midnight Weave ~ Unity Stamp Co.

 Hello there crafty friend!
Sharing a super fun and quick Halloween card today using the new Eternal Midnight Weave {paper pack} along with the recently released Ghostly Bat Ensemble, both from Unity Stamp Co. Absolutely no coloring on this card! It was so quick!


The new Eternal Midnight Weave {paper pack} is filled with wonderful Halloween papers. I love the spiderwebs in this one. I made a quick background for this card by simply trimming my pattern papers to 4-1/4 x 6" and tearing towards me holding the right side of the paper. I got 6 paper strips but I've only used 4 of them for this card so the black card stock in the background will show through. 


I really wanted to make a card with the new ghost, too. I haven't played with him until now and man... he is TOO cute! I stamped him with Black Amalgam ink and fussy cut him with my Cutter Bee scissors.


I also stamped the sentiment with Black Amalgam ink and die cut it with a die from the Scallops & Squares Nesting Dies. I added foam tape to the back of the ghost and the sentiment and then I popped them both up on the card. SO easy peasy!!

You can check out my process video here... Torn Pattern Paper | Eternal Midnight Weave | Unity Stamp Co. 


 Stop by Unity Stamp Co. and check out all the amazing new releases for the month of August!

Thanks so much for stopping by!
See ya next time.

Inky hugs,
Crystal


{Please note that comment moderation is on. Your lovely comment will appear once approved.}

Monday, August 14, 2023

Inky Paws Challenge #204 ~ Sketch Challenge Reminder

 Hello there crafty friend!
 There's still time to play along with the Inky Paws Challenge #204!! You have until this coming Friday, August 18th to get your entries in for this fun sketch challenge and a chance to win a $20 store credit to Newton's Nook Designs!


Today I'm sharing a fun Halloween card using the sketch for the current challenge. I love making Halloween cards! Do you like to make them? 


I have had the Newton's Perfect Pumpkin Stamp Set in my stash for a looonnng time! I made a cute shaker card 6 years ago with it. I've had it that long! I stamped the sweet kitty and pumpkins with Memento Tuxedo Black ink and colored them up with my Copic markers. I fussy cut the pumpkins and Newton on the black line. I cleaned up the edges and made them look nice by coloring them with a Memento Tuxedo Black marker using the side of the marker.

Here's a quick list of the Copic Markers I used:

Kitty ~ C00, C1, C3, R00, R20
Hat ~ N0, N1, N3, N5, YG11, G14
Pumpkins ~ YR21, YR15, YR68, E51, E55, E57


I paired up these cute stamps with the super sweet Halloween Meows 6x6 Paper Pad. The stripes in the green paper draw the eye across the card. They also work with the strips in the sketch. I die cut the jack-o-lantern paper using the large scalloped rectangle die from the Frames & Flags Die Set. Adhered it to a True Black card front measuring 5-1/2 x 4-1/4" that I also adhered to a white A2 top fold card base.


I used the smaller circle die from the Circle Frames Die Set... I didn't want to overcrowd the kitty. I just die cut some black card stock and adhered the pumpkins directly to them and then popped them up on the card. I omitted the middle circle and put the kitty in it's place. I also popped up the kitty using foam tape. The sentiment was super easy... just stamped on white card stock with Memento Tuxedo black ink and I trimmed it with my guillotine trimmer. I popped it up on the card, as well. It also kinda grounds the kitty and pumpkin.


Now it's your turn to get your paws inky with your Newton's Nook Designs products and create a project using the sketch. Be sure to link up to the Inky Paws Challenge! Can't wait to see your projects!


Thanks so much for stopping by!
See ya next time.

Inky Hugs,
Crystal


{Please note that comment moderation is on. Your lovely comment will appear once approved.}

Wednesday, August 9, 2023

Membership Wednesday ~ August 2023 Uniquely Unity Gnome-O-Ween ~ Unity Stamp Co.

  Hello there crafty friend!
Today I'm sharing an adorable Halloween card using the super cute gnomes from the fantastic August 2023 Uniquely Unity membership from Unity called Gnome-O-Ween. I just love these super cute stamps!!


I knew that I wanted to use all of these cute gnomes and the Stitched Circle Plate Background die from Gina Marie Designs has been on my desk just waiting to be used... the perfect pair up! I ink smooshed a quick background using Seedless Preserves, Twisted Citron and Black Soot on Stampers Select White card stock from Papertrey Ink. I die cut True Black card stock using the background die. And then adhered them together.


The gnomes are all stamped with Black Amalgam ink and I colored them up with the following Copic markers:

Skin ~ E000, E00, E11
White Beards ~ C00, C1, C3
Orange ~ YR21, YR15, YR68
Green ~ YG11, G14
Purple ~ V000, V12, V05
Black ~ N0, N1, N3, N5
Brown ~ E51, E55, E57, E59


I die cut the sentiment using the smallest die from the Scallops & Squares Nesting Dies and also die cut a True Black piece of card stock using the next size up in the dies. I adhered them together and then adhered the sentiment directly to the card. I added foam tape to each of the gnomes and popped them up on the card. So happy to be adding cards to my Halloween stash.


Here's a quick look at the Uniquely Unity membership this month! Aren't they just the cutest?! Well, that's it for me today! I'll be back in two weeks with inspiration for the August 2023 Whit Kit. I hope you'll give me a visit and check out what I share! Until then have an ink-tastic day!


Thanks so much for stopping by!
See ya next time.

Inky Hugs,
Crystal


{Please note that comment moderation is on. Your lovely comment will appear once approved.}