Showing posts with label VersaMark. Show all posts

Friday, October 19, 2018

Scrapping for Less ~ Newton's Nook ~ Sending Warm Thoughts

Hello! Today I'm sharing a couple of cute Fall cards using the Sweater Weather stamp set by Newton's Nook. Now this adorable set is geared a bit more towards a Christmas theme with the snowflakes and the mittens included in the set. I had a different idea for this set since the temperatures are starting to drop and it's finally time to pull out some sweaters, I really wanted to make a Fall themed card using this set so let's have a look at what I came up with... 


I started by blending some Vintage Photo and Walnut Stain distress ink over the Newton's Nook Tree Rings stencil on two pieces of kraft card stock measuring 4 x 5-1/4". I adhered a strip of coordinating card stock on the left edge and then adhered a 1-1/2" strip of Echo Park Celebrate Autumn patterned paper on both pieces of stenciled kraft card stock. I then mat these pieces with a dark brown card stock measuring 4-1/8 x 5-3/8" and adhered them to kraft card bases. I stamped the sentiment on a piece of coordinating card stock using Versamark watermark ink and heat embossed a fine white embossing powder. I then die cut it with a banner die that I trimmed on one end. I adhered these banners to the card and set them aside.


Since I wanted a Fall theme for my card, I decided to use the coffee cup and pumpkins from the Newton's Nook Fall-ing For You stamp set that was included in the September 2017 Flavor of the Month card kit. I stamped all the images in Memento tuxedo black ink and them colored them in with the following Copic markers:

Newton ~ YR0000, YR21, YR24, BG70, BG72, N0, N1, N2, R37, R56
Bear ~ E44, E47, E49, E70, E71, E74, R00, YR15, YR21, YR24, YR68, Y35, BG70, BG72
Pumpkins ~ E55, E57, YR15, YR27, YR68
Coffee Cups ~ R37, R56, BG70, BG72, YR21, YR24, YR68, N0

All that was left to do was fussy cutting the images out and adhering them to the cards using a liquid glue. I sure hope you enjoyed the cards I'm sharing with you today. I had so much fun making them!

Thank you friends for checking out my blog post!
See ya next time.

Inky Hugs!
~ Crystal


Tuesday, August 7, 2018

You're Fintastic!

Hello! Today I'm sharing a sweet card I made using The Greeting Farm's Mermaid Grotto and Maisea stamp sets. My inspiration started with the Beach Color Combo challenge in the Stampers Swap Shop Facebook group... using the following (or similar) colors.


I pulled out some of my Summer Dreams papers from Echo Park. I cut and layered the patterned papers onto a kraft card base and set them aside. 


I stamped the bottle, mermaid, and a bunch of fish on a piece of white card stock using Gina K. Design's Amalgam Jet Black ink. I love this ink... you can color with Copic Markers, watercolors, and even colored pencils with gamsol!! I colored in the images with the following Copic markers:
Fish ~ YR15, YR68
Mermaid ~ RV10, RV55, E000, E21, V06, V09
Bottle ~ Y06, Y17, RV10, RV55, E000, E33, E47, E50, E55, E57, BG0000, BG10, BG32, C00, C1, C3, YG17, YG67, G17


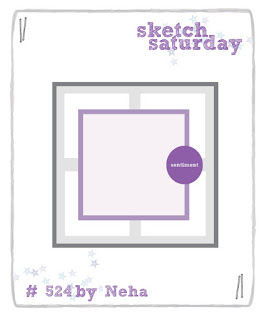
I die cut the bottle, mermaid, and fish. Using my Versamarker I colored parted of the sand and then heat embossed sand embossing powder from Hero Arts. I adhered all of my pieces to the bottle and popped it up on the card. I stamped my sentiment with Versamark watermark ink onto the teal blue paper in the Summer Dreams paper pack and then heat embossed fine white embossing powder. I trimmed the papers down and adhered them on either side of the bottle. I adhered another little fish to finish this card off. I loved this sketch #525 from Sketch Saturday so much that I just had to play along again this week.

 Sketch Saturday

Thanks so much for stopping by!

See ya next time.
~ Crystal

Friday, August 3, 2018

Scrapping For Less ~ Revisiting May 2018 Flavor of the Month Card Kit ~ In the Countryside

Hello! Crystal here and today I'm sharing some cards I made using up my papers from a collection in the May 2018 Flavor of the Month card kit. So, I saw this sweet sketch on the Sketch Saturday challenge blog and I thought this was just the perfect way to use up those Tiny Checks papers and play with the adorable stamps in this kit.


My first step was cutting up all my papers. I cut them all into 3 x 3 inch squares and then decided I'd trim the smaller squares to work on a 5-1/2" square card. So the squares in the background are 2-1/2 x 2-1/2" and the mat for them is a 5-1/4" squared piece of Wild Cherry card stock. That layer is adhered to the 5-1/2" squared white card base.


My focal images are all on a 2-5/8" squared piece of white card stock with the exception of this one above that is 2-1/2" squared. I did mat this one on a white piece of card stock to help pop the focal image that was stamped with Versamark watermark ink and heat embossed with white embossing powder and that white piece is 2-1/2" squared. 


For my cards with the little animal scenes, I stamped the image and the sentiment first with Memento tuxedo black ink and then masked the image before blending some Tumbled Glass and Mowed Lawn Distress Oxide inks for my background. I then colored the images in using Copic markers {I'll list them all at the end of the post} and a little bit of white gel pen for highlights.


Once my focal images were all done, I mat them on black card stock measuring 2-3/4" squared and then layered them on the 3" squared piece of check patterned paper that was mat on 3-1/4" squared piece of card stock.... phew.. that's a lot of measurements. I hope those aren't confusing! I popped up the focal images using foam tape and then added my final touches to each card. The little circle images for the cow cards are Farm Animal stickers from the card kit. I mat them on black card stock and popped them up on the card, as well. The little circle sun in the first card with the pigs is a part of the exclusive Piggy Picnic set from Scrapping for Less. And then, lastly, the 'good times' sentiment is from the Carta Bella Frames and Tags included in the first collection of the kit.

I had so much fun putting these cards together. I sure hope you like my cards for today! I just love the sweet animal stamps in the May 2018 In the Countryside card kit! There are still some kits available in both the Double Dip and the Banana Split subscriptions and even better ~ they are on sale! 
Here are the Copic markers I used:
Card #1 ~ R00, R14, R20, R81, E11, E31, G03
Card #3 ~ E0000, E01, E02, E23, E25, E51, E81, N1, N5, Y06, Y35, R20
Card #4 ~ R00, R81, R83, R85, E000, E02, C1, Y06, Y17, B000

I'm entering my last card with the cute pink cow to the Sketch Saturday challenge... 
such a fun sketch!

 Sketch Saturday challenge

Thanks so much for stopping by!

See ya next time.
~ Crystal


Saturday, June 9, 2018

Scrapping for Less ~ SugarPea Designs ~ Novel Birthday!

Hello! Today I'm sharing an adorable card using SugarPea Design's Reading Friends... oh my goodness... this set is so sweet! Reminds me of when I was a kid... I was always reading! Now I'm always card making... lol... well, when I can!


I started off by stamping the image on white card stock with my go to ink - Memento tuxedo black - and then I colored and colored... I loved coloring this image! I used the following Copic markers ~ Tree - E55, E57, G14, G17; Girls - E0000, E000, E00, R20, E99, YR23, YR24, E11, E31, YR02, YR16, Y000, Y13, B000, B12; Books - N0, Y06, Y35, R14, R27, E55, E57, G12, G14, B000, B02, B24; Sky Background - B0000, B000. I die cut the image and then mount it on a die cut yellow scalloped rectangle. I set that aside.


I cut the diagonal rainbow paper from Lawn Fawn's Really Rainbow paper pack and mat it on white card stock. I then adhered that piece to a blue card base. I cut the blue notebook paper from the same Really Rainbow paper pack and adhered it to the card. I then popped up the main image on the card.


I used the EK Tools Powder Tool Applicator on a scrap of white card stock to keep any static from messing up my stamped sentiment and then using VersaMark watermark ink I stamped the sentiment and heat embossed ultra fine black embossing powder. My last touch was to add a few sequins from my stash. So cute! I love how this turned out! I hope you do too!

Thanks for stopping by!

See ya next time.
~ Crystal


Wednesday, December 13, 2017

Love You Beary Much

Happy Wednesday! Today I have a cute card using a set from Heffy Doodle that I used awhile back for our product feature blog hop. You can find this adorable set in the Scrapping for Less shop right here ---> Beary Big Heart. I've had Christmas cards on the brain lately so it was nice to play with a set for Valentine's Day.


I blended the background using Worn Lipstick and Picked Raspberry Distress Oxide inks. I then stamped the little flower all over using VersaMark ink and heat embossed ultra fine white embossing powder. I cut a frame using two different sizes of Wonky Square dies. I adhered a piece of vellum card stock to the back the frame piece and then adhered that to my white card base. 


I stamped the little bear using Memento Tuxedo black ink and colored it in with copic markers {E00, E31, E33, R20, and 0}. To color the heart I blended some Pink Flambe Nuvo mousse and paper pieced it to the image. I stamped the little flower on a scrap of paper and colored it in with copic markers {R20, RV04}. I fussy cut the bear and touched the edges with a Memento Tuxedo black marker. I adhered the bear to the vellum square with glue dots. I stamped the sentiment, fussy cut it out, and then adhered it to the card.


Thanks for stopping by!

See ya next time.
~ Crystal


Tuesday, October 31, 2017

~ 3 Days of Halloween ~ Day 3 ~

Hello! It's my final day for my 3 Days of Halloween series! I know I already shared a card using this beautiful stamp... but I think Unity's Esmerelda Girl is my favorite so I just had to make another card!


For this card, I stamped Esmerelda on a piece of white card stock in Memento Tuxedo black ink and then colored her in with the following Copic markers: Dress/hat - V01, V05, V09; Hair - E02, E07, E08; Skin - E50, E51, E53; Broom - E55, E57; Ground/belts - N01, N02, N05. I die cut the piece using the largest rectangle in the In & Out Diagonal Stitched Rectangle Stax set from My Favorite Things. I then blended some Hickory Smoke and Black Soot distress inks around the edge. I stamped a few background stamps from Stampin' Up!'s Ghoulish Grunge set. I still had the Tim Holtz Cobweb thinlit die on my desk so I decided to cut out another True Black cobweb. I added some glittery goodness to it using a clear Wink of Stella pen. I decided to cut up some of the web so I could fit more of it on the card. I then decide to add some more purple to the card and mat the panel onto a scalloped rectangle of Blackberry Bliss card stock from Stampin' Up! I adhered the entire panel to a card base of Soft Stone card stock from Papertrey Ink. The finishing touch was a quick sentiment from the Simon Says Stamp set If The Hat Fits I used on yesterday's Halloween card. I stamped it in VersaMark ink and then heat embossed a fine white embossing powder. I fussy cut a banner and popped it up on the card using dimensionals. I just love how this card turned out! I sure hope you do, too!

If you missed Day 1 of my ~ 3 Days of Halloween ~ series... you can check it out here and Day 2 can be found... here.

I sure hope that you've enjoyed my ~ 3 Days of Halloween ~ series!!

Thanks for stopping by!

See ya next time.
~ Crystal