Showing posts with label Valentine. Show all posts

Sunday, December 19, 2021

Filled with Love Mini Slimline ~ Advent Calendar Day 19 ~ Unity Stamp Co.

  Hello there crafty friend!
It's Day 19 of my Countdown to Christmas series!! I'm sharing a little reveal and a project each day on my YouTube channel using the fantastic Advent Calendar from Unity Stamp Co!! Please be sure to subscribe to my channel so you don't miss a day of this fun countdown series!


Day 19 ~ a sweet heart postage stamp!


I paired it up with the Love is in the Air {paper pack} and Love is All Around Us {paper pack}, both from Unity. 


The sweet postage stamp is stamped with Barn Door Distress Oxide ink and the sentiment, from the So Very Grateful {January 2018 Sentiment Kit}, is just stamped with Black Amalgam ink from Gina K. Designs.

Check out my process video here... Unity Advent Calendar Day 19.


I'll be back tomorrow with Day 20 of the Advent Calendar reveal and a pretty card!


Thanks so much for stopping by!
See ya next time.


Inky Hugs,
Crystal


{Please note that comment moderation is ON. Your comment will appear shortly.}

Thursday, February 14, 2019

The Rabbit Hole Designs ~ Love You More ~ Love Is In The Air

Happy Valentine's Day!! Today, I'm sharing a sweet card using the sweetest set from The Rabbit Hole Designs called Love You More. I just adore this stamp set and had a fun idea to use this set with some Glitter Glaze from Brutus Monroe!


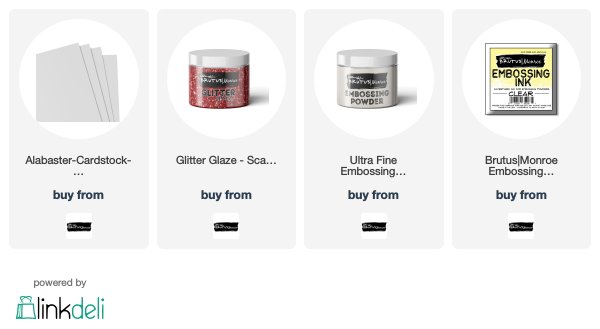
Ever since I created my first card using this stamp set... you can see that on my Instagram here ---> Love You More card... I had the idea for this card in the back of my mind. I really wanted to play with the Glitter Glaze from Brutus Monroe again. I used a heart stencil from my stash and masked off the portions I didn't want on the card. I taped the stencil down over the top folded 4-1/4 x 5-1/2" card of Alabaster card stock and then used a palette knife to apply the Scarlet glitter glaze over the stencil. I set the card aside to let it dry and then stamped the adorable images on a separate piece of Alabaster card stock. I then colored all the images with the following Copic markers:

Skin ~ E000, E00
Girl's Dress ~ BV31, BV34
Girl's Hair ~ E55, E57, E59
Boy's Shirt ~ YR16, YR27, N0
Boy's Jeans ~ B95, B97
Boy's Hair ~ E43, E44, E47
Balloons ~ R000, R14, R27
Clouds ~ BV20, BV23
Bird ~ R20, Y11

The clouds got a little too dark for my liking so I went back in with a white Gelly Roll pen and it turns out, I liked the texture that it gave to the cloud so that's a win win there! I fussy cut all the images and adhered then with mono multi purpose liquid glue. I trimmed off the excess cloud on the right side. I then stamped the sentiment with Clear Embossing Ink and heat set Alabaster embossing powder. I die cut the sentiment with a banner die and then trimmed off the left side. I adhered it to the card using the liquid glue and there you have it! I love this card!


Here's a close up of the coloring and you can see the pretty glitter in the glitter glaze hearts!
Love it! I sure hope that you like my card, too! 


Thank you friends for checking out my blog post!
See ya next time.

Inky Hugs!
Crystal


{SUPPLIES}

Affiliate links are used at no extra cost to you:


Friday, February 8, 2019

Polka Dot Orchard ~ Penguin Love ~ Be My Penguin

Hello there! Today, I'm sharing a sweet Valentine's Day card using the adorable penguin from Polka Dot Orchard's Penguin Love digi stamp set. Just like my All You Need card from the other day using the same digi stamp set, I made card fronts using this sweet penguin and an assortment of sentiments right in a document so I could print these off and have 4 card fronts ready to color and create with.


So, I had a few questions about the digi card fronts I created last time... I thought I'd share a picture to hopefully clear up any confusion. I resized the penguin and the sentiments to fit on a 8-1/2 x 11" piece of card stock. Once printed, I can trim them into card fronts measuring 4-1/4 x 5-1/2", color, and make into cards. Typically though, I keep them in a full sheet and do all of my coloring at once and then cut them into card fronts. I have found that my measurements in the document aren't always perfect so sometimes the images need to be cut smaller than a card front, but that's fine because I prefer to use pretty stitched dies to die cut them out. I hope this helps those that asked!


Onto the card I created... I absolutely adore this penguin! How sweet is this little guy?! I colored him using the following Copic markers ~ N0, N1, N2, N5, N8, Colorless Blender, R000, R14, R27, YR15, YR27, YR68, W2, W5. I die cut the card front using a stitched rectangle die and adhered a few heart sequins. And then I started searching through my limited Valentine's papers... I really need more Valentine's papers! I chose the red and white heart paper from the My Funny Valentine paper pad by Pebbles. I adhered that to a white card base and got to thinking I wanted to mat the focal image... but I didn't want to cover up all the pretty hearts in the background. My solution to this was having my 'mat' off set a bit. I adhered the focal image to the off set black card stock and then adhered them to the card base. I was then able to trim off the edges of the card base - trimming off the excess black card stock.


Here's a close up of the sweet penguin! So stinkin' cute!
I hope that you like my card and found the information on my process for digi stamps informative.
Be sure to check out this sweet digi stamp set in the Polka Dot Orchard Etsy shop!

Thank you friends for checking out my blog post!
See ya next time.

Inky Hugs!
Crystal

Sunday, February 3, 2019

Polka Dot Orchard ~ Penguin Love ~ All You Need!

Hello there! I have a quick card to share with you today using a sweet new digi set from Polka Dot Orchard! I just love the combination of images in the new Penguin Love set... and it's on sale this weekend for 70% off!! What an amazing deal! Now before you run off to buy it... let's look at my card real quick.


I wanted to make some easy card fronts so I resized this cup and a couple of sentiments all onto a 8-1/2 x 11 size document so that all I had to do was print it off and cut the sheet into four. I could then color and trim (or die cut) them to add to a card base. Easy peasy!


So this is my first card to share from that sheet. I colored the cup using the following Copic markers ~ R000, R14, R27, V15, V17, W00, W2, N1, N4.
My inspiration for the color combination is a cup that I use for watercoloring that was given to me by my kids for Mother's Day a couple of years ago. It's very similar to this cup... even with the stripes on the handle! So I thought it would be perfect to do a similar cup with the love theme! I kept the colors light for the coffee because I imagined it was topped with a whipped cream... yum! To finish off the card, I added some Nuvo purple rain glitter drops on the stir stick heart and here and there on the card. It was very hard to get a good picture of the glitter drops, but it's all glittery! I promise!

Well, that's it for me today. I hope to share another card using this adorable set later this week!
Now, run and go get your digi set before the sale is over! :)

Thank you friends for checking out my blog post!
See ya next time.

Inky Hugs!
Crystal

Friday, December 21, 2018

Scrapping for Less ~ The Greeting Farm ~ Save the Day

Hello! Today, I'm sharing a Valentine's Day card using The Greeting Farm's Save the Day stamp set. I don't know about you all but I needed a little break from the Christmas card making... don't get me wrong, I love Christmas and I love making Christmas cards, but I needed a little creative break. So when I saw this sweet set I knew I was going to use it to make a Valentine's Day card for my husband. He's my hero!


I had a rough idea for my design but believe it or not... it was supposed to be a no layer card. LOL! Isn't it funny how sometimes the card just evolves into something you didn't quite plan?! Well, that was the case with this one. I started with the Stitched Arch Stax dies from My Favorite Things. I die cut the white and the black layers and then decided I wanted to have red in the mix since it's a Valentine, that only made sense... so I thought a red card base would be good. And then on my desk I saw the new Polka Heart Backdrop die from Lawn Fawn... of course, I had to use it! I used it to die cut a white piece of card stock that I trimmed down and adhered to the red card base.


That turned out to be too much white in the background so to break that up I found some papers from my stash with a Valentine's theme and trimmed them down. I adhered it to a piece of red card stock and then used a stitched scalloped edge die on both sides of the patterned paper. I adhered this panel to the card base and set it aside. 

Using a grassy edge stencil, I blended some Mowed Lawn distress ink for the grass on the bottom of the first layer. I then used a mini cloud edge stencil with Tumbled Glass distress ink to create some clouds in the background. I set that piece aside and stamped the images using Memento tuxedo black ink. I then colored them in using the following Copic markers:

Trees ~ G05, G17, G24

Knight ~ C0, C2, C4, C8, R000, R37, R89, E55, E57, E59

Lady ~ E0000, E000, E00, E55, E57, E59, R000, R14, R20, R27

I fussy cut each of them out along the black lines and then went over the edges of the images using a Memento tuxedo marker (that helps to clean up the edges). I decided the Lady needed a little glittery goodness on her dress so I added some Sprinkled Sugar Stickles to the image. I just love how the ombre coloring of her dress looks with the beautiful glitter on it. I adhered the images to create the scene and then popped up the arch panel on the card. I stamped the sentiment using VersaMark watermark ink on a scrap of red card stock and then heat embossed fine white embossing powder. I trimmed it down and then adhered it to the card using foam tape on the left side and liquid glue on the right since it would lay over the popped up arch.


Here's a close-up look at the glittery goodness on the Lady's dress. Love it!
Well, that's it for me. I hope that you enjoyed my first Valentine's Day card for the coming year! 
I wish you all a very Merry Christmas!

Thanks so much for stopping by!
See ya next time.

Inky Hugs,
~ Crystal


Wednesday, January 10, 2018

Sealed With a Kiss Valentine

Hello! Today I'm sharing a cute Valentine's card idea using up some of my leftover Christmas papers. 


I just had to use these cute stitchy heart papers from the October Flavor of the Month kit that I still have in my stash and there just happens to still be one Single Scoop October FOM kit available... here. Don't fret, if you missed out on that kit or if you'd just rather get the Lawn Fawn Knit Picky papers, they are also available... here.


I paired up those cute papers with the Lawn Fawn Sealed With a Kiss stamp set {also available in the store... here} for a quick and simple Valentine's card that I think turned out pretty cute. To start, I cut the papers and had a pretty good idea of where they would fit on the card so I went ahead and stamped the little seals and the sentiment on the card with Memento Tuxedo black ink. I colored in the seals using copic markers {N0, N1, N2, N3, N4, RV11} and then I colored the ground also using copic markers {B0000 and B00}. I adhered the papers to the top of the white card front and then die cut it out using the Large Cross-Stitched Rectangle Stackables die. I then popped up the card front with foam tape adhering it to a white card base. I added the twine as an afterthought so I was thinking I would share how I did that.


I had this strip of watercolor paper left over from a project so I punched a little hole in one end to turn it into a paper needle of sorts.  


The watercolor paper is a heavier weight so it stays pretty straight while running it under the layer of card stock.


It's just long enough to reach the end of my A2 card so I can grab it and pull it through.


Now all that's left is making a little bow.


And there you have a little tutorial on adding twine, thread, or ribbons after you've added a layer. I also have another 'needle' that I made using left over acetate that has a point on one end. I use that one for tighter areas that may be a bit more tricky to get through. I sure hope that this little tutorial was a help. I'd love to hear if you have a similar 'tool' in your crafty space or maybe you have an even better little 'tool'... let me know in the comments.

 Anywho, I think this card mixing a little Christmas with Valentine's turned out pretty cute!


Thanks for stopping by!

See ya next time.
~ Crystal