Showing posts with label Doodlebug Designs. Show all posts

Sunday, July 13, 2025

Miss Anya with Love ~ Preview Day 3 ~ The Greeting Farm

 Hello there crafty friend!
It's the final day of previews at The Greeting Farm for the July release! Introducing MISS ANYA WITH LOVE... today's super sweet stamp set has two beautiful Miss Anya's with flowers and some other cute accessory stamps! All too cute!


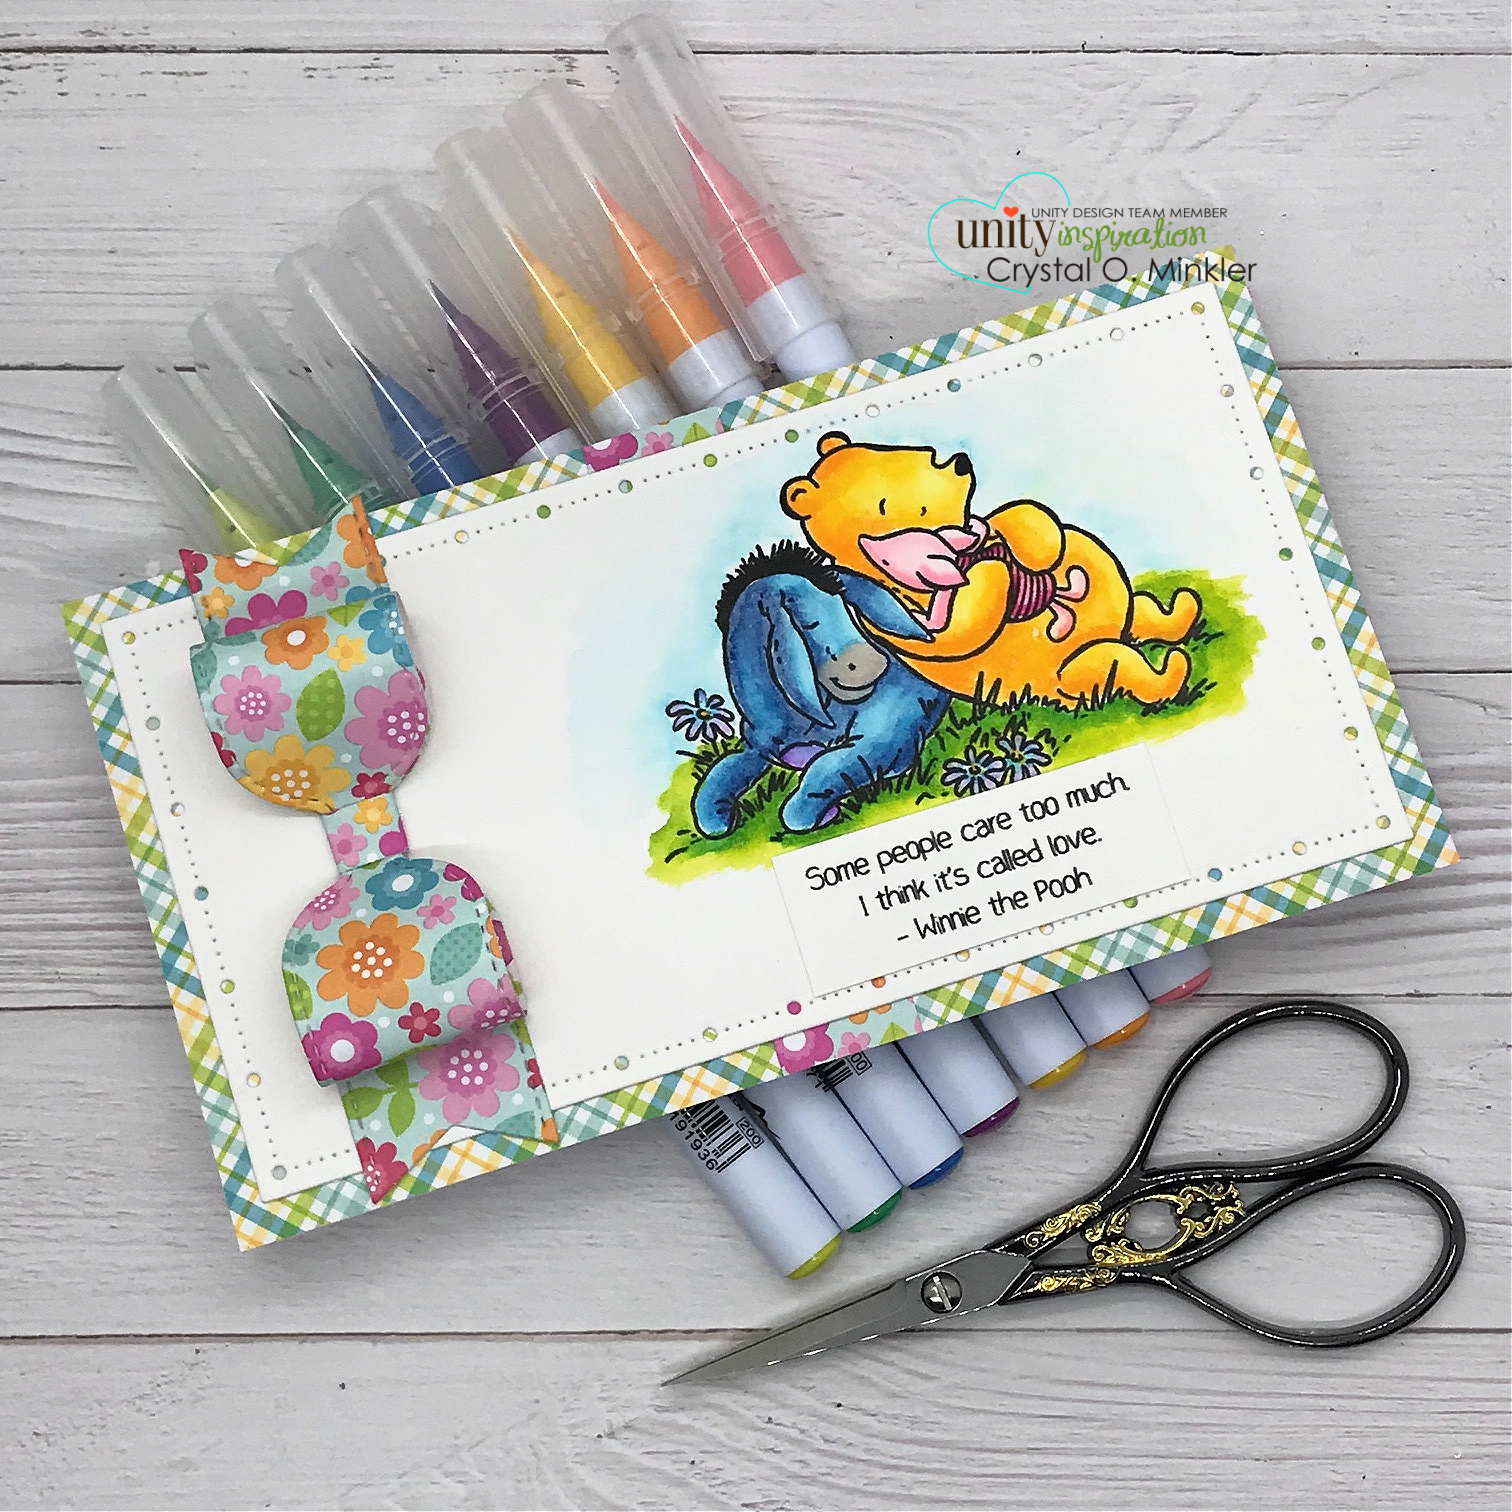
I stamped Miss Anya, the flowers and cute bird with Memento Tuxedo Black ink and colored them with Copic markers. Fussy cut each of them on the line and then colored the edges with a Memento Tuxedo Black marker making the edges nice and neat.

Here's a quick list of the Copic markers I used:
Skin: E000, E00, E11, E04
Hair: E25, E27, E29
Shirts: Y11, Y15, YR23, RV10, RV02, RV14
Belt: N2, N4, N6
Jeans: B91, B93, B95, B97
Shoes: RV10, RV02, RV14
Birdie: Y11, Y15, YR23
Flowers: RV10, RV02, RV14, RV29
Leaves: G000, G21


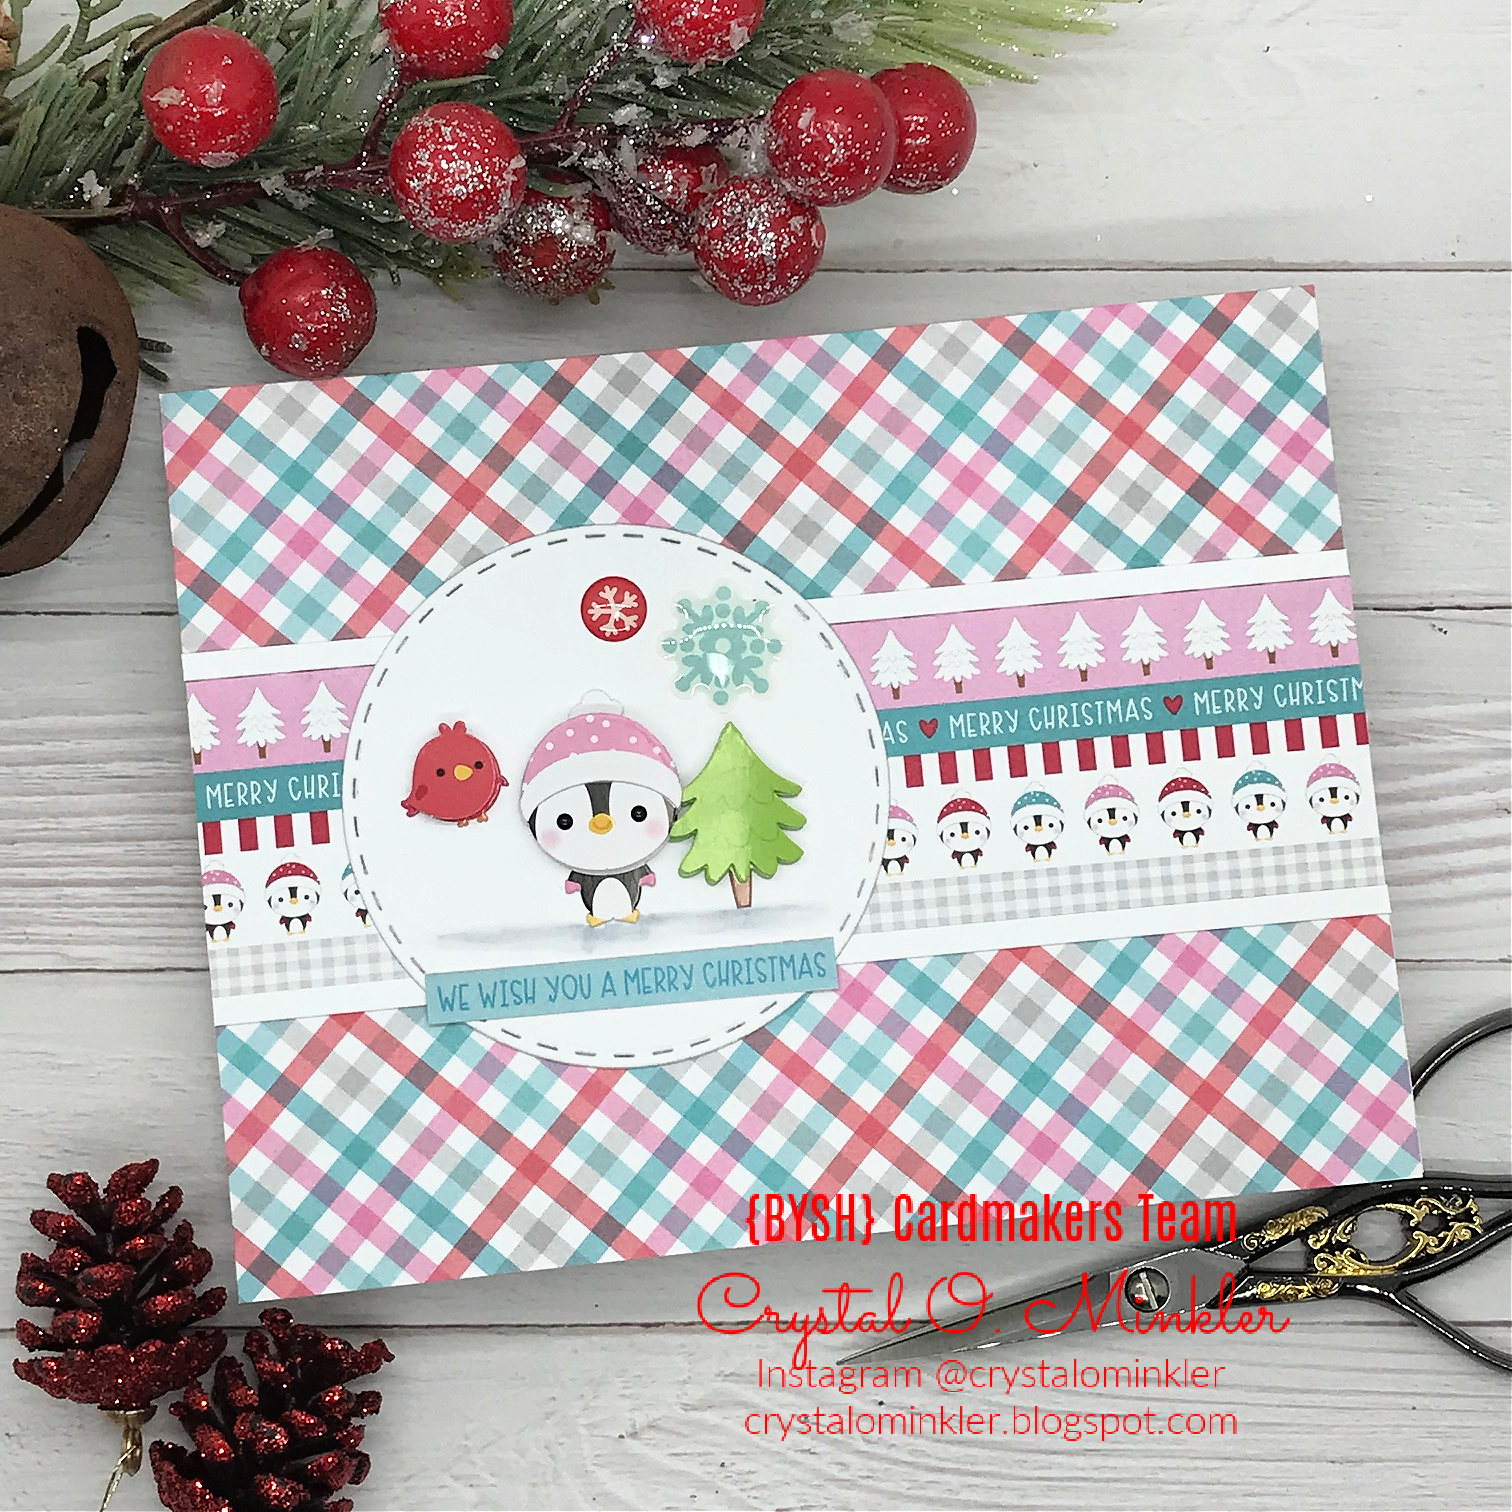
I paired up Miss Anya with papers from the My Happy Place paper pad from Doodlebug Designs. I cut my paper layers and adhered them to a black A2 top fold card base that I turned on the side for a landscape card. I adhered the flowers and birdie and then popped up Miss Anya with foam tape.


I stamped and trimmed the sentiment. Popped up the sentiment with foam tape. And then I finished off the card with a few black enamel dots from Spellbinders.


The release goes live in the store tomorrow the 15th at 12am EST! Woohoo! Be sure to come back tomorrow for the release Blog Hop!! One lucky winner will receive a $50 gift card to The Greeting Farm. All you have to do is comment on the hop! Yay!

Thanks so much for stopping by!

Inky Hugs,
Crystal


Wednesday, June 11, 2025

Hunny Bunny ~ Preview Day 2 ~ The Greeting Farm

 Hello there crafty friend!
It's Day 2 of previews at The Greeting Farm for the June release. I am loving the cute bunnies in the Hunny Bunny stamp set!! They are all SO cute!


I made a hoppy birthday card with a fun carrot theme. I actually used Easter pattern papers from Doodlebug Designs called Hippity Hoppity for my background layers.


I stamped all the fun images with Memento Tuxedo black ink and colored them up with Copic Markers.

 Here's a quick list of the Copics I used:
Bunny: W0, W1, W3, R00, R20
Cupcake: C0, C2, E11, E25, YR20, YR15, YR68, YG11, YG17
Plate: Y02, Y15, YR23
Carrots: YR20, YR15, YR68, YG11, YG17
Balloon: YG11, YG17, Colorless Blender
Dirt: E11, E25


I fussy cut all of the colored images and colored the edges with a Memento Tuxedo Black marker. I adhered all the images on the die cut piece of Kraft card stock. I adhered the trimmed sentiment to the main panel and then popped up the main panel and sentiment with foam tape.


This card was so much fun to make! Be sure to stop by the TGF blog to see all the makes from the design team. The release goes live in the store on the 15th at 12am EST.

Thanks so much for stopping by!
See ya next time.

Inky Hugs,
Crystal


{Please note that comment moderation is on. Your lovely comment will appear once approved.}


Friday, May 16, 2025

Crafty Friends Are The Best ~ Crafty Friends ~ Unity Stamp Co.

Hello there crafty friend! 
The Birthday celebration continues over at Unity with another fab release and sale!! So many amazing stamps and goodies!! I am LOVING the new Crafty Friends stamp! 


I inked up the beautiful stamp with Black Amalgam ink and colored it with just a bunch of Copic markers. I die cut the panel with a square die from the Scallops & Squares {nesting dies}.


Here's a quick list of the Copics I used:
White: C00, C2
Black: N0, N2, N4
Tan: E00, E21
Green: YG11, G14
Blue: B000, B00, B02
Yellow: Y11, Y15
Blue-Green: BG10, BG01, BG34
Pink: RV10, RV02, RV04
Red: R20, R14
Brown: E21, E25
Coral: Y11, YR15
Purple: V000, V12, V15


I paired up this fun crafty stamp with the Cute & Crafty 6x6 Paper Pad from Doodlebug Designs. I've had these fun papers in my stash for SO long... I've been itchin' to use them! Love them! I finished off the card with a few white enamel dots from Spellbinders and some white twine.

Thanks so much for stopping by!
See ya next time.

Inky hugs,
Crystal

{Please note that comment moderation is on. Your lovely comment will appear shortly.}

Tuesday, May 13, 2025

Fun on the Farm ~ Preview Day 3 ~ The Greeting Farm

 Hello there crafty friend!
It's the final day of previews at The Greeting Farm for the May release! Introducing Fun on the Farm... today's adorable stamp set has a sweet Ian and Anya all dressed up as farmers with adorable critters and fun sentiments! 


I stamped Ian with Memento Tuxedo Black ink and colored him and the adorable sheep up with Copic markers. I fussy cut Ian and the sheep and then colored the edges with a Memento Tuxedo Black marker.

Here's a quick list of the Copic markers I used:
Skin: E000, E00, E11, E04, R20
Hair: E70, E71, E74
Red Bandana: R20, R14
Shirts: BG10, BG01, BG34, E21, E35 
Jeans: B91, B93, B95, B97
Boots: N2, N4, E21, E35, E25
Sheep: C00, C2, N2, N4
Flower: Y11, Y15, BG10, BG34


I paired up Ian and the adorable sheep with the Doodlebug Designs Down on the Farm 6x6" paper pad. My paper layers are: Brown - 4-1/4 x 5-1/2"; Blue Green - 3-5/8 x 4" ; and the sheep paper is 2-3/4 x 4".


I stamped the sentiment on a strip of white card stock. I trimmed it and felt like the extra white space needed something. So I stamped the cute little flower included in the set. I colored it with Copic markers and fussy cut it leaving a white border.


I added foam tape to the back of Ian and popped him up on the card. I finished it up with a few white enamel dots. The release goes live in the store on the 15th at 12am EST! Woohoo! Be sure to come back tomorrow for the release Blog Hop!! One lucky winner will receive a $50 gift card to The Greeting Farm. All you have to do is comment on the hop! Yay!

Thanks so much for stopping by!
See ya next time.

Inky Hugs,
Crystal


{Please note that comment moderation is on. Your lovely comment will appear once approved.}

Wednesday, March 1, 2023

{BYSHC} Sketch Challenge 31 ~ Let it Snow ~ Doodlebug Design

 Hello there crafty friend!
It's time for a new sketch challenge over in the Build Your Stash Holiday Cardmakers! Today I'm sharing a sweet Christmas card using my favorite Doodlebug Design collection called Let it Snow.


I used a fun mix of pattern papers from the Let it Snow 6x6 paper pad to create my background and layers for my card.


And then I searched through my Let it Snow Chit Chat and Let it Snow Odds & Ends die cut pieces. I had a few different die cuts laid out on my desk including the cute Santas in my photo. But once I saw the sentiment... I just HAD to use the Yeti with this sentiment. Too cute!


I do have a bit of a tip for the the layers in the sketch. I cut a scrap piece of card stock to 3-3/8 x 4-3/8" and adhered my two pattern papers to it {the rainbow polka dots and snowflakes paper}. This was way easier than trying to adhere those two papers to the gingham layer separately and get them centered on the card front.  


Here's a look at {BYSHC} Sketch 31 for the month of March!
I hope you'll join us and play along with the sketch! If you're interested in seeing a bit more inspiration for this sketch, check out the amazing inspiration from the design team over on the {BYSH} Cardmakers blog!


Thanks so much for stopping by!
See ya next time.

Inky hugs,
Crystal


{Please note that comment moderation is ON. Your lovely comment will appear shortly.}

Tuesday, October 18, 2022

Halloween Series 2022 ~ Hocus Pocus ~ The Greeting Farm

 Hello there crafty friend!
I'm back with another card for my Halloween Series 2022!! All of us card makers have those Must Have Uninked Stamps sitting on our shelves just waiting to be inked! I decided for my Halloween series this year I'm inking up a few of those dusty and neglected stamp sets. My first card was using a cute stamp from Not 2 Shabby called Happy Halloween... if you missed it, you can check out that card here. Today I'm sharing a sweet card using the Hocus Pocus stamp set from The Greeting Farm. This was a special preorder set that The Greeting Farm offered a while ago. Unfortunately, I'm not seeing it in the shop right now. I just adore Halloween stamps and the witches in this set were irresistible! I had to have them!


I paired up this adorable witch with the Pumpkin Party 6x6 paper pad from Doodlebug Design. These are some of my favorite Halloween papers. I just love the bright combination of colors in this paper pad.


My card design was inspired by one of the sketches I've shared in my Tawny Owl Paperie Inky Inspiration Facebook group. This was last month's sketch and I didn't get to play with it very much so I wanted to use it for this card.


Here's a quick list of the Copic markers I used to color up this cutie:

Skin ~ E000, E00, E11, E04
Eyes ~ YG11, G02
Hair ~ YR21, YR15, YR68, YR27
Hat ~ N0, N2, N4, N6, V000, V12, V15, V17, YG11, YG23, G14
Dress ~ V000, V12, V15, V17, YG11, YG23, G14
Shoes ~ N0, N2, N4, N6


I only made a couple changes to the sketch... the polka dot papers are a little smaller measuring 3-7/8 x 1-7/8" and the stars papers measures 3-1/2 x 1-1/2". And then I placed the heat embossed sentiment underneath the circle element. It almost looks like the little witch is in a crystal ball. Ha! That's a total accident but so fun!


I think this turned out pretty cute! I hope you like it too!
I'll be back next week with my last Halloween card for my Halloween Series 2022!


Thanks so much for stopping by!
See ya next time.

Inky Hugs,
Crystal


{Please note that comment moderation is on. Your lovely comment will appear shortly.}

Friday, September 30, 2022

{BYSHC} Sketch Challenge 26 ~ More Cards with Let it Snow ~ Doodlebug Design

 Hello there crafty friend!
I'm back with my weekly Christmas card using the {BYSHC} Sketch 26 from the Build Your Stash Holiday Cardmakers Facebook group. I shared a couple cards earlier this month using the Let it Snow collection from Doodlebug Design and while I was making them I realized I had another Let it Snow paper pad. So I decided to make a couple more cards using the collection. So today I'm sharing a couple more cards using a couple more adorable Doodlebug Doodle Pops.


I cut my layers and adhered them all together. I cut (2) 1/8" strips of white card stock and adhered them along the edge of the Santa paper - a trick I love to do rather than matting the pattern paper. It makes for a less bulky card.


I removed the backing from the Santa Doodlebug Pop and adhered it to a white stitched circle die cut. I also added a couple hearts from the Let it Snow Shape Sprinkles stickers pack. Since the Santa Doodlebug Pop has some dimension to it I decided not to pop up the focal piece and just adhered it to the card.


The sentiment is a cut apart sentiment from the Let it Snow paper pad that I trimmed and mat on a scrap of white card stock. I adhered the sentiment directly to the card front and then I adhered the card front to a white A2 top fold card base.


I just love this cute polar bear and squirrel Doodlebug Pop!! I decided for my second card to turn the sketch... what do you think?


I think it's really cute turned on the side. I moved the sentiment just under the striped paper. I think it pops a bit better there.


Do you have a favorite?! I don't know if I can pick... I really love that Santa but the critters in the second card are just too cute!


Here's another look at the {BYSHC} Sketch 26!
 I hope that my cards today have inspired you to pull out those Christmas goodies and make some cards! This year just keeps flying by! The holidays will be here before we know it! If you're interested in seeing more inspiration for this sketch, head over to the {BYSH} Cardmakers blog... the design team is sharing some really cute cards this week! Today is the last day to play along with the {BYSHC} Sketch Challenge 26... I'll be back tomorrow with my first card for the {BYSHC} Sketch Challenge 27!!


Thanks so much for stopping by!
See ya next time.

Inky Hugs,
Crystal


{Please note that comment moderation is on. Your lovely comment will appear shortly.}

Friday, September 9, 2022

{BYSHC} Sketch Challenge 26 ~ Let it Snow ~ Doodlebug Design

 Hello there crafty friend!
I'm back with my weekly Christmas card using the {BYSHC} Sketch 26 from the Build Your Stash Holiday Cardmakers Facebook group. It seems to be each month I use the adorable Let it Snow collection from Doodlebug Design! I've been working hard to use up all the scraps I have left in my Let it Snow paper pad... well, I found another paper pad!! LOL... I guess I had bought two. So, I'm basically starting over with this goal! But it's actually ok because I have a whole bunch of Let it Snow Doodle Pops and a couple packs of the Ephemera with a lot of die cut pieces so I could use more papers with those for cards. Today I'm sharing a couple cards using the adorable Doodlebug Doodle Pops.


Please forgive the quality of this photo... the acetate on the little Snow Wonder Shaker Pop made it difficult to get a nice photo in my photo box. It almost looks blurred. :( It's so cute in person though!!


I used a scrap of paper from my first paper pad and the card front piece is from the new paper pad. I adhered them together and instead of matting the diagonal stripes paper I cut 1/8" strips of white card stock and adhered that along the edge. This is a really good trick for a faux mat without adding more bulk to the card. 


The sentiment is one of the cut apart sentiments from the paper pad. It's mat on a piece of white card stock. Such a cute and easy card... no stamping just cutting and gluing!


My second card using another scrap from my old paper pad and a card front from the new paper pad. I also added the white card stock strips - my faux mat.


The cute little scene here features a few different Doodle Pops - the penguin is from the Playful Penguins Doodle Pop, the tree is from the Special Delivery Doodle Pop, and the bird is from the Polar Pals Doodle Pop. I grounded the little scene using C00 and C2 Copic Markers.


The little snow stickers are from the Let it Snow Shape Sprinkles stickers pack. And the sentiment is another cut apart sentiment from the paper pad.


Here's a look at {BYSHC} Sketch 26 for the month of September!
I hope you'll join us and play along with the sketch!


Two more cards for my Holiday card stash!! Woohoo! I hope that my cards today have inspired you to pull out those Christmas goodies and make some cards! This year is flying by and the holidays will be here before we know it! If you're interested in seeing more inspiration for this sketch, head over to the {BYSH} Cardmakers blog... the design team is sharing some really cute cards this week! 


Thanks so much for stopping by!
See ya next time.

Inky Hugs,
Crystal


{Please note that comment moderation is on. Your lovely comment will appear shortly.}

Friday, August 12, 2022

{BYSHC} Sketch Challenge 25 ~ Let it Snow ~ Doodlebug Design

 Hello there crafty friend!
I'm back with my weekly Christmas card using the current {BYSHC} Sketch Challenge 25 and today I actually have two quick cards to share. I used the Let it Snow 6x6 paper pad from Doodlebug Design. I've been trying to use up this paper pad. I think I've used it at least once each month and I still have scraps. Actually, I still had two full sheets so that's why I decided to make two cards. And I have a whole bunch of the ephemera pieces from the Let it Snow Odds & Ends and Let it Snow Chit Chat still to use!


As I had mentioned I had two full sheets of pattern paper... the Santa paper and the Polka Dots. I cut them both to 4 x 5-1/4" and adhered them to two Real Red card fronts measuring 4-1/4 x 5-1/2".


I cut scraps of the Polka Dot paper to 1 x 5-1/4" and 1 x 4" and adhered them horizontally and vertically on the card front. Then I started looking through all my ephemera pieces. So many choose from... I finally decided to go with the two circles. They worked well with the layout of the card and fit the sketch perfectly.


I really liked the rainbow of colors in the Polka Dot papers so I thought I'd keep that theme throughout the card and used the Rainbow Striped paper for my 1" strips.


I chose the December 25 ephemera piece for this one... it pops on the card and it has a few of the colors in the papers. I used foam tape to pop up both of the circle ephemera pieces and finished off the cards with a few Frosty Friends Shape Sprinkles. Pretty simple cards but I think they turned out pretty cute too.


Here's a look at this month's Sketch 25 for the Build Your Stash Holiday Cardmakers Facebook group. I have a couple more ideas for cards using this month's sketch that are a bit more involved... we'll see if I have time. Anywho, be sure to stop by the {BYSHC} blog to see a whole bunch more adorable inspiration from the {BYSHC} Design Team.


Thanks so much for stopping by!
See ya next time.

Inky Hugs,
Crystal


{Please note that comment moderation is on. Your lovely comment will appear shortly.}

Thursday, June 30, 2022

Sweet Mini Slimline ~ Winnie The Pooh: I Think It's Called Love ~ Unity Stamp Co.

 Hello there crafty friend!
Today I'm sharing a cute mini slimline card with an adorable new release from Unity Stamp Co. called Winnie the Pooh: I Think It's Called Love. I can't get enough of the Winnie the Pooh stamps from Unity! If you haven't already stopped by the Unity website to see the latest additions to the Winnie the Pooh line of stamps, you really should go and check them out!!


Isn't this adorable trio just the sweetest stamp ever!! I love them! And I thought rather than coloring them up with Copics I'd play with my ZIG Clean Color Real Brush watercolor markers. I forgot how fun they were to blend with!


I used the following ZIG Clean Color Real Brush markers to color up this adorable trio:

Pooh ~ 050 Yellow, 052 Bright Yellow
Piglet ~ 026 Light Pink, 021 Light Carmine, 025 Pink
Eeyore ~ 036 Light Blue, 034 Dull Blue, 082 Purple, 028 Pale Pink, 071 Flesh Colour
Grass ~ 053 Yellow Green, 041 Light Green, 047 May Green
Flowers ~ 083 Lilac, 031 Cobalt Blue, 052 Bright Yellow


I paired up this cute colored image with the Cute & Crafty paper pad from Doodlebug Design. The colors in the papers wee just perfect for this image... though my pictures don't do it justice. In person, they really do coordinate well. I went with a 6-1/2 x 3-1/2" mini slimline so my card base measures 6-1/2 x 7"; scored at 3-1/2".


I cut my plaid pattern paper to 6 x 3-1/2" and then cut it in half to use on either side of the card base for my background. I cut a strip of scrap card stock to adhere in the middle of those pieces and then I adhered my 3/4 x 3-1/2" piece of pretty floral paper on top. I die cut my colored trio with the Big Little Chain Mini Slimline die from Gina Marie Designs leaving lots of white space on the left side.


 I stamped and trimmed the sentiment and adhered it underneath the trio and then I sat looking at my card for a bit trying to decide what to do with the left side. LOL! I started looking through my dies and found the Stitched Beautiful Bows dies from My Favorite Things. How stinking cute is that bow!! It was so easy to make, too. I sure love how this card turned out! I hope you like it, too!


Thanks so much for stopping by!
See ya next time.

Inky Hugs,
Crystal


{Please note that comment moderation is ON. Your lovely comment will appear shortly.}