Hello and welcome to Day 2 of my Growing in Unity week!
My next Source of Inspiration is Color! Now for today's post I decided to go with Non-Traditional Christmas Colors. I received a wonderful gift last year from a friend that included card stock samples for Papertrey Ink card stock, so I pulled those little sample cards out to decide on my color combos. I had so much fun combining color combos that I got a little carried away and made four cards to share today. So grab a cuppa and let's get to it!
My first card using
Unity's Christmas Magic stamp set has Aqua Mist, Olive Twist, Pure Poppy (Red), and my favorite... Kraft. For the main image I used the following Copic markers ~ R14, R27, Y000, Y06, Y13, YG93, YG95, YG97, N0, N3, N5, N8, E41, BG11, BG32. I stamped the sentiment with Memento tuxedo black ink and then mat the focal image on a piece of Aqua Mist card stock. I wrapped it a few times with a red and white twine... tied it off with a bow. I then popped up the panel onto a Kraft card base using dimensionals.
Here's a closer look... showing the glossy accents on the little Christmas lights in the wreath and the windows on the truck. I even put some on the brake lights. There's some clear wink of stella on the red bow and my final touch for this card was some red enamel dots.

I absolutely had to share this new wintry Angie Girl called
Emerson Girl... isn't she beautiful. Now for this card I went with a color combo of Pinefeather, New Leaf, Green Parakeet, and Amethyst Allure. I love how this one turned out! I colored Emerson using the following Copic markers ~ R20, E000, E000, E00, E23, E25, E29, E79, N0, N1, G17, G29, V0000, V12, V15, V17. I mat the main panel on a piece of Amethyst Allure card stock and set it aside. When color is your inspiration sometimes it's a challenge to find the right coordinating items... and I got a little nervous trying to find the right papers for this card. Luckily for me, I'm a bit of a paper hoarder so I found these great papers with greens that work perfectly... it's from The Paper Studio and it's called 12 Days of Christmas. I adhered all of my layers to a Pinefeather card base. I wrapped some purple baker's twine around the last layer of green. I then popped up Emerson on the card and decided to not add a sentiment since the background paper says Merry Christmas. My final touch for this card was some clear wink of stella in the hat and scarf... sadly the picture doesn't show that.

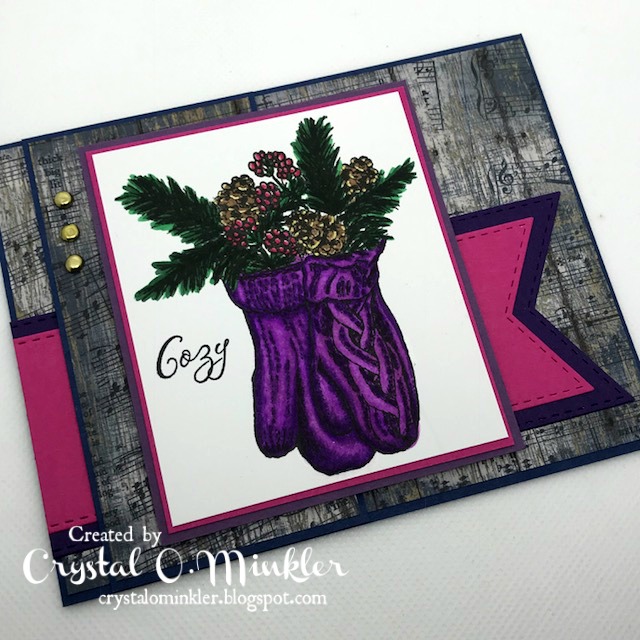
My next card features this gorgeous stamp set by Tierra Jackson called
Cozy Mitts. Now for this card, I wanted a rich color palette with a pop of pink... so I went with Raspberry Fizz, Royal Velvet, Plum Pudding, and Enchanted Evening. I colored the main image using the following Copic markers ~ G17, G29, V04, V06, V09, RV17, R30, E25, E74. I also added some gold accents to the tips of the pine cone using a Uniball gold pen. For the sentiment, I decided to mask it off and just stamp the word Cozy. I stamped the entire sentiment on the inside of the card (no picture ~ sorry) on a white panel that I adhered inside. I found these beautiful wood panel with music notes papers in my stash... they're from The Paper Studio and they're called Pine St. Square. I adhered my layers to an Enchanted Evening card base, also adding a few brads and that finished off card number three.

My final card you may recognize from my entry into the Interactive Card Challenge in the Unity Show & Tell Facebook group. I used a few different stamp sets for this card, starting with the
Days a Little Off set that has this sweet snowman. My color combo for this card is Sweet Blush, New Leaf, Berry Sorbet, and Weathervane. I started with a Weathervane card base that I cut the scalloped square window from. I stamped the snowman on a piece of white card stock and then colored it in with the following Copic markers ~ N0, N3, R00, R01, R05, R12, R22, B0000, B000, Yg23, YG25, E35, E57. I then adhered it on the inside of the card so the snowman peeked through the window. I die cut the Merry Christmas sentiment out of white and Berry Sorbet card stock. I adhered them together leaving a bit of the white peeking out. I die cut the holly and berries, sponged a little color on the edges, and then popped them up on the front of the card.

That white panel left from the peeking snowman was not pretty since the Copic markers bled through, but I just covered that up with a piece of Weathervane card stock that I had stamped and heat embossed the sentiment from the
Cheerful Prancing sentiment kit.

And now for the Shadow Box portion of the card. Jennifer McGuire has a great video showing how to create these Shadow Box cards. I altered mine just slightly to fit my card. I stamped the trees from the
So & So Loves set on a white panel and then colored it in using the same Copic markers I used for the snowman, excluding the greens and browns. I trimmed that panel down and adhered it behind the window. I stamped another snowman and colored it just like the first snowman. I fussy cut it out and adhered it to the side of the window. I had die cut another set of holly and berries that I adhered to the top corner. My final touch for this card was touches of clear wink of stella in the hearts of the trees, the die cut berries, and of course the snowman's hat, scarf and buttons.
I know today's post was much longer and if you've made it this far, I thank you!
I hope you've enjoyed these cards and found some inspiration to use fun color combos for your cards, be it Christmas or any occasion.
Be sure to leave a comment on each of my GIU blog posts for a chance to win one of two fabulous grab bags of 25 stamps from Unity Stamp Company!!!
Come back tomorrow for my next Source of Inspiration post (I promise, tomorrow's post is shorter)!
Thanks so much for stopping by!
See ya next time.
~ Crystal