Showing posts with label #bobunny. Show all posts

Thursday, June 13, 2024

One in a Million Friend Card ~ A Hedgie Hello ~ Unity Stamp Co.

Hello there crafty friend! 
Popping in today with a sweet card featuring the adorable A Hedgie Hello from Unity!! It's time for Unity's June release and there are so many adorably sweet new stamps! It was so hard to pick one to play with, but the super cute hedgehog won out! It's just too sweet!


I stamped the A Hedgie Hello stamp and sentiment using Black Amalgam ink from Gina K Designs onto Stampers Select White Card Stock from Papertrey Ink. I colored up the hedgehog with my Copic markers. Fussy cut the hedgehog using my EK Success Cutter Bee Scissors and leaving a bit of a white border around the image. I die cut a stitched rectangle of white card stock using the middle die from the BIG Scallops & Rectangles {nesting dies}.

Here's a quick list of the Copic markers I used:
Hedgie: W00, W0, W2, W3, W5, R00, R20
Hedgie Nose: C00, C3
Flowers: B000, B02, B04, V01, V05, V06, Y06, Y15
Leaves / Stems: YG11, YG23, YG06


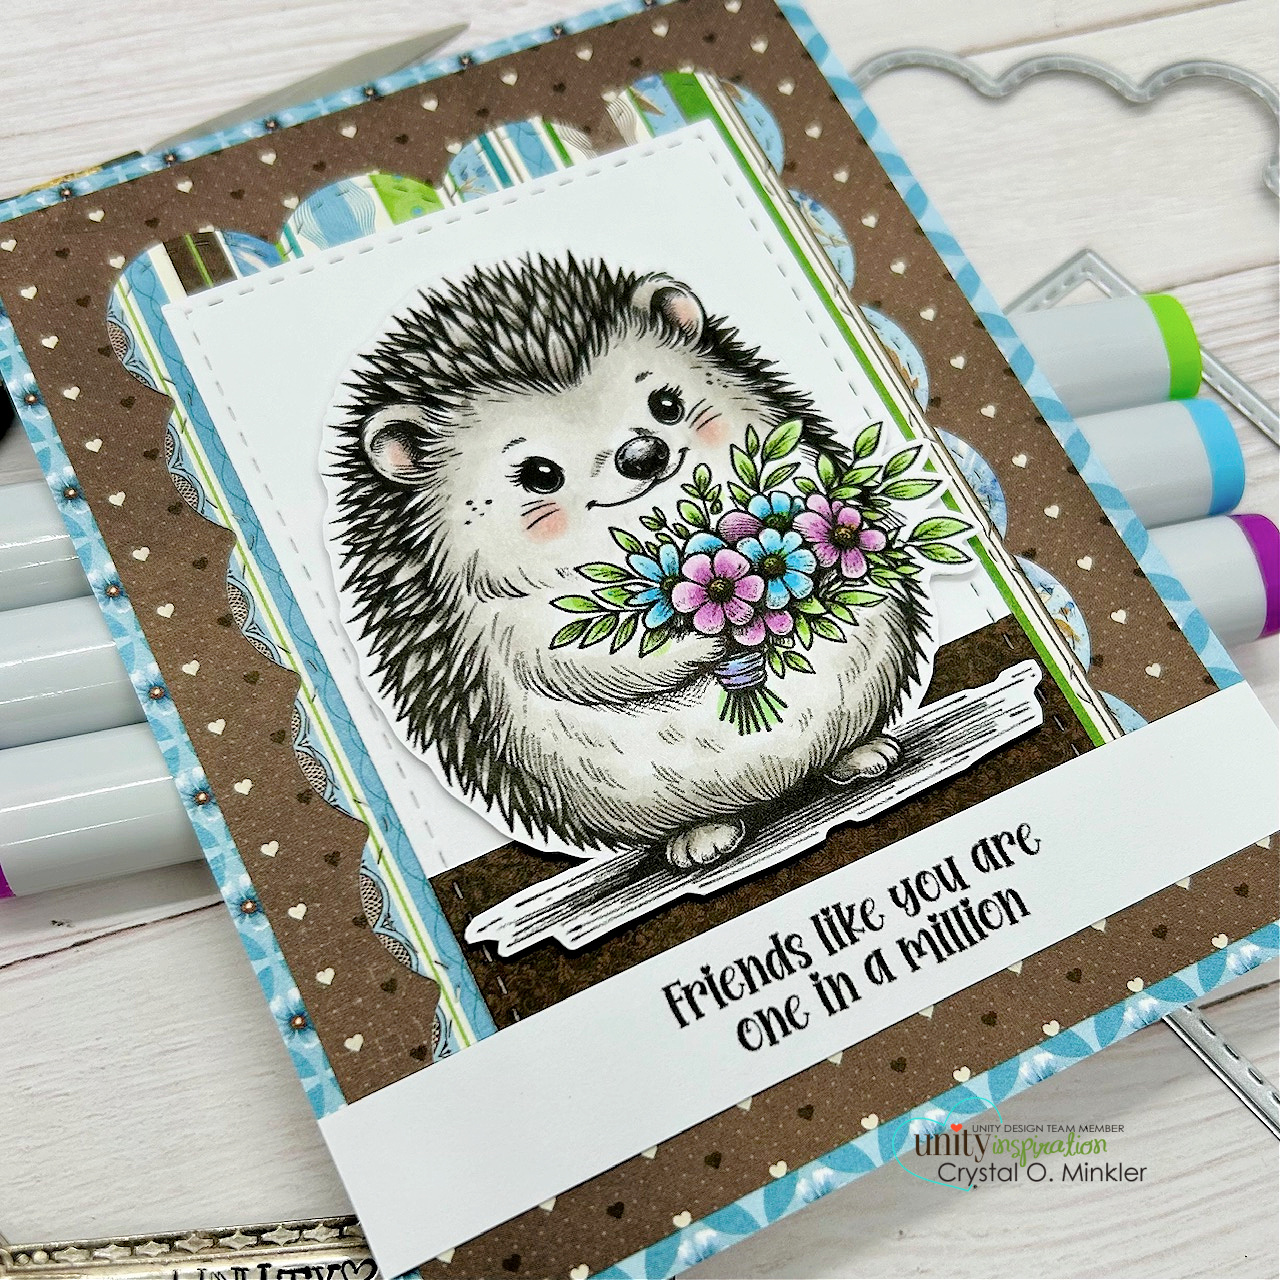
My paper layers are from the beautiful Penelope Collection from Bo Bunny. I colored before looking through my papers... ooopsies!... and was happy to find these papers have at least the blue and green to coordinate nicely. Lots of layers on this one. The bottom blue layer is a card front of 4-1/4 x 5-1/2". On top of that is the brown with hearts that measures 4 x 5-1/4". Next layer is the striped papers that I die cut using the middle scalloped die from the BIG Scallops & Rectangles {nesting dies}. I die cut a piece of dark brown pattern paper using the middle stitched rectangle die {same die I cut out the white card stock}. I trimmed the brown pattern paper and adhered it to the bottom of the white rectangle.


I adhered all of those layers together and then adhered them to a white A2 top fold card base. I trimmed the sentiment and adhered it across the card. I trimmed off the excess hanging off the edges. I added foam tape to the back of the hedgehog and popped it up on the card. I think this one turned out pretty cute. Hope you have an ink-tastic day! 

Thanks so much for stopping by!
See ya next time.

Inky hugs,
Crystal

{Please note that comment moderation is on. Your lovely comment will appear shortly.}

Friday, June 17, 2022

{BYSHC} Sketch Challenge 23 ~ Curvy Girl with Holiday Gifts ~ Stamping Bella

 Hello there crafty friend!
I'm back with my weekly Christmas card using the {BYSHC} Sketch 23 from Build Your Stash Holiday Cardmakers and this week I was excited to finally ink up the beautiful Curvy Girl with Holiday Gifts from Stamping Bella!! Love this big beautiful stamp and she's been just sitting on my desk waiting to get inked up!


For this card I used pattern paper for all my layers. I used the Christmas in the Village Collection 6 x 6 paper pad from Bo Bunny. I meant to pick out my papers before coloring but then I forgot to so once I was done coloring I started looking through my paper stash and was so excited to find these papers that have all the colors I used in my coloring! SO lucky!! I chose complimentary papers from the pack for each layer and even went with the white pattern paper as my top layer. I love the soft print in the background... it just works so well with this beautiful image!


This beautiful girl was a dream to color up! So fun... I really enjoyed it! 
Here's my list of Copic markers for coloring up this image:

Skin ~ E000, E00, E11, E04
Hair ~ E43, E44, E49
Holly & Berries ~ YG11, G24, G46, R20, R14, R27
Dress / Shoes ~ BG000, BG15, BG13, BG18, R20, R14, R27
Polka Dot Gift ~ RV00, RV02, RV06, RV66, Y11, Y06, Y15, Y28
Pink Gifts ~ RV10, RV21, RV14, Y11, Y06, Y15, Y28
Green Gift ~ YG11, G24, G46, R20, R14, R27


The sketch only calls for one layer but I wanted to use both the red and teal papers so I decided to use the Scallops & Rectangles {nesting dies} from Unity to cut my layers so that I could have some of both papers in my background layers... it really helps to bring the reds and teals from the colored image to the forefront. And then the banner with the ornaments helps to coordinate all the colors together. I added a few enamel dots from the Coffee Enamel Dots from Echo Park Paper Co. to finish off my card. It just worked out perfectly! Love when that happens!


Here's another look at this month's {BYSHC} Sketch 23! I hope you've found some inspiration for the sketch or maybe just been inspired to make a Christmas card. If you're interested in seeing a bit more inspiration for this sketch, check out the amazing cards from the design team over on the  {BYSH} Cardmakers blog! I'll be back next week with one last Christmas card using this fun sketch!


Thanks so much for stopping by!
See ya next time.

Inky hugs,
Crystal


{Please note that comment moderation is ON. Your lovely comment will appear shortly.}

Friday, May 28, 2021

{BYSHC} Sketch Challenge 10 ~ Warm Wishes ~ The Greeting Farm

Hello there crafty friend!
I am back with one more {BYSHC} Sketch 10 card before we go into June... can you believe it's almost June?! Like days away from it?! This year is flying by! Anywho, I've used another sweet stamp from The Greeting Farm called Warm Wishes. I adore the cute boy and girl in this stamp set but I only had room for one with this sketch so I opted for the girl but I also added the adorable little snowman from the Miss Anya Hello Winter stamp set.


I used the absolutely gorgeous Winter Playground papers from Bo Bunny! So many pretty blues and flourishes... and all those beautiful snowflakes! I love love love this gorgeous paper!! Enough about that... I did a little coloring and I paper pieced her coat and boots. All of my layers have a slightly larger mat of white card stock. I fussy cut the stamped images only partially leaving a little hill of snow... it got tricky around her legs and I had to use my Fiskars Fingertip Craft Knife, but I think it turned out ok. Oh, and I almost forgot I ran my bottom layer through the Big Shot with a snowflake embossing folder from Darice just called Snowflake.


Here's a list of the Copic markers I used for this cutie:

Skin ~ E000, E00, E11, R00, R20
Hair ~ B000, N0, N1, N3, N6, N8
Jacket / Socks / Mittens ~ C00, C2, BG70, BG72
Skirt ~ N0, N3, N6
Snowman ~ C00, C2, YR68


Here's another look at {BYSHC} Sketch 10... there's just a few more days to play along with the sketch! Come join us in the Build Your Stash Holiday Cardmakers Facebook group to see more inspiration or stop by the {BYSH} Cardmakers blog... we share inspiration on the blog each week.


Thanks so much for stopping by!
See ya next time.

Inky Hugs,
Crystal


{Please note that comment moderation is ON. Your comment will appear shortly.}