Showing posts with label copic on kraft. Show all posts

Monday, June 13, 2022

Membership Monday ~ June 2022 KOM My Heart is With You ~ Unity Stamp Co.

 Hello there crafty friend!
I am back with another Membership Monday post and this time I'm featuring the Kit of the Month from Unity Stamp Co. called My Heart is With You.  This membership includes a large 8-1/2 x 11" sheet of fabulous red rubber and the stamps are always SO amazing!! Last month's KOM had an amazing door stamp and I made a very simple card with a bit of copic coloring on Kraft. I had a lot of people ask how I copic color on Kraft and I thought the beautiful window in this month's KOM would work great for me to show how I do it.


Before I share my process video though, I thought I'd share a few photos of my card. Isn't that window just beautiful?! I love it with the brick background!!


Here's a quick list of the Copic Markers I used to color up the window:

Shutters ~ R20, R14, R27, R37
Hinges ~ N2, N4, N6
Window Frame ~ E51, E53, E55, E57
Light in Window ~ Y11, Y06


I used the Bricked Layering Stencil from Tim Holtz for my background along with Antique Linen, Vintage Photo and Ground Espresso Distress Oxide inks. The focal piece was die cut with the largest stitched rectangle die from the Scallops & Rectangles {nesting dies} from Unity. I have to say these dies are one of my faves now... definitely ones that I reach for most often!


Here's a look at the amazing June 2022 Kit of the Month called My Heart is With You! Isn't it wonderful?!  You can check out the Kit of the Month membership over at Unity Stamp Co. I'll be back next Monday to share a card using the awesome Whit Kit membership from Unity! Hope you have a wonderful week!


Thanks so much for stopping by!
See ya next time.

Inky Hugs,
Crystal


{Please note that comment moderation is ON. Your lovely comment will appear shortly.}

Monday, May 23, 2022

Copic Coloring on Kraft ~ Happy and Cozy Mini Slimline ~ Unity Stamp Co.

 Hello there crafty friend!
My Whit Kit has been delayed a bit so in lieu of a Membership Monday post, I have a mini slimline card using the adorable new release called Happy and Cozy. When I shared my card earlier this month with the awesome door from the May 2022 Kit of the Month, I had several people ask about my copic coloring on Kraft. I thought this cute stamp set would be perfect for sharing my technique.


I die cut the panel on Kraft card stock with the Scalloped Stitched Mini Slimline die from Gina Marie Designs. And then I got to coloring... 


Here's a list of the Copic Markers I used:

Cabin ~ E55, E57, E59
Windows ~ Y11, Y06, Y15
Grass ~ YG13, YG93, YG95, YG97, YG99
Trees ~ E55, E57, YG13, YG93
Stars / Moon ~ Y11, Y06
Chimney / Smoke / Steps ~ N1, N3
Sky ~ BV0000, BV000, BV01, BV34, BV25, BV29


One little note when you color on Kraft card stock... the ink appears very dark at first, but it does lighten when it dries. It's also a bit muted in color... I really love the technique!


I added some white acrylic paint splatters and since the splatters messed up the nice clean edges I was wanting, I trimmed the panel just inside the stitching. I adhered the layers and wrapped some {Ivory} burlap string around the panel tying a pretty little bow. I popped up the panel with foam tape adhering it to a 3-1/8 x 6-1/8" piece of Midnight Muse card stock and then I adhered the card front to a 7 x 6-1/2" mini slimline card base that I scored at 3-1/2". If you're interested in seeing my coloring and process you can check it out here... Copic Coloring on Kraft | Happy and Cozy Mini Slimline | Unity Stamp Co.


  Well that's it for me today! I sure had a blast coloring up this sweet scene card to share with you all. If you haven't checked out the sale over at Unity for the second round of the Birthday Sale, you really should!! Lots of amazing new releases too!! 


Thanks so much for stopping by!
See ya next time.

Inky Hugs,
Crystal


{Please note that comment moderation is ON. Your lovely comment will appear shortly.}

Monday, May 2, 2022

Membership Monday ~ May 2022 Kit of the Month ~ One Friend ~ Unity Stamp Co.

 Hello there crafty friend!
I'm so excited for you all to see the new May 2022 Kit of the Month from Unity Stamp Co!! The stamps in this month's kit are amazing and beautiful!! One in particular is my absolute favorite and that's the gorgeous doorway that I'm sharing in my card today.


I couldn't wait to color this beauty on Kraft card stock with my Copic Markers... the details in this gorgeous stamp really made it so easy to know where to put the shading and where to leave the coloring light.


Here's a quick list of the Copic Markers I used to color up the doorway:

Door ~ R20, R14, R27, R37, N0, N2, N6
Opening ~ N0, N2, N6
Wall / Front Step ~ E51, E53, E55, E57
Flowers ~ G24, G46, RV10, RV21, RV14, RV34
Planter ~ Y000, Y15, Y35, Y28, G24


I die cut the colored image with a large stitched rectangle die from the Blueprints #13 dies from My Favorite Things and mat it with a 4-1/4 x 5-1/2" piece of True Black card stock from Papertrey Ink. I trimmed each of the words in the sentiment and mat them each with the same black card stock. I adhered the card front to a white A2 top fold card base and was happy to say it was done... it really doesn't need anything else. I love it!


Here's a look at the amazing May 2022 Kit of the Month called One Friend! Isn't it amazing?! 
You can check out the Kit of the Month membership over at Unity Stamp Co. I'll be back next Monday to share a card using another fab membership from Unity! Hope you have a wonderful week!


Thanks so much for stopping by!
See ya next time.

Inky Hugs,
Crystal


{Please note that comment moderation is ON. Your lovely comment will appear shortly.}

Wednesday, April 20, 2022

Find Joy ~ Let's Be Off Background with Best Destination ~ Unity Stamp Co.

 Hello there crafty friend!
Today, I'm sharing a card using a couple new releases from Unity Stamp Co. I thought it would be fun to combine the new Let's Be Off Background stamp with the cute car in the Best Destination stamp set.


I started by ink smooshing my background with Evergreen Bough, Forest Moss and Iced Spruce Distress Oxide inks on Kraft card stock. I dried my ink smooshed card stock completely with a heat tool and then stamped the Let's Be Off Background stamp with Ranger Jet Black Archival ink. I dried the background again with my heat tool and then mat it with True Black card stock. I adhered the card front to a kraft A2 top fold card base.


I stamped the cute Best Destination stamp with Gina K. Black Amalgam ink on Kraft card stock and then I colored it up with Copic markers. I love coloring on Kraft card stock with my copics!! It's one of my favorite techniques for a unique card.


Here's a list of the Copic markers that I used for the cute Best Destination stamp:

Sky ~ B0000, B00, B02
Sun ~ Y06, Y15, Y38
Clouds ~ N0, N2
Car ~ N0, N2, N5, R20, R14, R27, Y06, Y15, Y38
Grass ~ YG11, YG23, YG17
Road ~ N0, N2, N5


I die cut the Copic colored scene with a circle die from the Additional Circles dies from Waffle Flower. I also die cut a scrap piece of True Black card stock with the same sized circle die. I adhered the two circles together and set it aside. I then stamped the sentiment, trimmed it and adhered it to the circle focal piece. I added a bunch of foam tape to the focal piece and sentiment and set them aside. 


I wanted to add a bit of interest to the card with some burlap string so I used my Tombow Mono Permanent Adhesive tape runner to add some adhesive to the card front. I twist and turned some {Ivory} May Arts Burlap string over the tape runner adhesive and then popped up the circle focal piece over top of the string. I love the little loops sticking out! So fun!

Head on over to Unity Stamp Co. to see all the amazing new releases and they have a fantastic sale going on right now too!!


Thanks so much for stopping by!
See ya next time.

Inky Hugs,
Crystal


{Please note that comment moderation is ON. Your lovely comment will appear shortly.}

Tuesday, January 4, 2022

Thinking of You ~ December 2021 Whit Kit ~ Unity Stamp Co.

 Hello there crafty friend!
I am excited for another fabulous year of Whit Kits from Unity Stamp Co. and I hope to be more consistent in sharing my cards using the kits. However, today I'm sharing a couple cards I created using the beautiful December 2021 Whit Kit called Trust in its Wings. December was such a busy month, I didn't get to play with this kit until now.


I couldn't help but color with my Copic Markers on Kraft card stock again... it's one of my most favorite techniques and it's so pretty for winter cards!


Here's a quick list of the Copic Markers I used to color the image:

Leaves ~ G14, G46
Berries ~ R14, R20, R27, R37
Bird ~ E01, E11, E17, E07, YR24, YR27


I used the coordinating die to die cut the bird. The top layer of Kraft is die cut with the Double Roped Square die from Gina Marie Designs.


My bonus card using the kit!! This kit has another great pack of papers and the wood wreath and berries paper was perfect for a very quick and pretty birthday card using a sentiment from a sentiment kit.


I colored the image the very same way and with the very same Copic Markers on white card stock. It's neat how it's so different from the Copic coloring on Kraft. 


You can check out my process video for my first card here... Thinking of You Card | December 2021 Whit Kit.


Even though the kit isn't available anymore, the stamps and papers are available separately at Unity Stamp Co. Be sure to check out the Whit Kit membership at Unity... the new January 2022 kit is perfect for New Year's cards! I can't wait to ink it up and share a bit of inspiration with you!


Thanks so much for stopping by!
See ya next time.


Inky Hugs,
Crystal


{Please note that comment moderation is ON. Your comment will appear shortly.}

Thursday, December 30, 2021

Cozy Winter Mouse Gnome ~ Unity Sketch Challenge ~ Unity Stamp Co.

 Hello there crafty friend!
Today I'm sharing one last card for the December Sketch Challenge over at the Unity Show & Tell Facebook group! This week I used three awesome kits for a fun wintry card!!


If you didn't get all your Christmas cards done for the year or maybe you didn't get them all sent out... save those for next year and make a fun wintry card to send to your friends and family! 


I paired up the adorable Peppermint Kisses Mouse Gnome with the fantastic Wintertime Window and Paneling {background} kits.

The mouse gnome and Wintertime Window were both stamped with Gina K. Black Amalgam ink and colored up with the following Copic markers:

Nose / Paws ~ E000, E00, E11
Ears ~ R20, R21, E000, N0, N2, N3
Tail ~ N0, N2, N3
Beard ~ C00, C2
Hat ~ R14, R20, R27, R37, C00, C2
Candy Cane ~ R14, R20, R27, C00, C2, G14, G46
Window ~ Y06, Y15, Y35, E43, E44, E47
Bricks ~ E31, E33, E37, E39
Trees ~ G14


Don't forget to ink up the inside of your card! I stamped the sweet mouse gnome and added the second half of the sentiment inside the card. So fun! Check out my process video here… Cozy Winter Mouse Gnome | December Sketch Challenge.


Here’s a look at the sketch! Always remember the sketch is meant to inspire, not require… have fun with it!! The sketch challenge ends tomorrow so there's still a bit of time to play along! I hope you can play along! This is my last week hosting the Unity Challenges... I hope you've had some fun and been inspired over the last three months. Next week Echo starts a brand new challenge... I can't wait to see the new challenge for January! So exciting!


Thanks so much for stopping by!
See ya next time.


Inky Hugs,
Crystal


{Please note that comment moderation is ON. Your lovely comment will appear shortly.}

Wednesday, November 24, 2021

Membership Monday Part 3 ~ November 2021 Whit Kit ~ Unity Stamp Co.

 Hello there crafty friend!
I'm back for Part 3 of my Membership Monday posts this week... I sure hope that you've enjoyed the cards I've shared so far using the gorgeous November 2021 Whit Kit from Unity Stamp Co called Thankful & Blessed Pumpkins. Today I used one of my most favorite techniques... 
Copic coloring on Kraft!


I love using kraft card stock during the Fall and Winter seasons... it's just so perfect! And I love how the Copic colors look on Kraft! I stamped the pretty pumpkins floral image with Gina K. Black Amalgam ink and then stamped just the center flower on a scrap of kraft card stock.


While I was coloring up this beautiful stamp for my card yesterday, I got to thinking how those same Copic colors would work on Kraft so I pretty much used all the same colors. Here's the list of Copic markers that I used to color up this beautiful stamp:

Pumpkins ~ YR15, YR21, YR27, YR68, E21, E23, E25, E29
Leaves ~ Y26, YG91, YG93, E23, E25
Center Flower ~ R00, R14, R20, R37, R59, Y15, Y21, Y38, YR27
Lighter Flowers ~ YR000, YR65
Berries ~ R20, R37, R59, E25
Magnolia Twigs ~ YG93, Y15, Y21


I used the coordinating die from the kit to die cut the colored image and set it aside. I colored up the center flower again on my scrap of kraft card stock, fussy cut it along the line and cleaned up the edges with my Memento Tuxedo black marker.


I added a bit of foam tape to the three petals and popped them up on the die cut. Such pretty dimension it gives to the card!


The background was created with the Mix & Mat Plaid dies from Papertrey Ink. I die cut a piece of kraft with all 3 pieces in the die set and then die cut a piece of dark brown card stock with just the outer twig die. I trimmed the dark brown outer twig die cut and adhered it to the kraft die cut piece. I adhered the inner portion of the twig die behind the plaid die cut. I also blended a bit of Vintage Photo Distress Oxide ink over the kraft die cut and around the edges of my Kraft A2 top fold card base.


I stamped just a portion of the 'thankful & blessed' sentiment with Ground Espresso Distress Oxide ink on Kraft card stock and distressed the edges just a tiny bit with Vintage Photo Distress Oxide ink. I trimmed the sentiment and then popped it up on the card with foam tape.


I hope that you've enjoyed the cards I've shared using the fabulous November 2021 Whit Kit from Unity! If you've been inspired to ink up your kit, I hope you'll share your creations in the Unity Show & Tell Facebook group. I'd love to see what you've created! There's a few days left to join this amazing membership at Unity! 

Tomorrow I'll be sharing my last card for the Non-Traditional Christmas Color Challenge... I hope you'll stop by to check it out!


Thanks so much for stopping by my blog!
See ya next time.


Inky Hugs,
Crystal


{Please note that comment moderation is ON. Your comment will appear shortly.}

Saturday, November 6, 2021

~ Friends of Unity November 2021 Blog Hop ~

Hello there crafty friend!
Welcome to our November 2021 Friends of Unity Blog Hop!! Can you believe the holidays are just around the corner?! I'm excited for our first Thanksgiving in our new home this month... and then, of course, our first Christmas next month. Our cue this month got me thinking about the holidays and handmade gifts...


...a Non-Card Project. I had several ideas come to mind and found a few online, but I decided to go with one of my favorite things to make for friends. A bookmark!


I've been itching to ink up this gorgeous holiday stamp from last month's Uniquely Unity stamp kit called Holiday Things. Every since this stamp was revealed I've wanted to stamp it on Kraft and color it up with my Copics. And to turn it into a bookmark was just a bonus! I used the Basic Bookmark 3 from Papertrey Ink to die cut the stamped background.


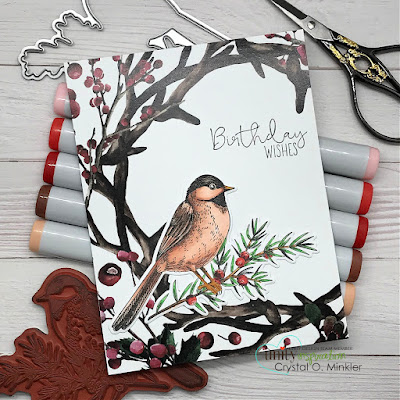
I wanted to go with a different sentiment... one that was smaller and wouldn't cover up too much of the background so I used one from the fabulous new November 2021 Sentiment Kit called Cherished Holly. The sentiments in this beautiful kit are so perfect for holiday makes. I blended a bit of Vintage Photo Distress Oxide over the sentiment to soften it.


I used a whole bunch of Copic markers to color up this bookmark. Here's my list:

Pinecone ~ E00, E11, E23, E25
Snowman ~ C00, C2, B00, B02, YR15, YR21, YR68
Bell & Bow ~ Y15, Y35, Y38, R14, R20, R27
Holly & Berries ~ G000, G24, G46, R14, R20, R27
Wreath ~ YG03, YG63, YG67
Rocking Deer ~ E00, E11, E23, E25, G000, G24, G46, R14, R27
Candy Cane ~ C00, C2, R14, R20, R27
Gnome ~ E000, E00, E11, R00, R20, RV21, V01, V04, R14, R20, R27, C00, C2 
Lollipop ~ C00, C2, R14, R20, YR15, YR21, Y15, Y35, G000, G24, B00, B02, BV00, BV11
Gingerbread Man ~ C00, C2, R14, R20, R27, E11, E23, E25
Ribbon & Bells ~ G24, G46, Y15, Y35, Y38
Stocking ~ C00, C2, V01, V04, V09, R20, RV21
Ornament ~ Y15, Y35, Y38, N0, N2, R14
Baubles ~ R14, R20, RV21, V01, V04, B00, B02, Y15, Y35, G000, G24, YR15, YR21
Bow ~ R14, R20, R27


I also had a fun idea for some festive tea bag holders that I made using my favorite holiday paper from Unity... the Farmhouse Christmas {paper pack}. My sweet friend, Robyn, sent me some wonderful tea last year that my daughter and I can't get enough of. I thought it would be fun to send some to friends this year and I just had to wrap them up all pretty.


The tea bag holder is made from a piece of Kraft card stock measuring 3-1/2 x 11" scored at 4", 4-1/4", 4-1/2", and 8-1/2". I die cut the flap with one of the border dies from the A2 Scalloped Borders One dies from Spellbinders.


The pattern paper on the front and back {yes, I put pretty paper on the back too} are 3-1/4 x 3-3/4". The pattern paper on the flap is 3-1/4 x 2-1/2" and then I die cut it with the same border die. I die cut the cute little tags with a die from my stash. I have no clue where it's from or what's it's called. But any little die would work or maybe a little tag. The sentiment is again from the November 2021 Sentiment Kit called Cherished Holly... love this kit!!


I wrapped the tea bag holder with some twine and tied a little bow to keep the tea bag holder closed. I slipped the tag through the twine.


I added a piece of Kraft card stock inside the tea bag holder measuring 1 x 7-1/4" and it's scored at 1-7/8", 2", 5-1/4", and 5-3/8". This piece of card stock inside holds the tea bags in the holder when it's closed.


I think these turned out pretty cute! Now, before we get to hopping... have you checked out the fabulous Brown Thursday sale?! If you're not familiar with this sale, it's the biggest sale of the year over at Unity Stamp Co!! They just released a whole bunch of amazing new stamps and their annual Advent Calendar!! Oh my gosh... you have to check it out, if you haven't yet!

Well, that's it for me this time! I hope you'll try your hand at some handmade gifts. I had so much fun! Please hop along and enjoy some more inspiration from the Friends of Unity... I can't wait to see all the different projects being shared! I'm sure that some of my friends are having a giveaway so be sure to comment as you hop along.


Let's get to the hopping...


Crystal <--- you're here

up next ---> Eileen


Thanks so very much for supporting our little hop!
We appreciate you!!

See ya next time.

Inky Hugs,
Crystal


{Please note that comment moderation is ON. Your comment will appear shortly.}


Wednesday, August 11, 2021

Vintage Krafty Christmas ~ Tin Tile Background & Holly Jolly Holiday ~ Unity Stamp Co.

 Hello there crafty friend!
It's time for a new release over at Unity and I am absolutely loving the fab new Tin Tile Background stamp and, of course, the Holly Jolly Holiday stamps!!! Ahh-mazing!!! I had to pair them up together and make a vintage krafty Christmas card!


I blended a background on Kraft card stock with Peacock Feathers and Evergreen Bough Distress Oxide inks and then I stamped the Tin Tile Background with Ranger Archival jet black ink. I added a bit of Vintage Photo Distress Oxide ink around the outer edges and die cut the piece with a large stitched rectangle die. I also die cut the center with a smaller stitched rectangle die and I mat both pieces with a piece of Neenah Grocer Kraft card stock. I added a bit of Apple Barrel white acrylic paint splatter to both layers.


I stamped the cute Santa and sentiment from the Holly Jolly Holiday stamp set with Gina K. Designs Amalgam black ink and colored up Santa with the following Copic markers:

Skin ~ E00, E04, E11, R20
Coat / Hat ~ R000, R14, R46
Shoes / Mittens ~ N3
White Accents ~ C00, C3, Sakura White Gelly Roll pen


I die cut my focal piece with a stitched circle die and added a bit of Vintage Photo Distress Oxide ink around the edges. I wrapped my card front with a piece of Cherry Cobbler Sheer Linen Ribbon from Stampin' Up (pretty sure it's retired) and then adhered my smaller rectangle piece. I tied a pretty bow with another piece of the pretty ribbon and adhered it to the card with a couple glue dots. And I popped up my focal piece with foam squares... done!

I just adore how this vintage krafty Christmas card turned out! I hope you like it too! Be sure to check out all the amazing new releases over at Unity Stamp Co. and, of course, there's a fab sale going on!!


Thanks so much for stopping by!
See ya next time.

Inky Hugs,
Crystal


{Please note that comment moderation is ON. Your lovely comment will appear shortly.}