Showing posts with label The Rabbit Hole Designs. Show all posts

Monday, May 27, 2019

The Rabbit Hole Designs ~ Caffeinated Friends!

Hi there crafty friends!
A quick post from me today sharing a couple cards I made over the weekend using stamps from The Rabbit Hole Designs' fabulous Caffeinated line of stamps!


A little stenciling and a strip of summer patterned paper from Carta Bella's Summer Splash paper pad made this quick card even quicker! I colored the Caffeinated Flamingo with the following Copic markers ~ RV0000, RV02, RV52, RV63, Y06, Y35, N0, N2, N5, N7.


This card was stubborn... much like this Caffeinated Rabbit looks to be! LOL!
I tried adding more paper and layers and Mr. Rabbit just wouldn't have it so I just added the die cut sentiment that I cut from the same Summer Splash papers and die cut the panel with a wonky stitched rectangle die. I fussy cut Mr. Rabbit and adhered him to the card over a little shading I added to the panel. I used the following Copic markers for this card ~ N0, N2, R20, BG11, BG32.
I'm entering Mr. Caffeinated Rabbit in the CASology: Summer Challenge.


That's it for me today! Two simple, but cute cards! Be sure to check out The Rabbit Hole Designs... their June release was revealed today and it's ADORBS!!

Thanks for checking out my blog post!
See ya next time.

Inky Hugs,
Crystal


Wednesday, May 8, 2019

The Rabbit Hole Designs ~ Coffee Lovers Spring I Summer 2019 Blog Hop

Hey crafty peeps!!
So, a few days ago I shared another card using The Rabbit Hole Designs stamps... you can check that card out here ---> Handmade Brew card. When I made the background for that card, I also made this background that I set aside just for the Caffeinated Rabbit! I have been just itching to ink this guy up!! I love this stamp so much!


This was totally me this morning!! LOL... 
So, I considered just leaving the background as is, but as I was reaching for my stitched rectangle die and I saw the Cover Up Stitched Clouds die by Lil' Inker Designs.  I thought it would make the background even better and I have to say that I love it! I very simply colored the rabbit with just a little touch of N0, N2, and R20 Copic markers. The cup was colored with V01 and V06. Now I was gluing down the rabbit and decided to put a little grey mat under him... imagine me doing a mad dash for the grey card stock LOL!! Well, since I was in a hurry I just hand cut my oval-ish mat and glued it hastily down and then finished adhering the rabbit. It was all very hare-ied *wink* *wink* and hilarious to me, anyway!


I stamped the sentiment on a scrap of the same grey card stock using VersaMark watermark ink and then heat embossed a fine white embossing powder. I trimmed the sentiment down to a flag and then popped it up on the panel. The main panel is also popped up on the white card base. 
There you have it... a fun, quick card!

There's a couple more days for the Spring/Summer Coffee Lover's Blog Hop. I sure 
hope you've had a chance to play along!!

Thanks so much for checking out my blog post!
See ya next time.

Inky Hugs,
Crystal

Sunday, May 5, 2019

The Rabbit Hole Designs ~ Coffee Lovers Spring I Summer 2019 Blog Hop


Hey crafty peeps!
Today, I'm sharing my love of coffee using The Rabbit Hole Designs little freebie stamp that I received in my last order from the new May release!! If you're not familiar with The Rabbit Hole Designs stamps... you are missing out!! After you check out my card, go check them out!


Once I saw this sweet little stamp set I just knew I had to make an alcohol ink background and pull out my much neglected Alcohol Lift Ink ink pad. I used turquoise and raspberry alcohol inks and just swiped the ink across the yupo card stock using a blending tool with the felt. I stamped the beautiful partial coffee image several times, along with the 'Love' and 'coffee' stamps. I even decided to stamp a few of the caffeine molecule stamp... so fun! 


I'm not sure why my card has a yellow tinge in this picture, but I took a few different photos and couldn't get a better picture so... here it is. 

I mat the alcohol ink layer onto a piece of Tempting Turquoise card stock and wrapped the vellum layer over top securing it with adhesive on the back. I popped up the panel onto a white card base and added a few white enamel dots... bam! Love how it turned out!

I encourage you to check out the Spring/Summer Coffee Lover's Blog Hop... it's so much fun!


Thanks for checking out my blog post today!
See ya next time.


Inky Hugs,
Crystal

Sunday, February 17, 2019

The Rabbit Hole Designs ~ Caffeinated Octopus ~ Gets me Kraken!

Hello there! Today, I'm sharing a card I made with the fabulous Caffeinated: Octopus set from The Rabbit Hole Designs for the CASology Cue Card: Wave challenge. I am loving all the fun Caffeinated stamps from this new stamp company!! And thought this octopus would be perfect for this challenge!!


I blended Tumbled Glass Distress Oxide ink over the My Favorite Things Make Waves stencil being sure to keep the blending light. I then stamped the Caffeinated: Octopus twice... once over the stenciled background and again on a scrap piece of white card stock. I knew that I didn't want to fussy cut around all those wayward hairs poking out of the octopus' curlers so I could fussy cut those right off but still have them on the card.


I colored in the octopus using the following Copic markers:

Octopus ~ BV04, BV31, BV34, R000, R11
Curlers ~ BG000, BG13, BG15
Coffee Pot ~ E44, E47, E49, N0, N1, N5, N8
Mugs ~ RV0000, RV17, RV19, RV21

I also used a touch of white gel pen on the mugs and coffee pot. The red in the eyes was made using a Paper Mate Ink Joy pen. I colored around the outer edges of the eyes with the R000 and R11 copic markers and then made tiny squiggly lines with the red pen. I fussy cut the octopus and then adhered it over the image I had stamped on the card front. I then ran the card front through the Big Shot with the My Favorite Things Wonky Stitched Rectangle die. I stamped the sentiment in the top right corner and then adhered the whole piece to a white card base.


Here's one more look at the finished card... pretty simple, but oh so fun!
Love this Caffeinated: Octopus!! 

There's still a little bit of time to play along with the CASology challenge! 
You can check it out here ---> CASology Cue Card: Wave challenge.


Thank you friends for checking out my blog post!
See ya next time.

Inky Hugs!
Crystal


Thursday, February 14, 2019

The Rabbit Hole Designs ~ Love You More ~ Love Is In The Air

Happy Valentine's Day!! Today, I'm sharing a sweet card using the sweetest set from The Rabbit Hole Designs called Love You More. I just adore this stamp set and had a fun idea to use this set with some Glitter Glaze from Brutus Monroe!


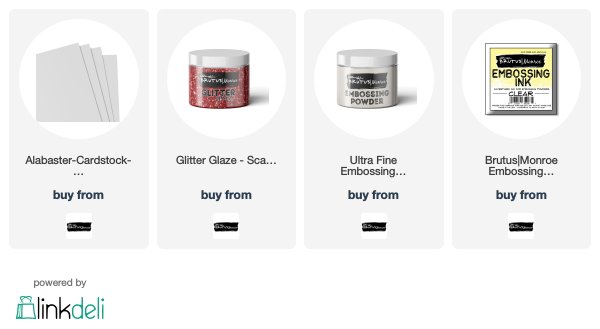
Ever since I created my first card using this stamp set... you can see that on my Instagram here ---> Love You More card... I had the idea for this card in the back of my mind. I really wanted to play with the Glitter Glaze from Brutus Monroe again. I used a heart stencil from my stash and masked off the portions I didn't want on the card. I taped the stencil down over the top folded 4-1/4 x 5-1/2" card of Alabaster card stock and then used a palette knife to apply the Scarlet glitter glaze over the stencil. I set the card aside to let it dry and then stamped the adorable images on a separate piece of Alabaster card stock. I then colored all the images with the following Copic markers:

Skin ~ E000, E00
Girl's Dress ~ BV31, BV34
Girl's Hair ~ E55, E57, E59
Boy's Shirt ~ YR16, YR27, N0
Boy's Jeans ~ B95, B97
Boy's Hair ~ E43, E44, E47
Balloons ~ R000, R14, R27
Clouds ~ BV20, BV23
Bird ~ R20, Y11

The clouds got a little too dark for my liking so I went back in with a white Gelly Roll pen and it turns out, I liked the texture that it gave to the cloud so that's a win win there! I fussy cut all the images and adhered then with mono multi purpose liquid glue. I trimmed off the excess cloud on the right side. I then stamped the sentiment with Clear Embossing Ink and heat set Alabaster embossing powder. I die cut the sentiment with a banner die and then trimmed off the left side. I adhered it to the card using the liquid glue and there you have it! I love this card!


Here's a close up of the coloring and you can see the pretty glitter in the glitter glaze hearts!
Love it! I sure hope that you like my card, too! 


Thank you friends for checking out my blog post!
See ya next time.

Inky Hugs!
Crystal


{SUPPLIES}

Affiliate links are used at no extra cost to you: