Showing posts with label guest designer. Show all posts

Friday, February 28, 2025

Fun With Stencils ~ A Colorful Life Designs ~ Coffee Loving Papercrafters

 Hello there crafty friend! Crystal here from Tawny Owl Paperie and I'm sharing my last post as a guest designer for the Coffee Loving Papercrafters. I've had a lot of fun sharing with you all! I hope you've enjoyed the coffee inspiration I've shared.


 Today I'm sharing a fun stenciled card featuring three fabulous stencils from A Colorful Life Designs. I used the fab Fractured Beams Stencil for my background. I blended Squeezed Lemonade, Mustard Seed and Abandoned Coral Distress Inks over the sun rays once and then again after shifting the stencil.


I blended over the cute cup from the Love Language Stencil on a separate piece of white card stock using Peacock Feathers and Mermaid Lagoon Distress Ink. I fussy cut the cup and adhered it to the panel. I blended Abandoned Coral and Candied Apple Distress Inks over the cute little heart on a scrap of white card stock. I fussy cut that leaving a white border and adhered it to the cup.


I then ink blended Black Soot Distress Ink over a fun sentiment from the Snarky Coffee Stencil. I trimmed the panel and realized that I had messed up the bottom left corner at some point so I just chopped it off. I adhered the panel to a black A2 card base and added six confetti pieces from the Metallic Orange Card Bling pack, also from A Colorful Life Designs. 


The ideas starting revving once I got started so I made a couple more cards. I blended lightly with Vintage Photo Distress Ink over the Mmmm portion of the Mmm Coffee Stencil. And then I blended with Ground Espresso Distress Ink over the 'Coffee'. 


I added the little heart from the Coffee Pot Stencil using Candied Apple Distress Ink. A fun CAS card on Kraft card stock.


I had an idea for the Coffee Pot Stencil so I ran with it. I blended the coffee pot with Black Soot Distress Ink. And without adding ink to my blending brush, I blended the steam lightly with the same brush. I blended Vintage Photo Distress Ink for the coffee. I left the coffee pot stencil in place and laid the Mmm Coffee Stencil over top and blended Ground Espresso Distress Ink over the Mmmm. I removed the coffee pot stencil and masked the Mmm coffee stencil and then blended the 'Coffee'. And I just had to blend another heart with Candied Apple Distress Ink.


I trimmed up the panel and adhered it to a black A2 top fold card base. These were such fun cards to make! I hope you've enjoyed the cards I've shared today and throughout the month. Have a wonderful weekend crafty friends!

Thanks so much for stopping by!
See ya next time.

Inky hugs,
Crystal

{Please note comment moderation is on. Your lovely comment will appear once approved.}

Friday, February 21, 2025

Curlers & Catitude Pissy Kitty ~ Unity Stamp Co. ~ Coffee Loving Papercrafters

 Hello there crafty friend!
 I'm so excited to share another fun coffee themed card as a guest designer for Coffee Loving Papercrafters


Today I'm sharing a sassy kitty card featuring the adorably snarky Curlers & Catitude Pissy Kitty. I absolutely adore this kitty stamp from Unity Stamp Co.


I stamped the kitty with Black Amalgam ink from Gina K. Designs and colored her up with Copic markers. Here's a quick list of the Copic markers I used to color up the kitty:
Kitty: YR21, YR15, N0, N2, N4, C00, R00, R20
Eyes: YG11, G14, C00, C2
Curlers: BG10, BG01, BG72
Mug: R000, R83, R37, E21


I paired up the snarky kitty with the Perk Me Up {paper pack} also from Unity. It has a fun vintage vibe that I love! I die cut the kitty and distressed the edges with a bit of Vintage Photo and Ground Espresso Distress Ink.


I stamped, trimmed and also distressed the edges of the sentiment. I adhered it to the bottom of the die cut circle and popped them both up with foam tape. Lots of fun to make this one! Hope you've been inspired to get inky this weekend with some caffeine themed goodies!

Thanks so much for stopping by!
See ya next time.

Inky hugs,
Crystal

{Please note that comment moderation is on. Your lovely comment will appear once approved.}

Friday, February 14, 2025

Coffee for All Seasons ~ Not 2 Shabby ~ Coffee Loving Papercrafters

 Hello there crafty friend!
I’m back as a guest designer for the month of February for the Coffee Loving Papercrafters!


Today I'm sharing a set of caffeinated seasonal cards that I created using awesome papers and fun ephemera from Not 2 Shabby. I am a huge fan of Not 2 Shabby's papers and coordinating ephemera. I have oodles and oodles and was happy to finally play with some of my stash.


First up is a lovely Valentine's Day card I created using the Lattes of Love 6x6 Paper Pad and the coordinating Lattes of Love Ephemera. I used all kinds of papers from the pack for all of my layers even the mats for my panels. And I used five different ephemera pieces for my focal piece.


Up next is a wonderful card for Summer... I used the gorgeous Make It Iced 6x6 Paper Pad and coordinating Make It Iced Ephemera. So many fab girls and summer drinks in this one! Love it! I used three pieces of ephemera for the focal image for this one and then a sentiment I added near the bottom of the card.


My third card features one of my favorite paper pad and ephemera pairings... the gorgeous Give Thanks 6x6 Paper Pad and coordinating Give Thanks ephemera. I love the beautiful pumpkins in these papers. I used three ephemera pieces for this one.


My card design was inspired by one of my favorite sketch from the {BYSHC} group... {BYSHC} Sketch 7. Lots of fun layers and endless possibilities! All of my measurements are directly from the sketch.


 Lastly, I just had to share a Christmas card. I love making them all year long! I used the adorable Brewing It Up 6x6 Paper Pad along with the Brewing It Up Ephemera. I used just two ephemera pieces for my focal image and then I fussy cut the sentiment from a third ephemera piece. So cute and so much fun to make! I hope you've been inspired to get crafty with some coffee papers and ephemera in your stash.


Thanks so much for stopping by!
See ya next time.

Inky hugs,
Crystal

{Please note that comment moderation is on. Your lovely comment will appear once approved.}

Friday, February 7, 2025

Coffee is Better ~ Angie Blom Digital Designs ~ Coffee Loving Papercrafters

Hello crafty friends!
I’m super excited to be guest designing for the month of February for the Coffee Loving Papercrafters!


Today I'm sharing a fun mixed media card featuring digi stamps from Angie Blom Digital Designs. I combined and resized the frame and coffee cup from the Vintage Frames and Coffee is Better Digital Stamp Sets in a Word Document.


Printed them off on white card stock and colored them up with my Copic markers. 

Here's a quick list of the Copic markers I used:
Frame: BG000, BG01, BG72, E50, E30, E35
Cup: E50, E21, E23, E25, BG000, BG01, BG72, R20, R14
Red Background: R00, R20, R14


I ink smooshed a fun background panel using Vintage Photo and Ground Espresso Distress Inks leaving some white space on the panel. I also spattered some Ground Espresso Distress Ink from the leftover ink on my desk. I adhered the panel to an A2 card base of dark brown card stock. 


I popped up the sentiment, cup and the vintage frame using foam tape. Lots of fun dimension for this card. So much fun to make! I hope you've been inspired to get inky with your coffee stamps!

Thanks so much for stopping by!
See ya next time.

Inky hugs,
Crystal

{Please note that comment moderation is on. Your lovely comment will appear once approved.}

Saturday, December 29, 2018

Brutus Monroe ~ Botanical Banners ~ Happy Birthday

Hello! I'm here with another guest spot featuring the gorgeous Botanical Banners stamp set... Oh My Goodness! These gorgeous flowers were a dream to watercolor! Let's get right to it, shall we?


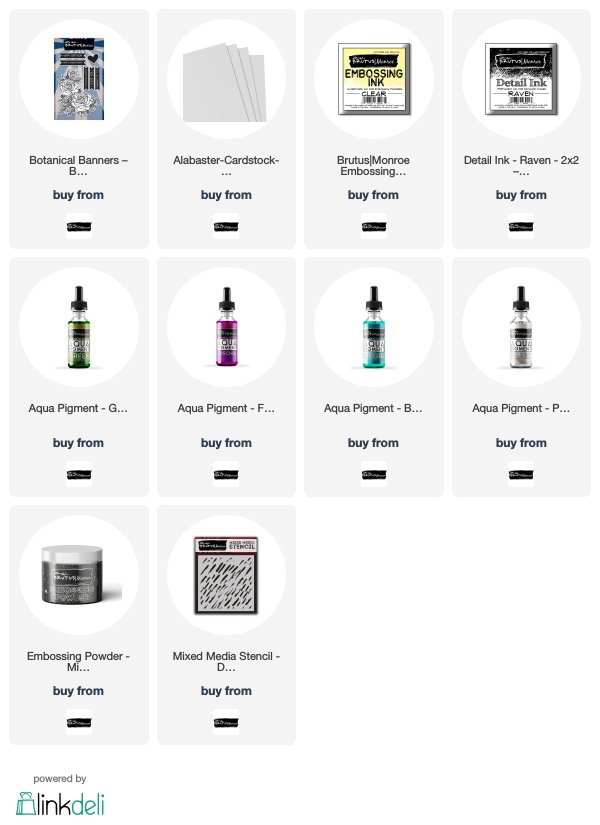
I stamped the Botanical Banners floral set onto Canson XL watercolor paper (140lb) with Brutus Monroe Clear Embossing Ink and heat set a fine black embossing powder. This is my favorite technique for watercoloring because the raised edges of the heat embossed image keep the watercolors pretty well contained. I then watercolored the image by putting a couple drops of the Aqua Pigment on my acrylic blocks, one color per block so there wasn't any chance of mixing.


 I used my watercolor pen to pick up the colors, cleaning off my pen with paper towel between colors. I have to admit when I used the Pearl Aqua Pigment to blend with the Fuschia on the petals of the flowers... I was blown away! It was just so gorgeous and the shimmer! Love it!


All the shiny on the card made it a little difficult to get a picture. In this picture though, I think you can see the shimmer from the Pearl Aqua Pigment watercolors on the petals but also around the flower with the Blue Green Pigment watercolors.... I just couldn't resist using the Pearl again after seeing how beautiful it was on the petals.


Here's one last shot at the shimmery layers on the card. I just can't get enough of it!


Once my watercolored panel was dry, I die cut it with a stitched rectangle die and set it aside. I have just been itching to give this Milky Way embossing powder a try every since it arrived and I have to tell you it is so cool! I thought I'd give it a try on a colored piece of card stock but didn't want to do your typical black or maybe dark blue... so I grabbed this Lavender card stock from my stash. I laid the Down Pour stencil over the Lavender card stock and dabbed the Clear Embossing Ink all over the stencil making sure not to push too hard because the ink pad is really juicy, but I did make sure to get good coverage through the stencil. I removed the stencil, added the Milky Way embossing powder and then heat it up and Oh. My. Goodness. Wow! I love this stuff! It has such an awesome look to it! Love love love! Anywho, I trimmed my background piece and adhered it to a card base of Alabaster card stock. I then popped up the watercolor panel with some foam tape. My last touch for the card was the sentiment... I stamped the happy birthday banner from the Botanical Banners stamp set with Raven Detail Ink and then just fussy cut it by hand. I adhered it to the card and called this one Done!

I have had so much fun sharing my creations with you this month. I hope you've enjoyed them!

Thanks so much for stopping by!
See ya next time.

Inky Hugs,
~ Crystal


{Supplies}

Affiliate links are used:

Tuesday, December 25, 2018

Brutus Monroe ~ Snow Friends ~ Merry & Bright

Hello! I'm back with another guest spot featuring Snowy Friends from Brutus Monroe! I just couldn't resist inking up this snowman... isn't he the cutest snowman?! I can't get enough of him... so I made up a bunch of cards using him!


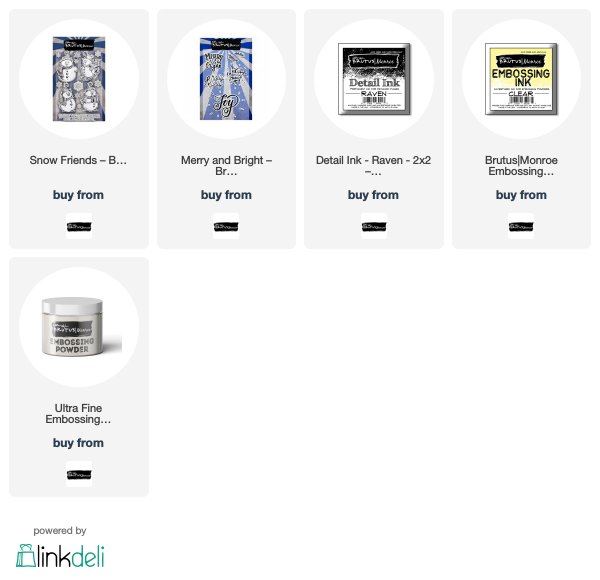
I started by stamping the snowman from Snowy Friends multiple times with Raven Detail Ink on a light kraft card stock. I colored the snowman first using the following Copic markers ~ B0000, B00, BG000, BG15, BG18, YR15, YR27, YT68, R14, R27, R89.


I love the look of Copics on kraft card stock! To finish off the images, I used some white Prismacolor pencil to highlight here and there. I then fussy cut all the snowmen and set them aside.


I had these note cards in my stash forever and I thought it was time to finally use them. They measure 3-1/2 x 5" when folded. I die cut a circle from a scrap piece of light weight card stock for my 'stencil' and then stamped the trees from the Freshly Cut stamp set by Brutus Monroe and Unity Stamp Company using Pine Needles Distress Oxide ink. I then blended some Shabby Shutters and Vintage Photo Distress Oxide ink around the outer edge of the circle. I used a heat tool to help the oxide inks dry completely and then rubbed an anti-static pouch over the circle area. 


I then stamped the Merry & Bright sentiment using clear embossing ink and heat set Alabaster white embossing powder. I added a few drops of Nuvo white blizzard glitter drops. To finish them up, I wrapped the cards a couple of times with a metallic turquoise twine and tied them with a bow.

Thanks so much for stopping by!
See ya next time.

Inky Hugs!
~ Crystal


{Supplies}

Affiliate links are used:


Tuesday, December 18, 2018

Brutus Monroe ~ Forest Background ~ Let it Snow

Hello! I am beyond excited to be guest designing for Brutus Monroe during the month of December! Woohoo! I hope to share some fun creations with you this month using some fabulous products!! Let's get started! 


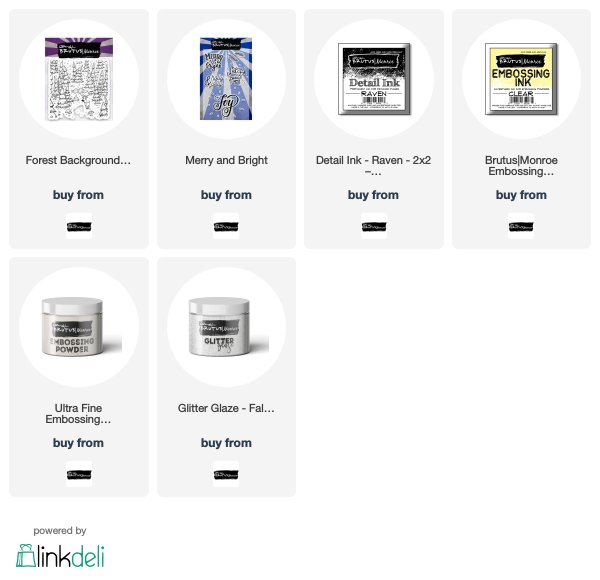
Today, I have a card I created using the adorable Forest Background stamp. I stamped the background using Raven Detail Ink and then colored in the images with the following Copic markers ~ E21, E23, E25, E34, E35, N0, N2, N5, E55, E57, E59, W5, G24, G29, G46, YG17. I knew that I wasn't going to use the entire background so I didn't color the whole thing. In fact, I just realized I missed a tiny bit of tree there in the bottom right corner. Ooops! Haha... well, sometimes that happens. I also added some 'snow' to the background using a snow marker and then heat set it to make it puffy. I then die cut the circle piece I wanted for my focal image and then die cut the stitched rectangle piece. I didn't want to exclude that sweet little bunny so I fussy cut him out and adhered him by the deer adding a bit of snow around him, as well. I then set those pieces aside to work on my back layer.


I just had to try out the Fallen Snow Glitter Glaze and I wanted to see what it would look like on a dark card stock so I chose a piece of dark blue card stock from my stash along with a snowy stencil. I was pleasantly surprised at the texture of the glaze... it was so easy to work over the stencil with the spatula filling in all the snowy bits. I love it! I love the effect of the glittery 'snow' on the dark background, too! The perfect base layer for the design I had in mind.

Once the glaze dried, I trimmed the snowy background and mat it on a piece of grey card stock. I mat the rest of my layers using the same grey card stock and then adhered all of my layers onto a white card base, popping up the focal image in the circle using foam tape. When I adhered that last focal piece I was careful to line up the images with the rectangle background.... it's a great way to give dimension to a card when using just a background stamp.


To finish off the design and tie the whole theme of the card together I chose the 'Let it Snow' sentiment from the Merry and Bright set. I didn't want to cover the background I had colored so I chose to stamp the sentiment on vellum card stock. I stamped it using Brutus Monroe Embossing Ink and then I heat embossed Ultra Fine Alabaster Embossing Powder... OMG! I absolutely love this embossing powder! You can see in the picture above how well it melted... so beautiful! I die cut the sentiment with a circle die and then I adhered it just on the right side where it overlaps the scene in the circle. I didn't want to use foam tape behind the other side since it would be visible through the vellum and it would cover the background so I just left it to kind of float there. 


Here's another look at the finished card. I love how it turned out! I hope I've inspired you to pull out those background stamps and have fun with some layers!

Thanks so much for stopping by!
See ya next time.

Inky Hugs!
~ Crystal


{Supplies}

Affiliate links are used:


Friday, November 23, 2018

Coffee Loving Cardmakers ~ Graciellie Design ~ Christmas Cheer


Hello! Today is my last day guest designing for Coffee Loving Cardmakers and I wanted to share a card I made using a gorgeous digi stamp set from Graciellie Designs called Poinsettia Tea Cup. I love poinsettias during Christmas time. They are my favorite flower this time of year! I just had to combine this digi image with this sweet sentiment... it made for an easy card, for sure! I am loving using digi stamps!


 I was able to combine the image and the sentiment on a Microsoft Word document and print it off. I colored in the image with the following Copic markers:
Tea ~ E30, E34
Cup/Saucer ~ N2, N5
Poinsettia/Mistletoe ~ R14, R27, R37, R89, Colorless blender, G46


Once that was done, all I needed to do was trim the white card stock to fit on my A2 card base of Smokey Shadow card stock.


I adhered a strip of patterned paper from the Carta Bella Christmas collection that I had die cut with a stitched scallop die from My Favorite Things. I then adhered the panel to the card base. I added a few Nuvo gloss white drops to the flower and some ebony black drops to the card. For some reason the black ones didn't settle right, but I'm not going to let those take away from the overall pretty card. I do love how this turned out! I hope you've been inspired to try out those digi stamps!

Thank you friends for checking out my blog post!
See ya next time.

Inky Hugs!
~ Crystal

Friday, November 16, 2018

Coffee Loving Cardmakers ~ I Just Need Coffee!


Hello! Today, I'm sharing some truth... I just need coffee!! Haha... but really, I'm sharing a fun card for another fabulous guest spot at Coffee Loving Cardmakers
I created an alcohol ink background and also used Alcohol Lift Ink and of course, one of my favorite owl stamps from Rubbernecker Stamps.


Trying to get a photo of this card was a challenge because of the shine on the Yupo cardstock. With that being said, that white behind the owl (to the right) is glare. 
I was having fun the other day creating a bunch of backgrounds using alcohol inks and I thought it would be fun to use some coffee colors. I don't have a lot of alcohol inks so I ended up using Butterscotch, Espresso, and Turquoise (of course!) with a bit of Gold Mixative. Once my background was how I liked, I blended Alcohol Lift Ink over the Tim Holtz Mini Stencil Set 3 - the one with the coffee ring and splatter. I dabbed the background with a paper towel until it wasn't as saturated and then I rubbed the background to remove the rest of the Alcohol Lift Ink. Doing that basically lifts away the alcohol ink that was on the background. Such a fun technique!


I set aside the background piece and stamped Preston ~ isn't he the cutest! ~ onto Canson XL watercolor paper using VersaMark watermark ink and heat embossed a fine black embossing powder. I watercolored Preston with my ZIG Clean Color Real Brush pens and then die cut him out with the coordinating Preston Die Cut.


I set Preston aside and went back to work with the background... I needed a sentiment, but Preston doesn't come with one so I searched through my Rubbernecker Stamps and found the perfect sentiment, ironically, in the Coffee Set. Preston looks like he NEEDS coffee! Don't we all?!
I stamped the sentiment using Versamark watermark ink and heat embossed a fine black embossing powder. Since I was heat embossing on Yupo card stock which is a plastic card stock, I was careful to not heat it too long... just enough to melt the powder. 


I then mat the background piece with Taken with Teal card stock from my stash. I popped the background up on a Vintage Cream card base and then adhered Preston with Multi Medium Matte. I just adore this card! I sure hope you like it too!


Thank you friends for checking out my blog post! 
See ya next time.

Inky Hugs!
~ Crystal

Friday, November 9, 2018

Coffee Loving Cardmakers ~ Happiest of Birthdays with Coffee!


Hello! Today I'm so excited to share a few variations of a Birthday card that I created with a Fall theme for my second guest spot with Coffee Loving Cardmakers. I am a huge fan of Unity Stamp Company and the original Dream of Being stamp set is THE set that got me hooked to their line of stamps. Well... they recently released a second Dream of Being set called Dream of Being {So Loved}  I was blown away! She's just as beautiful as the original and all dressed up for my favorite season ~ Fall!


So naturally, I had to ink her up for some much needed Fall birthday cards. I stamped the image and the sentiment onto several 5-1/2 x 4-1/4" pieces of white card stock and then adhered a couple of strips of patterned paper from Echo Park's Fall is in the Air paper pack. I then die cut them with a Pleated Lace Rectangle die from Gina Marie Designs.


Once that was done, I colored each of the images using the same Copic markers but changing up the colors of the clothes. Here's a list of the colors I used:
Hair ~ E55, E57, E74, E77, E79
Skin Tone ~ E000, E51, R20, RV21
Clothes ~ YR27, R56, YG61, YG63, YG67, YG91, YG93
Cup ~ Y35, W00, W1, N1


Once all of the images were colored, I wrapped the panels with twine and tied a bow. I then popped it up on a 5-1/4 x 4" piece of Summer Sunshine card stock.


 I then mat that panel on a 5-3/8 x 4-1/8" piece of Americana card stock and adhered the entire piece to a Kraft card base.


I love how simple these cards were to make and I think they turned out really nice!


Here's a close up of my favorite card of the bunch. I added some flecks of orange in the hat on this one and I really love how it turned out! It reminds me of a hat that I have! 
 I hope you've enjoyed my cards today and have found some inspiration!

Thank you friends for checking out my blog post!
See ya next time.

Inky Hugs!
~ Crystal