
The kids and I are at it again! It's time for another Get Kids Crafty hop and the theme this month is Valentine's Day. We decided it would be fun to make Daddy a little something for Valentine's Day.
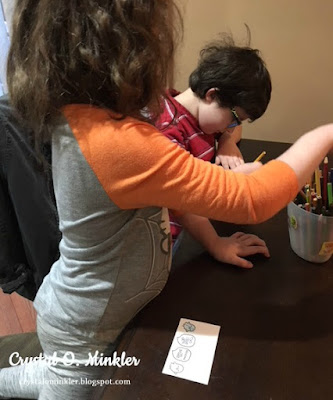
We started by stamping and coloring our images (we used the misti to stamp the images - I forgot to take pictures. Oopsy!) from Lawn Fawn's Love Letters stamp set.


Get Kids Crafty is hosting its first quarterly giveaway (open to US and International followers)!! All you have to do to participate is showcase your children's projects on social media using the hashtag #getkidscrafty.


Images must be shared publicly on Facebook and/or Instagram to be eligible, pictures of your child's work (not your children) are required. Bonus points if you are in the Get Kids Crafty Facebook group and share in the group! Please share by February 14th, and the winner will be announced in the February Get Kids Crafty Blog Hop!
~ Hop List ~
Jeanette with Acute Stamper
Marcia Caradinta with The Frolicking Fairy
Sara with Phineas and Mae
Megan with Mad Crafters Tea Party
Hannah with Fanciful Spaces
Crystal O. Minkler <--- you're here
Annalisa with Faith Dream Create
Evie Does It
Thanks for stopping by!
See ya next time.
~ Crystal & the kiddos
We started by stamping and coloring our images (we used the misti to stamp the images - I forgot to take pictures. Oopsy!) from Lawn Fawn's Love Letters stamp set.


And then we pulled out the Cuddlebug to die cut our images. The kids got a kick out of cranking the plates through. We used a touch of washi tape to hold the dies down.


We started to assemble our pieces. We had die cut some mailbox pieces from Lawn Fawn's Happy Mail dies so here the kids are gluing the mailbox pieces together.


We set those aside and started assembling our card. We had die cut some Grassy Hillside Border pieces (also from Lawn Fawn) that we adhered to the bottom of our card front. We then decided we wanted to color the sky, which turned out to be harder since the grass was there... but we made it work. We did learn a lesson about planning out our scene or project before gluing.


Once our skies were colored we adhered our mailboxes to the card. We put an acrylic block on the mailbox to weigh it down a bit so it would dry flat.


I missed a few picture taking moments... oopsy again... we traced the kids hands on some construction paper and then cut them out. We adhered those to these little kraft paper bags and added some die cut hearts. We punched out a couple holes and added some black twine... because black is Daddy's favorite color. Our cute little krafty paper bags became our envelope of sorts. We plan to add a couple treats to Daddy's gift.


Here the bags are beside each other... how cute is that?! I think the kids did a great job (with a bit of help from Mom).

Get Kids Crafty is hosting its first quarterly giveaway (open to US and International followers)!! All you have to do to participate is showcase your children's projects on social media using the hashtag #getkidscrafty.


Images must be shared publicly on Facebook and/or Instagram to be eligible, pictures of your child's work (not your children) are required. Bonus points if you are in the Get Kids Crafty Facebook group and share in the group! Please share by February 14th, and the winner will be announced in the February Get Kids Crafty Blog Hop!
~ Hop List ~
Jeanette with Acute Stamper
Marcia Caradinta with The Frolicking Fairy
Sara with Phineas and Mae
Megan with Mad Crafters Tea Party
Hannah with Fanciful Spaces
Crystal O. Minkler <--- you're here
Annalisa with Faith Dream Create
Evie Does It
Thanks for stopping by!
See ya next time.
~ Crystal & the kiddos


