Pages

Friday, February 26, 2021

{BYSHC} Sketch Challenge #7 ~ More Milk & Cookies ~ Doodlebug Design

 Hello there crafty friend!
I'm back with one last Christmas card using sketch #7 for the {BYSHC} Sketch Challenge #7 in the Build Your Stash Holiday Cardmakers Facebook group. And yes, I just had to use the adorable Milk & Cookies papers from Doodlebug Design again!! I really am trying to use up these papers... I still have SO much!! Anywho... this was another super quick card!


No joke! It took me longer to decide if I wanted to go landscape or portrait for this one more than anything else. The papers were easy... since the main piece is busy with Santa and the fun Christmas scene I wanted to go with less busy papers for my background panels. The tan paper is kind of busy with images but not in color so I think it works well as a background. I have the papers mat on a piece of kraft card stock and then a mat of Real Red card stock and a card base of kraft card stock.


The main focal piece is also a paper that is included in the paper pad. I had already cut into this paper to use the other side of the double sided paper but I'd been looking at this one piece trying to figure out a way to use it in this sketch. The Stitched Arch STAX from My Favorite Things was the perfect dies to die cut the focal piece and work around the portion that I had already used. Woohoo! I also used another cut apart sentiment from the paper pad. I trimmed down the Seasons Greetings and adhered it to a die cut piece of kraft card stock. I adhered it to the bottom of the main piece and then popped up the whole piece. It almost looks like a snow globe which is why I added some shimmer to the Santa scene.


It's so hard to get a good photo of the shimmer though. I used a Nuvo Glitter Gloss Aqua Shimmer pen for the shimmer and in person it really is like a snow globe! You can see bits of the shimmer in each of the photos or maybe I'm imagining it. LOL Hopeful thinking!


Here's another look at the {BYSHC} Sketch #7.
There's just a couple more days to play along! Head over to the {BYSH} Cardmakers blog to see more inspiration using this fun and super easy sketch!


Thanks so much for stopping by!
See ya next time.

Inky Hugs,
Crystal

Thursday, February 25, 2021

Coffee, Gnomes & You Slimline Card ~ Copic Coloring ~ Unity Stamp Co.

 Hello there crafty friend!
Eeep! There's a new fabulous release over at Unity today!! I created this adorable slimline card using two new releases... the adorable Coffee, Gnomes & You stamp set along with the Coffee is Life background stamp! Love these new stamps!!


I stamped the Coffee is Life background stamp twice side by side with Gina K. Amalgam black ink and then trimmed it down to 3-1/4 x 8-1/16". I ink smooshed it in some Vintage Photo and Ground Espresso Distress Oxide inks and then splattered a little Ground Espresso Distress Oxide ink. I dried it with my mini Wagner Heat Tool and then mat it on an Early Espresso slimline card front measuring 3-1/2 x 8-1/2". I then adhered the card front to a white slimline card front measuring 7 x 8-1/2" scored at 3-1/2".


Now for this adorable gnome... also stamped with Gina K. Amalgam black ink and I colored her up with the following Copic markers:

Skin ~ E0000, E00, E11, R00, R20
Hair ~ E51, E74
Cup ~ BG10, BG23
Hat ~ RV10, RV11, RV14, BG23
Grounding ~ E74

I fussy cut the gnome about halfway through my coloring so I could place her on the card and see what colors I wanted to use. I went with a favorite combo... turquoise and pink!


I adhered the cute gnome to a white die cut 3" circle that I mat on an Early Espresso 3-1/2" circle. I trimmed the sentiment words separately so I could adhere them just where I wanted them. I just love how this card turned out! I have a video sharing my Copic coloring and assembling of this card. You can check that out here... Coffee, Gnomes & You Slimline Card.


Two of my favorite things... an adorable gnome and coffee!! What's not to love!
Go check out the fab new releases and sale over at Unity!!


Thanks so much for stopping by!
See ya next time.

Inky Hugs,
Crystal

Monday, February 22, 2021

CAS Geometric Cards ~ February 2021 Whit Kit ~ Unity Stamp Co.

 Hello there crafty friend!
I'm back with another card using the wonderful February 2021 Whit Kit called Small Steps are Progress... now this card is a little outside the box. I thought it would be fun to use the terrarium and make a geometric style card.


And then to play along with the sentiment, I decided to make my layers crooked. For my first card I also thought some splatter was in order. It definitely gives this card a little something extra.


A close up of the first card.


And the second card which I left clean and very CAS... too CAS maybe?
I kind of like it... it definitely plays off of the sentiment as well.


A close up of the second card.
Well, I know that these cards are different... especially when you see the fun succulents in the Small Steps are Progress stamp set that's included in the card kit, but I had to run with my idea.

Here's a little video sharing my process in making the first card with the splatters... CAS Geometric Cards.


I hope that I've inspired you to think outside the box when you're getting inky! Be sure to check out the fabulous Small Steps are Progress card kit over at Unity Stamp Co.!

Thanks so much for stopping by!
See ya next time.

Inky Hugs,
Crystal

Saturday, February 20, 2021

CAS Terrarium Card ~ February 2021 Whit Kit ~ Unity Stamp Co.

 Hello there crafty friend!

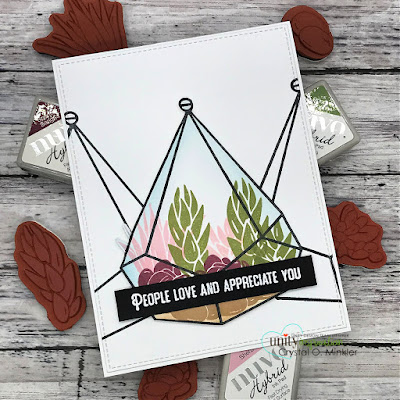
Today I'm sharing the first card I created using the awesome February 2021 Whit Kit called Small Steps are Progress from Unity Stamp Co. Another fantastic card kit!! I have some fun ideas using this month's kit. I hope you'll stop by to check them out. First up is this CAS Terrarium card!


I used the terrarium stamp and stamped it twice, once on either edge of a white card front measuring 4-1/4 x 5-1/2". I then stamped the terrarium again on another card front. I stamped the different succulents using the ink cubes included in the card kit.


I blended a little Classic Kraft ink from Papertrey Ink on the bottom portion of the terrarium. I also blended a little Tumbled Glass Distress ink on the upper edges of the fussy cut terrarium. I stamped the sentiment with Wow Clear Embossing ink and then heat set the Alabaster White embossing powder from Brutus Monroe. I die cut the background panel with a large stitched rectangle die and adhered it to a white A2 top-fold card base. I then popped up the focal piece with foam tape and adhered the sentiment with a bit of Tombow Mono Multi liquid glue in the center and a couple small pieces of foam tape on the ends of the sentiment.

I have a short video sharing my process for this card. You can check it out here... CAS Terrarium Card.


I'm so happy with how this CAS card turned out. I do love a good CAS card.
Hope you like it too!


Thanks so much for stopping by!
See ya next time.

Inky Hugs,
Crystal

Friday, February 19, 2021

{BYSHC} Sketch Challenge #7 ~ Camping Adventures with Poinsettia Greetings ~ Mix Match of Digis

 Hello there crafty friend!
I'm so excited to share a fun card that I created using a non-Christmas digi set from Angie Blom Digital Designs that I combined with one of my very own digi sets available at Polka Dot Orchard!! Such a fun combination and it works fabulous with the current sketch challenge over at Build Your Stash Holiday Cardmakers Facebook group. AND both shops are having a sale!!! Gotta love a good sale!!


Since both of these fun stamps are digital, I was able to combine them in a Word Document. I inserted the beautiful lantern from the Camping Adventures set from Angie Blom Digital Designs into my Word document. I resized it so it would work nicely for this card design. I then inserted the pretty poinsettia from the Poinsettia Greetings digi set from Polka Dot Orchard. I decided to add two... making the front poinsettia a little smaller and the back one a little bigger. I love the festive combination here!


I also inserted the Seasons Greetings sentiment from the Poinsettia Greetings digi set and printed off the images. Time to color!! I used the following Copic markers:

Lantern ~ C00, C2, N0, N1, Y000, Y06, Y17, B0000
Poinsettias ~ R000, R14, R27, Y06, Y17, YG11, G14, G46 
Grounding ~ N0, N1 


I changed up the sketch for the sentiment... I didn't want to cover up any more of the images so I just had it come off the edge of the card. Ohhh... I forgot to mention the pretty papers I used are from another Doodlebug Design paper pack in my stash called Christmas Magic. I was lucky enough to find these perfect papers to coordinate with my colored images!! Phew! The two bottom layers are both pretty papers from the paper pack. The yellow mat for my focal piece is Daffodil Delight card stock from Stampin' Up! All the pretty layers are adhered to a white A2 top-fold card base. The sentiment is adhered to the focal piece and then that whole panel is popped up on the card with foam tape.


Here's another look at the fun {BYSHC} Sketch 7. I will be sharing one more card next week using this fun sketch! I hope you'll come check it out.

Speaking of checking things out, drop by the {BYSH} Cardmakers blog... we're featuring a mix of creations shared by the {BYSH} Cardmakers team and a fun card randomly chosen from the challenge entries in the {BYSH} Cardmakers Facebook group.


Thanks so much for stopping by!
See ya next time.

Inky Hugs,
Crystal

Monday, February 15, 2021

Plant Kindness Background 2-Ways ~ Unity Stamp Co.

 Hello there crafty friend!
There's a new fabulous release over at Unity Stamp Co. going on right now and I wanted to share a couple of quick CAS cards that I created using the new Plant Kindness background stamp.


This fabulous background stamp has five rows of succulents in four columns. I masked the far left column and the two columns on the right and stamped these cute succulents with Gina K. Amalgam black ink. And then I stamped the sweet Hello sentiment from the new Gotta Love Sentiments set that also just released at Unity Stamp Co.


I colored the succulents with the following Copic markers: E08, E09, E11 {planters}; YG01, YG03, YG11, YG63, V000, V04, V12, YR000, YR15, YR21, YR68, Y0000, R14, R27 {succulents}; N0, N2 {grounding}


Of course, I couldn't just make one card! I decided to change things up for this one and masked the bottom four rows so I could just stamp the top row. And I used a different sentiment from the Gotta Love Sentiments set.


I love the versatility of this fabulous background stamp! So many possibilities!! 

I have a video sharing my coloring and assembly of my Thinking of You card. You can check that out here... Plant Kindness Background 2-Ways.


Be sure to check out all the new releases over at Unity Stamp Co. and see all the fabulous stamps on sale!! Gotta love a good sale!

Thanks so much for stopping by!
See ya next time.

Inky Hugs,
Crystal

Friday, February 12, 2021

{BYSHC} Sketch Challenge #7 ~ Santa & the Mrs. ~ Unity Stamp Co.

 Hello there crafty friend!

I have had such a busy week... I wasn't sure that I would make it with this weeks Christmas card, but thankfully I already had this sweet design started so I was able to find time to finish it. I'm still trying to use up that Milk & Cookies paper pad by Doodlebug Design I've been hoarding. I still have lots and lots of paper left but I'm making progress! The sweet Santa & the Mrs. stamps from Unity Stamp Co. were also in the pile of stamps I wanted to create holiday cards for last year... so it only made sense to pair it up with these papers! Let's check out the card...


I always like to play around with sketches and change things up a bit... for this one I've altered the measurements to work for a 5 x 5" square card. The holly patterned paper measures 2-1/2 x 4-3/4" and the brick is 2-1/8 x 4-3/4". I love how the Santa is over the brick paper like he's going down a chimney and Mrs. Claus has that little holly in her hair that plays off the holly paper. Perfection!


I chose not to mat the papers and just use a 5 x 5" Real Red card front for the card. I adhered that to a 5 x 10" white card base that I scored at 5". The main focal piece was stamped on a large scrap of white card stock and then colored with the following Copic markers:

Skin ~ E0000, E00, E11, R00, R20
Hair ~ C00 C2
Clothes ~ R000, R14, R27, N0, N2, N3, N4, N6, Y06, Y17
Gingerbread Man ~ E21, E23, E25
Holly ~ YG11, G14, G46, R14
Santa's List ~ N0, N3


I just realized I didn't color the sky behind them! Ooops! Well, I did add a little C00 and C2 for the snow. Lol! Anywho... I die cut the colored image with the Stitched Square Stacklets die from Taylored Expressions and mat it with a 3 x 3" piece of Real Red card stock. I stamped the Merry & Bright sentiment with Wow Clear embossing ink and heat embossed Alabaster White embossing powder from Brutus Monroe. I trimmed the sentiment and cut the ends for a banner. I adhered the top part of the sentiment to the focal piece with Tombow Mono Multi liquid glue and then popped the whole thing up with foam tape. Love it!


Here's another look at the sketch for {BYSHC} Sketch Challenge #7.
I hope you'll come join us over in the Build Your Stash Holiday Cardmakers Facebook group and start building your stash of holiday cards along with us!


Thanks so much for stopping by!
See ya next time.

Inky Hugs,
Crystal

Saturday, February 6, 2021

~ Friends of Unity February 2021 Blog Hop ~

Hello there crafty friend!

Welcome to our February 2021 Friends of Unity Blog Hop! I'm so excited to share the creations I've made for today, but before we get to that I have some news... we have two new friends joining us! 

Please give Colleen Balija and Rachel Duong a great big welcome!!

I've admired the fantastic creations shared by both of these talented ladies and was super excited when they both accepted our invitation to join our little hop! Let's get to it, shall we?


Our cue this month is one of our faves... Paper Piecing!
For some reason I struggled getting my mojo going, but eventually it kicked in and I was able to make three CAS cards... each card seemed to inspire the next! Love when that happens!


My first card features the beautiful Peyton Girl... she's looking cute in some Everyday Eclectic papers by Echo Park. If you're not familiar with paper piecing, it's very much like paper dolls for stamps. You stamp the image on different papers and fussy cut the pieces and then adhere them to your main image.... piecing it all together. I stamped Peyton on a card front of white card stock measuring 4-1/4 x 5-1/2". I trimmed my first patterned paper about the size of her smock and secured it to my stamp platform using purple tape. I stamped Peyton again and then secured a piece of the pink patterned paper to my stamp platform using purple tape and stamped her pants. I fussy cut those and cleaned up the edges with a Memento Tuxedo black marker and set the pieces aside.


I colored up Peyton with the following Copic markers:

Skin ~ E0000, E00, E11
Hair ~ E51, E55, E57
Paint / Paint Brushes ~ R21, R32, YG01, YG11, N0, N2, N4, E55, E57
Flowers ~ R0000, R21, R32, YG01, YG11
Shoes ~ YG01, YG11, BG01, BG10

Once I had Peyton colored how I wanted, I added tiny dots of glue to the areas that I was paper piecing. I then die cut the card stock with the Lawn Fawn Stitched Hillside Border die. I adhered the pretty patterned paper to the back of the panel being sure that the panel measured 4 x 5-1/4". I then adhered the entire piece to my white A2 top-fold card base. I stamped the sentiment with VersaFine Onyx black ink and trimmed it down. I popped it up on the card with foam tape.


My second card is a fun Valentine's Day card that I made using the Love to Go stamp set. I used the beautiful Love is All Around Us {paper pack} for my paper piecing. I had originally planned to use the same card design for this one as my first card, but as I was working on it the striped papers caught my eye and this design came to mind. I love it! Now for the papers on this one... these were some of the first papers that Unity produced and there's a bit of a shine on them. The Memento Tuxedo black ink just sits on the paper and will smudge if touched so I added some Hero Arts Ultra Fine Clear Embossing powder and melted it... no more smudging! Thought I'd share that tip if you have some of the older Unity papers in your stash. I fussy cut the papers, cleaned up the edges with my Memento Tuxedo black marker and then set them aside.


The Copic coloring for this one is pretty simple. A little C00 and C2 on the cup; R000, R14, R27, R37, R89 on the lid; and N0, N1, N4 on the drink hole and for grounding the cup. I adhered the fussy cut papers to the cup and die cut the panel with a stitched rectangle die. I then stamped the sentiment which thankfully still fit... lol. I cut the striped paper to 3-3/4 x 5" and adhered it to a white A2 top-fold card base. I then popped up the focal piece with foam tape. I added a little red to the hearts around the cup with R14 and R89 to finish off the card.


My last card... another Valentine's Day card... features the absolutely adorable Bear-ly Enough stamp set... how stinkin' cute is that bear?! I just love him! He was so fun to paper piece too! I used the White Winter {paper pack} from the December 2020 Whit Kit ~ Winter Shake Up. These papers are now available separate from the kit!! They were just perfect for this cute bear! I stamped the bear on a scrap of white card stock and then again on the knit paper and the plaid paper. I cut the nose and belly from the plaid papers and adhered them to the knit paper and then fussy cut the whole bear. I partially stamped the bear one more time inking up the heart.


I colored the heart with R000, R14, R27... I fussy cut it and cleaned up the edges with my Memento Tuxedo black marker and adhered it to the bear. I set that aside and grabbed a white card front measuring 4-1/4 x 5-1/2". Using purple tape, I taped off the top portion and the bottom and blended some Spun Sugar, Worn Lipstick, and Picked Raspberry Distress Oxide inks. Once I was happy with my ink blending, I did a little water splatter. I dabbed up the excess with a paper towel and then I removed the tape slowly so as not to tear the card stock. I trimmed the card front down to 4 x 5-1/4" and adhered it to a white A2 top-fold card base. When I fussy cut the bear he lost some of his fur detail so I decided to stamp him directly on the card. Of course, this was after I'd adhered it to the card base so I used my Stamp Grid Transparency to ensure that the bear was in the right spot. I adhered him to the card and stamped my sentiment with VersaFine Onyx black ink. Done!

That was a bit long but I sure hope it was helpful to you. Now, before we get to the hopping... I'm thinking it's time for another giveaway!! I will randomly chose a winner from the comments so be sure to comment on each of the blogs while you're hopping! I sure appreciate each and everyone of your comments! I believe that a few of my friends are also having giveaways so...


Let's get to the hopping...


Crystal <--- you're here

up next ---> Eileen


Thanks so very much for supporting our little hop!
We appreciate you!

See ya next time.


Inky Hugs,
Crystal


{Please note that comment moderation is ON. Your comment will appear shortly.}


Friday, February 5, 2021

{BYSHC} Sketch Challenge #7 ~ Milk & Cookies ~ Doodlebug Design
 Hello there crafty friend!
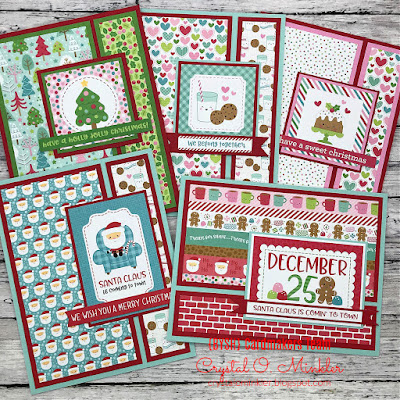
Today I'm sharing five cards that I created for the {BYSHC} Sketch Challenge #7 using the adorable Milk & Cookies papers by Doodlebug Design!! I adore Doodlebug Design papers and these ones I've been hoarding... but no more! I'm trying to use up these papers so when the new designs come out this year I'll have room for them! Woohoo!


Here's a look at all five cards together. Aren't they just the cutest?! I used the cut-apart papers for my focal pieces... such easy cards to make. It did take some time to get all the papers and card stock cut, but other than that and adhering all the layers... super quick!


For my first card I actually flipped the sketch... kinda. I kept the bottom layers {striped and brick papers} the same as in the sketch, but flipped the focal piece. It definitely worked for this design! So cute! I love that adorable gingerbread man! I used Pool Party and Real Red card stock from Stampin' Up for my mats and card front. And also used a scrap of white card stock to mat the focal piece.


The sentiments for all of these cards are also part of the cut-aparts in the paper pack. They worked perfectly for this card sketch too! I had fun mixing and matching the papers for all the cards. I used Real Red from Stampin' Up and New Leaf from Papertrey Ink for this card.


Now this one isn't very Christmassy, so I may add another sentiment to the card to give it more of a holiday feel... OR I might just give it to my hubby for Valentine's Day. Not sure. Either way... its adorable and also came together super quick! I used Pool Party and Real Red card stock from Stampin' Up! for this one, as well.


Eeep! How cute is this one?! I love that sweet cake! I chose the hearts and polka dots for the background papers to play off of the hearts and polka dots on and around the cake. Just perfect! Now for this one, I used Real Red card stock again, but I also wanted the pink in the papers to pop so I used Lovely Lady card stock from Papertrey Ink. Isn't that sentiment strip just perfect?! I added a couple of tiny scrap layers on either end of the strip to keep it level with the focal piece. Love!


And the last one... which is probably my most favorite! Love that cute Santa! I used Pool Party and Real Red card stock again for this one. The sentiment is also a cut-apart but I did make it a bit more sturdy by adhering it to a layer of red card stock. A trick I used for most of the sentiment strips.


Well, I'm definitely ahead this month for my goal of a Christmas card a week! I'm super happy with how all of these cute cards turned out. Check your stash of Christmas papers... you may just have some with these quick cut-aparts too! They are perfect for this month's sketch challenge. I hope you'll come join us over in the Build Your Stash Holiday Cardmakers Facebook group and start building your stash of holiday cards along with us!

Thanks so much for stopping by!
See ya next time.

Inky Hugs,
Crystal

Wednesday, February 3, 2021

February 2021 Uniquely Unity ~ Pure Magic Happy Birthday ~ Unity Stamp Co.

 Hello there crafty friend!

I shared a few birthday cards that I made the other day using the new February 2021 Uniquely Unity stamp set called Pure Magic and I had lots of questions about how I made them so I decided I'd make a couple more so I could share how I made them. They are really quite easy once all the papers are cut to size and the little bit of coloring and ink blending is done.


I really like the light cream colored one that I made originally so I decided to make another one just like it and luckily I had another piece of the same the paper that I had used. Unfortunately, I didn't have any of the other papers I had already used so I decided to go with this pretty green paper that is also in the Tattered & Worn paper pack from The Paper Studio. 


The patterned paper is trimmed to 4-1/4 x 4-1/2" and it's adhered to a card front of Fine Linen card stock from Papertrey Ink that measures 4-1/4 x 5-1/2". The black strips are 1/8 x 4-1/4"... a little trick that I do rather than adding a whole layer underneath the patterned paper. It gives the illusion of a mat but keeps the card thin for mailing.


I did very minimal Copic coloring with E51 and E55 for this card and a little ink blending just around the edges with Antique Linen. The sentiment is from the Abundant Blessing Sentiment kit, also from Unity Stamp Co. It's stamped on True Black card stock with Wow Clear embossing ink and I heat embossed Alabaster White embossing powder from Brutus Monroe with my Mini Wagner heat tool.


I followed the very same steps for this card. The focal piece is trimmed down to 2-1/2 x 4-1/8". And the card front for this one is Always Artichoke card stock.


I used YG61 & YG63 for some simple Copic coloring and Bundled Sage for the ink blending around the edges. The sentiment strips are trimmed to 2-9/16 x 15/16".

I also have a video on my YouTube channel of how I created these two cards. You can check out that video here... Simple Copic Coloring & Ink Blending | Pure Magic Birthday Cards.


Another quick look at the two cards that I created.


And here's a look at the original four that I created. I do love how quick these cards came together!
I hope that this post and the video I've shared has helped those that asked how I made these cards.

Thanks so much for stopping by!
See ya next time.

Inky Hugs,
Crystal