Pages

Wednesday, July 31, 2019

Polka Dot Orchard ~ Magic of Christmas & Reason For The Season ~ Christmas in July

Hello there crafty friends!
I'm here today with one last Christmas in July post sharing a few more creations using the digi stamps I created for this coming Christmas season. Both of these digi sets are available at Polka Dot Orchard.


My first card is using the sweet kneeling Santa with baby Jesus from the Reason For The Season digi set... I just love this scene! I also added the digi star for this card... like the star was Santa's guide to Jesus. I paired these images up with the perfect paper called Wise Men Still Seek Him by Echo Park. I love the regal colors of the paper and the brighter colors of Santa and baby Jesus pop on the card.

Supplies used for this card:
Copics:
Santa ~ N0, N2, N3, N4, C00, C1, C3, R000, R14, R20, R27, E000, E00, E21
Manger/Straw ~ E55, E57, Y15, Y21
Baby Jesus ~ E23, E25, E55, B0000, B02, B14, E00, E21
Ground ~ E30, E31, E33
Star ~ Y000, Y15
Lawn Fawn Everyday Sentiment Banner die
My Favorite Things Blueprints 15 dies


My second card is a fun card to send a friend during the month of July... but since it's a digi stamp you could alter this sentiment and have it just say Happy Christmas. I really love the combination of papers I used with the colored image from the Magic of Christmas digi set... so bright and cheery!

Supplies used for this card:
Copics ~ N0, N2, N3, N4, C00, C1
Uniball Gold gel pen
Echo Park A Perfect Winter paper pad
Carta Bella Santa's Workshop enamel dots
Taylored Expressions Stitched Rectangle Stacklets
Lawn Fawn Stitched Hillside Borders


My last creation to share today actually isn't a card, it's a gift that I've made and will put in a 6 x 6" frame... just a little funny Christmas decoration that can be hung up in the house. I know just the right person to give it to... I know she'll love it!! I knew that I wanted to add a layer of patterned paper to the main image so I made sure not to make the digis too big. If you're familiar with the Magic of Christmas digi set, you may have noticed that Santa's hat is flipped in the other direction well... digis are awesome that way!! You can rotate them, flip them, resize them... so many possibilities!! 


I colored the images with the following Copic markers:
Santa's Hat ~ R000, R14, R27, C00, C1
Santa's Boots ~ N0, N2, N3, N5, C00, C1

I trimmed down the main panel and some how my top left corner got messed up so I had to find something to fix it and I decided to go with a corner punch. I then mat the piece on True Black card stock and wrapped some pretty silver ribbon on either side. I tied a little bow and used a glue dot to add it to the panel. I set that aside and got my base done. I thought this Santa paper from the Celebrate Christmas paper pad by Echo Park was a perfect backdrop for the main panel... I trimmed it down to 5-3/4 x 5-3/4" and mat it with a 5-13/16 x 5-13/16" piece of True Black card stock. I just wanted a skinny black mat. And then my final layer is a Real Red 6 x 6" piece of card stock. I adhered all those layers together and then popped up my main panel with foam tape. I love how this turned out and I'm so excited to have a Christmas gift done already!! Isn't that crazy!! Lol!!


Here's a close up of the sparkle on Santa's Hat... I used the Sakura clear stardust gelly roll pen. Oh, and for the buckles on Santa's Boots I used the Uniball Signo silver gel pen... though in the picture it looks white. It's just the shine on the silver gel pen. 

That's the last of my Christmas in July creations for this year! 
I've had so much fun getting ahead on my Christmas cards and projects! 

Some of the wonderful Polka Dot Orchard Design Team members joined me in our very first Instagram Hop on July 25th sharing all kinds of beautiful Christmas in July creations... if you haven't had a chance to hop yet, be sure to check it out. Here's a link to get you started at the Polka Dot Orchard Instagram. Or you can start on my Instagram ---> here or there's also a link at the top of my blog to my Instagram if you want to scroll back up there. Be sure to check it out though... there's prizes up for grabs and today is the last day to enter!!

Thanks so much for checking out my blog!
See ya next time.

Inky Hugs,
Crystal

Tuesday, July 30, 2019

Unity Stamp Company ~ Cuddlebug Raccoon with Pumpkin Patch {border backgrounds} ~ Happy Fall

Hi there crafty friends!
I wanted to share one of the cards that I created for the latest Unity Stamp Company release using the adorable Cuddlebug Raccoon and gorgeous Pumpkin Patch {border backgrounds} stamps!!

My original plan was to make a simple card with the cute raccoon in the back and the pumpkins in the corner but then I colored the raccoon and the leaves and nuts and realized that the pumpkins would cover a lot of that up so, I got to thinking how to work around that and decided to make a pocket card!


 Like I said, I colored the raccoon and also the pumpkins.
 I used the following Copic markers:
Raccoon ~ W00, W1, W2, W4, N0, N1, N2, N4, N7
Ground ~ E21, E23
Pumpkins/Leaves ~ BG09, BG18, BG72, YR14, YR15, YR21, YR24, YR27, YR68, G24, G94, G99 Nuts ~ E55, E57, E59

Once the images were colored, I die cut the pumpkins on the edge and then fussy cut the inner portion. I die cut the raccoon and layered him with some pretty fall paper from Carta Bella called Hello Fall. I adhered that to a True Black card measuring 3-3/4 x 4-7/8"... on the other side of the Cuddlebug Raccoon I added a piece of white card stock measuring 3-1/2 x 4-5/8". That's where I can add a personal message to the recipient. I tied off some jute twine and set that part of the card aside.


I die cut a piece of kraft card stock with the same stitched rectangle die I used for the edge of the pumpkins and then I adhered the kraft piece to a True Black card measuring 4-1/4 x 5-1/2... so it's not a card base, it's just a card front. Using tear & tape adhesive I adhered the pumpkins to the card just on the very edge leaving the pocket for the raccoon card.


A fun way to incorporate a portion of the new Pumpkin Patch {border backgrounds} stamp along with the adorable Cuddlebug Raccoon! I just love how this turned out! I hope you do too!

Thanks so much for checking out my blog today!
See ya next time.

Inky Hugs,
Crystal

Monday, July 29, 2019

Scrapping for Less ~ July 2019 Summer Camp Card Kit ~ Another Look!

Hi there crafty friends!
I'm back with a bonus card from the July 2019 Flavor of the Month Card Kit called Summer Camp! I love this kit so much!! I had this fun little idea for a card while working on my cards for the hop but I didn't have time to finish it. So... I finished it and here it is! I think it turned out pretty cute!


I used the fabulous My Favorite Things Blueprints 15 dies to design my card... I'm not sure if these dies are still available but if you can find them snatch them up, because they can make for a quick card design! I die cut the patterned paper layers using the dies from the set and adhered them to a Kraft card base. I then colored up a cute little scene with copic markers on a kraft tag that's included in the card kit. I paper pieced the bears tent from the patterned papers in the kit. Fussy cut it and adhered it to the colored bear image. I then fussy cut that out and adhered it to the tag! I popped up the tag and the sentiment on the card... done!

Copic markers used for this card:
Scene ~ G24, G29, E55, E57, E59, Y13, Y17
Bear/Inside of Tent ~ W0, W1, W2, W4, N1, N2


Here's a close up picture of the card and the little scene I created for the snoozing bear. Such a cute stamp!! If you haven't checked out the hop for this new kit, you can do that here ---> July 2019 FOTM Card Kit Reveal & Hop!! You can also check out the other cards I made using this fabulous card kit and start hopping ---> here!

I sure hope you enjoyed my little bonus card for the July 2019 Summer Camp card kit! I'd love to hear what you think of it in the comments below!

Thanks so much for stopping by my blog!
See ya next time.

Inky Hugs,
Crystal

Friday, July 26, 2019

Scrapping for Less ~ July 2019 Flavor of the Month Card Kit ~ Summer Camp


 July! What is another summer activity you enjoy? 
Lots of folks love summer camping and kids love going to camp. I spent 3 summers of my career life as a summer camp director at a girl's week long resident camp...it was hard work but yet super satisfying. I loved seeing the girls (most of them were city girls) being exposed to nature, hiking, and the outdoors. We have a great kit for you this month. All about camping and the outdoors! So grab your computer, a beverage, maybe go out on your back porch (so you are outdoors) and hop along and view the most wonderful inspiration from our Design Team and guest designers! You can purchase your kit from our subscription page...links for 1x purchases are in the paragraph to the left of the slider on that page. Make sure to enter the rafflecopter for a chance to win a past kit. Hope you enjoy this month! Happy Camping! ~ Teresa, SFL Co-Owner


If you are just starting hopping, we're so glad to have you join us! 
The hop starts on the Scrapping for Less blog or you can start hopping right here.

Here's a quick look at the July 2019 Summer Camp card kit...


Isn't that just an amazing card kit!!! 
I just adore the cute stamps this month and the papers are awesome!! 


Collection One: Under the Stars
So one of the sketches this month is a fun long card and I thought this would be a fun way to build a night time scene. I used some of the beautiful Under the Stars paper for the top of the scene and then added layers of Timber Green card stock that I had die cut with different hillside border dies. 


I then stamped the sweet camper from the Happy Camper set by Sunny Studios and colored it in with copic markers. I also stamped the sentiment and fussy cut it into a banner... popping up the fussy cut camper, as well as, the sentiment on the card.


To finish off the card, I adhered a few of the Camping Icon stickers by Darice that are 
included in the kit. So fun!

Supplies used (not found in the kit):
Copics ~ N0, N2, N3, N5, Y000, BG10, BG23, R17
Lawn Fawn Stitched Hillside Border die
Lawn Fawn Forest Border die
3M Scotch 1/2-inch Double-Sided Foam Tape


Collection Two: Camping Plaid
First, I just have to say that the plaid in this kit is absolutely amazing! It's all beautiful Fall colors and I love it! It would be great for masculine cards too! 
Now, onto the card... I veered a little off of the sketch with this one. I wanted to build a scene using the Tree embossing folder that's included in the collection and I thought it would be fun to have it in the background. I blended a little Mowed Lawn and Gathered Twigs distress inks over the embossed tree to give it some color and dimension. I trimmed it down and adhered it to a mat of Hot Fudge card stock. I then adhered all of the layers to this beautiful plaid patterned paper layer that's adhered to a white card base. Such pretty colors! 

I set the card aside and got to work on my scene with the squirrels. I masked the sky with purple tape and blended Mowed Lawn distress ink over the white card stock. I then removed the purple tape mask and covered the green portion of card stock. I blended some Tumbled Glass distress ink over a cloud stencil very lightly and then blended some more ink around the edges and above the masked portion of card stock. I stamped the squirrels and colored them in. I then fussy cut them and adhered them to my scene that I mat with the Timber Green card stock. I stamped the sentiment, trimmed it down and mat it on the Timber Green card stock and then popped it up on the card. 
To finish off the card, I adhered a few sequins in the leaves of the tree and adhered the wooden binocular icon by Kaisercraft.

Supplies used (not found in the kit):
Copics ~ E23, E25, E30, E33, E34, E35, E37, N0, N1, N4, Y06, YR15, YR16, YR68
Distress Inks ~ Tumbled Glass, Mowed Lawn, Gathered Twigs
My Favorite Things Mini Cloud Edges


Collection Three: Camping No.1
My next card just may be my most favorite!! The sweet little bears in this collection are just too cute! I trimmed all of my layers of patterned papers and adhered them to a white card base. I used a fishtail die for the sentiment and the s'mores patterned paper and then mat them on kraft and Hot Fudge card stock and popped them up on the card. For my focal image I used Copic markers to color my scene on the metal rimmed kraft tag included in the collection. I stamped the bear and fire on white card stock, colored them up, and then fussy cut them out. I adhered them to the tag and then added a little green twine. I then popped up the circle tag on the card.


To finish off this card I added a few of the tiny sequins included in the collection.
Oh my goodness... I just love how this turned out!

Supplies used (not found in the kit):
Copics ~ W0, W1, W2, W4, R000, E55, E57 (bear); N0, N1, N2, N4 (rock); E55, E57, E59, Y13, YR15, YR68 (campfire); E55, E57, G24, G29, Y06, Y13, Y17, YR15 (background on tag)
My Favorite Things Stitched Fishtail Flag STAX


Collection Four: Summer Camping
And my last card for today... a close second fave! LOL! This was a bit of an experiment for me... I tried something different with the hair and also created a scene using copic markers. I'm very happy with how it turned out! I actually made this card before the bear card and copic colored background on this one gave me the courage to try another on that kraft tag. So glad I tried! I love learning new techniques with my copic markers!! 

So for the card I cut a few of the patterned papers and adhered them directly to a white card base. I also die cut the 'Explore' (exclusive to the Banana Split subscription!!) out a few times from Kraft card stock and once from the Tangy Orange card stock. I adhered the Tangy Orange layer a little offset from the kraft to give it a little dimension.


 I had stamped the sweet little girl first and colored her up with copics leaving her shirt blank so I could paper piece the fun diagonal striped paper. I realized it had been a while since I paper pieced anything... such a fun technique! I need to do it more often! Now for my scene, I kept it pretty simple with some dirt and grass. If I was to do this again, I would probably extend the dirt across the panel with the grass in the background, but I'm still happy with how it turned out. I die cut the panel with a stitched rectangle die and then mat it on a piece of Hot Fudge card stock that I also die cut using a slightly larger stitched rectangle die. I adhered a few green paper leaves so they would peek out from under my focal image and then I popped up the focal image. I stamped the "Let's" sentiment with VersaMark watermark ink and then heat embossed a fine white embossing powder. I trimmed the sentiment and then mat it with a scrap of Hot Fudge card stock. It's hard to see in the pictures but to finish off this card, I added a tiny orange rhinestone to the little campfires in the background patterned paper. Just a fun little touch that gives the fire some shine! Oh, and I almost forgot I used the fun Sakura Glaze pen in the Banana Split subscription to add the dots on the hair bands in her hair and also on the eyelets in her shoes.

Supplies used (not found in the kit):
Copics ~ E000, E00, E21 (skin); E34, E35, Y21 (hair); E31, E33, YG11, G21, BG10, BG53, Y15, Y35 (clothes/accessories); E31, E33, YG17, YG23, B0000, C0, C1 (background scene)
Taylored Expressions Stitched Rectangle Stacklets
VersaMark Watermark ink
Brutus Monroe Alabaster Ultra Fine embossing powder


I sure hope you've enjoyed my cards today!

Your next stop on the hop is... Desiree


Be sure to head back over to the Scrapping for Less blog to enter the Rafflecopter once you've finished hopping!


Thank you friends for checking out my blog post!
See ya next time.

Inky Hugs,
Crystal

Scrapping for Less ~ July 2019 Flavor of the Month Card Kit ~ Sneak Peek

Hi there crafty friends!
Today, I am sharing the last Sneak Peek of the July 2019 Flavor of the Month Card Kit!!! Oh my goodness... this is such a fun kit! Perfect for summer!!


I combined the beautiful patterned papers for my layers on this card... the papers in this card kit are amazing!! I especially love the ones in this collection! I stamped and colored my little camper using the following Copic markers ~ B0000, B00, B24, B52, RV10, RV21, N0, N2, N4, N7, and Y00. To finish off the card I added a few black rhinestones... they look like planets in the background!


I just love how the blues in the camper help the blues in the background paper to pop!!
Glamping under the stars could definitely be my happy place... especially with this sweet little camper!! The kit reveals tonight at midnight... be sure to sign up for your kit subscription!! Don't miss out on this fabulous kit and go subscribe ---> July 2019 FOTM Card Kit!!!! And be sure to use the hashtag #FOTMsummercamp when you share your creations using this fabulous kit!!

Thanks so much for checking out my blog!
See ya next time.

Inky Hugs,
Crystal

Monday, July 22, 2019

~ Growing in Unity Winners ~

Hello there crafty friends!!
I wanted to share the winners from my Growing in Unity week... but before I do, thank you all so much for an amazing week!! I truly feel blessed by all of your sweet comments!

And the winners are...


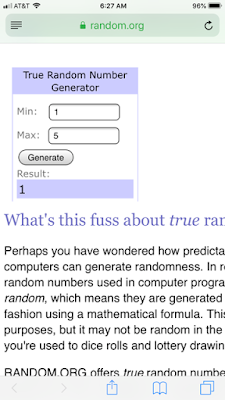
Random.org chose Day 3...


and comment #51...


Congratulations, Rachel Duong!!


Random.org chose Day 1...


and comment #11...


Congratulations, Mary Brown!!


Rachel and Mary, please email me at crystalominkler@gmail.com with your mailing addresses to claim your prize!! You have two weeks to claim your prize.


I mentioned a few times that this or that card was my favorite and really it's hard to choose when it comes to the cards you've created, but I wanted to share my all time favorite for my week.


I honestly have a couple favorites but this one right here was THE card I had in my head for the longest time just waiting for my GIU week. And it took me three tries to get it just right! When you work that hard on a card... it gets a special place in your heart! So this sweet bunny soaring through those galaxy clouds is my favorite! Do you have a favorite?! I'd love to hear your favorite.

Thanks again for a fabulous week and for checking out my blog!
See ya next time.

Inky Hugs,
Crystal


Sunday, July 21, 2019

Polka Dot Orchard ~ Petals for the Pittman's ~ Happy Birthday

Hello crafty friends!
I'm so excited to share another card using the daisy image that I created for the Petals for the Pittman's fundraiser digi set. I was so touched when Jessica of Polka Dot Orchard asked me to contribute to this amazing fundraiser digi set... the set is so huge that it's actually two digi sets and both sets are just filled with amazing flowers and sentiments!! 


Be sure to go check out these wonderful digi sets right here ---> Petals for the Pittman's.


I started my card by simply printing off my daisy digi... it measures approx. 3-1/2 x 2-1/2"... I then colored it with the following Copic markers ~ YG11, YG23, YG25, Y06, Y11, Y35. I die cut my daisy with the Double Stitch Scalloped Rectangle Frames die by Poppy Stamps. This die cuts the rectangle, as well as, the scallops around it, so I usually adhere these two pieces to a piece of copy paper just so they stay nice together and then I can layer them or in this case, pop them up on the card. My next layer is a piece of kraft card stock that I blended Squeezed Lemonade and Mustard Seed on over a 6 x 6" stencil called Mini Halftone Circles by The Crafters Workshop. I then die cut the kraft layer with the Blueprints 22 die by My Favorite Things. I didn't want to just have a plain white card base so I thought a diagonal strip of Bright Buttercup card stock would be fun so I trimmed it and adhered it to the white card base. I then adhered the kraft layer with the popped up daisy.


To finish off my daisy card, I trimmed the sentiment from the Floral Flourish Background 3 digi set. I just love the font for this Happy Birthday sentiment!! Love love love it!!

If you haven't had an opportunity yet, I'd like to invite you to check out the Polka Dot Orchard blog with all the information for this amazing fundraiser. There's more information on the Pittman's and the whole reason behind this wonderful fundraiser. I'd also love to invite you to share your floral cards over on the Polka Dot Orchard Linky party... there's opportunities for several prizes for participants and who doesn't love a crafty prize!! So please go link up your floral cards!! You can find all of this information here ---> Polka Dot Orchard's Petals For The Pittman's Fundraiser.

Thanks so much for stopping by my blog!!
See ya next time.

Inky hugs,
Crystal

Friday, July 19, 2019

Scrapping for Less ~ Pink & Main ~ Happy Camper

Hello there crafty friends!
I'm here with another look at the Happy Camper stamp set by Pink & Main. I've paired this adorable set again with the wonderful Galaxy Foil papers also by Pink & Main.


I can't get enough of these Galaxy Foil papers!! They just make a card so quick and easy and those shiny stars are so much fun! Today, my design also includes a fun Campfire Sticker by Jolees... isn't that fun?! It's a pretty big sticker and I struggled a bit with what to do with it, but I think it makes for a fun card with this bear holding marshmallows getting ready to make some s'mores. It's hard to tell in the picture but his little marshmallow on top is actually on fire... which I imagine with this huge campfire it would be!! I used the following Copic markers for the bear ~ E000, E33, E35, E37, YR15, R20, BG11, BG13, B95, B97


You can see some of the glittery goodness in the fire with this picture. 
To finish off the card, I popped up the bear and the sentiment that was stamped with VersaMark watermark ink on black card stock and heat embossed an ultra fine white embossing powder.
Hope you enjoyed my card for today... but hold on, I have a bonus card!!


When I had created my card earlier this month using the Hootiful stamp set by Heffy Doodle... you can check out that card here ---> Hootiful For You-Hoo card...  I had stamped and colored a few extra images so I thought I'd use those for this super quick card. All I did for this card was blend some Chipped Sapphire distress ink directly on my white card base. I started blending in the center and worked my way out giving a nice fade to the color. Such a quick card and one that I can send a friend to wish them a hootiful day!!

Now that's all for me today! I sure hope you liked my cards!
Thanks so much for stopping by! See ya next time.

Inky Hugs,
Crystal


Growing in Unity ~ Day 5 of My 5 Favorite Things

Hello there crafty friends!
Well... it's the final day of my Growing in Unity week. It's amazing how fast the time flies! I just want to say real quick that I have seriously enjoyed every single comment on my blog, on Facebook, and on my Instagram! This has been a fabulous week and I truly appreciate each and every one of you so... thank you!! Thank you so very much!!

Now, for my last day of My 5 Favorite Things I just had to go with the very first line of stamps that got me hooked on Unity Stamp Company... Angie Girls!! The Angie Girl line is amazing... there's a girl in there for anyone and everyone! And I know some people are put off because the girls don't have faces and in all honesty, that did put me off for a short while, BUT once I came to the realization that I could use the same faceless stamp for my niece, my neighbor, my friend, my sister and imagine that the stamp is her! OMG! The possibilities are truly endless... and to top it all off, the Angie Girls come with the most wonderfully, empowering, and just fabulous sentiments!! I love them!!

So, as a little challenge to myself, I decided to use a couple Angie Girls that I had not yet inked up... you have a few in your collection too, right?! Lol... I know I'm not the only one!! I also wanted to encourage any of you that are in the Unity Show & Tell FB group to pull out your Angie Girl stamps {or any stamp} with Empowering sentiments and enter your card in this month's Empowerment Challenge or enter your card in the new Perfect Paper Mini Challenge... which also inspired my cards for today because well... I have a plethora of pretty patterned papers!! I'm a paper hoarder and I'm not ashamed to say it!!! BUT I'm also a paper hoarder who wants to make room for more pretty papers so I must use some of these pretty papers I've been hoarding and that is exactly what I did!!
Let's get to it, shall we?


My first card is using the beautiful Erica Girl and those pretty flowers made it so easy for me to pick out some paper to coordinate with this stamp! I used the Echo Park I Am Mom paper pad... which I actually opened up to use just for this card. I had bought it around Mother's Day and hadn't used it so this was a perfect opportunity to cut into the paper!! While I was deciding what to do for todays post, I also thought it would be fun to use another sketch and just change it up here or there so you'll notice all the cards have a similar design. So back to my card... I started by stamping Erica Girl and the sentiment on a 4-1/4 x 5-1/2 piece of white card stock with Gina K's Black Amalgam ink. I then colored the stamped image with the following Copic markers:

Skin ~ E000, E21
Hair ~ C1, C2
Clothes ~ N0, N1, BG11, R00, R01, R22, Colorless Blender
Flowers ~ BG11, R01, R14, R22, Y06, Y11, N10


Since I had my papers already picked out, it was so easy to pick my colors to color this image... just a little tip to remind myself to do that more often! My original plan was to adhere a strip of patterned paper along the edge of the focal panel but... I thought it would be fun to use more of the pretty papers in the paper pad so I die cut a bunch of different papers with my banner die and played around with placement and there you have it! Not my typical placement... especially with the ones going up the card, but I really like it!! I hope you do too! To finish off these cards, I stapled the trimmed banners and adhered my layers to a white card base, popping up my main panel.
 Love how this turned out!


So, I did it again... with Kimmie Girl!! Eeep! I love this stamp and I can't believe that I've never inked her up... or at least, I don't remember inking her up. :) This card is the very same design using Echo Park Coffee papers... but this time my bottom layer {with the coffee beans} was actually just a scrap piece that was cut into a frame from a previous project. It was perfect though for this card. I adhered the main panel to the framed piece of paper and then popped up the entire panel with foam tape. Of course, I adhered and stapled the banners before that step.


Isn't she cute?!? And I adore that sentiment! So for this card I used the following Copic markers:

Skin ~ E000, E00, E21
Hair ~ E55, E57, E59
Clothes/cup ~ B95, B97, B99, R83, R85, BG10, BG23
Ground ~ N0, N1


And my last card for today and for my Growing in Unity week is probably the most fitting one... this is me and I love all things Unity!!! This is actually the Planner Gal Kit: Unity Unies created by the fabulous Angie Blom for all the Unies in the Unity Show & Tell group. I love this kit!! There's lots of little crafty stamps included in this kit, but since I was in a rhythm and working with one design... I stuck to that. BUT I paired this fabulous stamp and sentiment with the wonderful Echo Park I'd Rather Be Crafting paper pad... perfect, right?! They are perfect together!! The only difference with this design is I was able to use a smaller stitched rectangle die so you can see more of the bottom layer of paper... which I love... those scissors and pencils and paint brush!! Love it!!


I even colored her to look like me with my silver streaks and all, holding my latest Unity order... so much fun! I used the following Copic markers for this card:

Skin ~ E000, E00, E21
Hair ~ E55, E57, E59, N0, N1, N3
Clothes ~ R01, R22
Unity Pkg/Watch ~ N0, N1, BG10, BG23, Colorless Blender

Be sure to leave a comment on each of my GIU blog posts for a chance to win one of two fabulous grab bags of 25 stamps from Unity Stamp Company!!! You have until Sunday to comment and I'll be picking two winners bright and early Monday morning!!

You can check out my other GIU days:


Thanks so much for checking out my blog!
See ya next time.

Inky Hugs,
Crystal


Thursday, July 18, 2019

Growing in Unity ~ Day 4 of My 5 Favorite Things

Hi again crafty friends!
I'm back with Day 4 of My 5 Favorite Things for my Growing in Unity week and today is all about backgrounds!! I love background stamps and in particular the {border backgrounds} stamps by Unity Stamp Company!! These fabulous stamps are so much fun to color and create with!! I just adore this line of stamps and I've made several cards with them, but for today I'm going to share two that I created for todays post and a couple that I made last month but never posted on my blog. 
So, let's get to it!!


For my first card, I actually found inspiration from a card I made earlier in the month using the Yuletide {border backgrounds} stamp for our Friends of Unity blog hop that was all about Vintage cards. You can check out that card here ---> Vintage Christmas card.
I started this card by stamping the beautiful Adornment {border backgrounds} stamp on white card stock with Gina K's Black Amalgam ink and then got to coloring! I used the following Copic markers ~ R14, R27, R46, G24, G29, B0000, B29, B39, Y000, Y06, Y15, Y17. I also used Gold Wink of Stella to finish up coloring the ornaments. I cut out the center of the card stock just fussy cutting around the images. I then lightly blended Vintage Photo Distress Oxide ink around the outer edges and ran the card stock through my big shot with a large stitched rectangle die. The center of the card stock was too bright so I ended up blending the same Vintage Photo ink but without adding more ink to my blending tool... I didn't want it to be too dark. And there was plenty of ink still on the sponge. To finish off this top layer of my card, I cut a piece of Real Red card stock to 4-1/4 x 5-1/2" and die cut the center with a stitched rectangle die... why did I do that? Well, I wanted a 'window' of sorts to the bottom layer and I figured I might be able to use the red stitched rectangle piece for another project. I adhered those layers together and set it aside.


I blended some Vintage Photo and Antique Linen Distress Oxide ink on a piece of Vintage Cream card stock being sure to leave the center portion lighter so I could stamp my sentiment and the tiny ornaments. The sentiment and tiny ornaments are from the adorable Merry Little Season kit that is actually a background stamp but I bought a second kit to cut apart the images to use separately. I used my Anti Static Pouch liberally over the cream card stock (the embossing powder really likes to stick to the distress oxide inks) and then stamped the sentiment and tiny ornaments with VersaMark watermark ink and heat embossed a fine antique gold embossing powder. I colored in the tiny ornaments with Festive Berries and Mustard Seed distress markers. I then popped up my top layer using foam tape and to finish off this card I added some Xmas Red stickles on the dots.


For my second card, I used the brand new She Sells Sea Shells {border backgrounds} along with the adorable Cuddlebug Sea Horse... Eeep! So cute together!! I used the following Copic markers for this card ~ V0000, V05, V12, BV23, BV25, B60, RV0000, RV00, RV10, RV63, RV95, R00, R01, R12, R30, E00, E33, G12, G24. I die cut the background with a large stitched rectangle die and mat it with Creamy Caramel card stock and then adhered the panel to a Lavender Moon card base. I stamped the sentiment from Sammy Girl using VersaMark watermark ink and then heat embossed a fine white embossing powder. I die cut it with a skinny banner die and then layered it offset with another banner die cut from Lavender Moon card stock. I popped those up on the card and got to work on Mr. Cuddlebug Sea Horse.


I fussy cut the seaweed and the sea horse. I adhered the sea weed to the card using liquid glue and then popped up the sea horse with foam squares. I just adore how this card turned out.


I just wanted to share a couple more cards that I created using these lines of stamps... this one is the Citrus Medley {border backgrounds}... such a dream to color! Unfortunately, I don't have the list of Copics I used to color this one. I did want to share how I changed this one up... I die cut the entire piece using a large scalloped die and then I die cut the center with a stitched rectangle die (both dies are from the Blueprints 20 die set by My Favorite Things). I adhered the center to a True Black mat and then adhered it to the card. I love the dimension it gives the card! The sentiment for this one is from Bird's the Word. I stamped that and trimmed it down and then mat it on True Black card stock, as well, and then popped it up on the card with foam squares. I just love this card layout for these {border backgrounds} stamps!


My last card to share with you today is probably one of my absolute favorites!! Not just because it's coffee themed... I do love my coffee!! But because it was such a quick card!! I colored a few of the cups and mugs from the Hot Mess {border backgrounds} stamp just randomly with coral and turquoise shades (I didn't write the Copic markers down but I'm thinking it was BG11, BG34, R01, and R22) and then smooshed it in Vintage Photo and Ground Espresso Distress Oxide inks. Once the panel was dry, I die cut it with the Blueprints 22 dies by My Favorite Things. I then stamped the sentiment from Kimmie Girl, die cut it with a circle die and mat it on a slightly larger circle die cut from Early Espresso card stock. I adhered my panel to an Early Espresso card base and then popped up the sentiment with foam squares. Easy peasy and delicious!! 

Be sure to leave a comment on each of my GIU blog posts for a chance to win one of two fabulous grab bags of 25 stamps from Unity Stamp Company!!! 
You can check out my other GIU days:


Thanks so much for checking out my blog!
See ya next time.

Inky Hugs,
Crystal